background image

24

Deutsch

Hinweise zu Pflege und Betrieb

Das Notebook ist zwar sehr stabil, kann aber dennoch be-
schädigt werden. Damit es nicht dazu kommt, sollten Sie die
folgenden Hinweise beachten:

Das Gerät darf nicht herunterfallen und in anderer Form Stößen 
ausgesetzt werden.

 Wenn der Computer fällt, können das Gehäuse und 

andere Komponenten beschädigt werden.

Das Gerät darf nicht nass werden und sich nicht überhitzen.

 Compu-

ter und Netzteil dürfen nicht in der Nähe von Wärmequellen stehen oder 
gelagert werden. Dies ist ein elektrisches Gerät. Wenn Wasser oder 
andere Flüssigkeiten eindringen, kann der Computer stark beschädigt 
werden.

Vermeiden Sie Interferenzen mit anderen Geräten.

 Halten Sie den 

Computer fern von magnetischen Feldern, die von Stromquellen, Moni-
toren, Magneten etc. erzeugt werden. Die können die Leistung beein-
trächtigen und Ihre Daten beschädigen.

Achten Sie auf die richtige Bedienung des Computers.

 Schalten Sie 

ihn erst aus,  wenn alle Programme geschlossen wurden (speichern Sie 
Ihre Daten!). Speichern Sie regelmäßig Ihre Daten, da diese verloren 
gehen können, wenn der Akku verbraucht ist.

Reparatur

Nehmen Sie vor dem Reinigen des Wenn Sie versuchen, den
Computer selbst zu reparieren, können Ihre Garantieansprüche
verloren gehen. Außerdem besteht Stromschlaggefahr für Ihre
Gesundheit und das Gerät durch frei liegende Teile. Lassen Sie
Reparaturarbeiten nur von qualifizierten Reparaturfachleuten
durchführen, insbesondere wenn folgende Umstände vorliegen:

• Wenn das Netzkabel oder der AC/DC-Adapter beschädigt oder zerschlis-

sen sind.

• Wenn der Computer Regen ausgesetzt war oder mit Flüssigkeiten in 

Berührung gekommen ist.

• Wenn der Computer unter Beachtung der Bedienungsanweisungen nicht 

korrekt arbeitet.

• Wenn der Computer heruntergefallen ist oder beschädigt wurde (berüh-

ren Sie nicht die giftige Flüssigkeit des LCD-Bildschirms).

• Wenn ein ungewöhnlicher Geruch, Hitze oder Rauch aus dem Computer 

entweicht.

Sicherheitsinformationen

• Verwenden Sie nur einen AC/DC-Adapter, der für die Verwendung mit 

diesem Computer zugelassen ist. 

• Verwenden Sie nur das Netzkabel und die Akkus, die in diesem Benut-

zerhandbuch spezifiziert sind

.


Entsorgen Sie die Akkus nicht in Feuer. 

Sie können explodieren. Richten Sie sich nach den regional gültigen Ent-
sorgungsvorschriften.

• Verwenden Sie den Akku nicht mehr, wenn er heruntergefallen ist oder in 

anderer Weise beschädigt (z.B. verzogen) ist. Auch wenn der Computer 
mit dem beschädigten Akku zu funktionieren schein, können dadurch 
Stromkreise beschädigt werden, die schließlich einen Brand verursachen 
können.

• Achten Sie darauf, dass Ihr Computer ausgeschaltet ist, wenn Sie es fur 

den Transport z.B. wahrend einer Reise in eine Tasche einpakken.

• Nehmen Sie vor dem Reinigen des Computers den Akku heraus, und 

trennen Sie es von allen externen Stromquellen, Peripheriegeräten und 
Kabeln (einschließlich Telefonkabel) ab.

• Reinigen Sie den Computer mit einem weichen, sauberen Tuch. Tragen 

Sie das Reinigungsmittel nicht direkt auf den Computer auf. Verwenden 
Sie keine flüchtigen Reinigungsmittel (Petroleumdestillate) oder Scheu-
ermittel zum Reinigen des Computers.

• Versuchen Sie nicht, Akkus zu reparieren. Lassen Sie die Akkupacks 

durch den Servicevertreter oder qualifiziertes Fachpersonal reparieren 
oder austauschen.

• Beachten Sie, dass das Logo bei den Computern, die über ein galvanisch 

beschichtetes LCD-Logo verfügen, von einer Schutzfolie bedeckt ist. 
Durch die natürliche Abnutzung kann diese Schutzfolie beschädigt wer-
den oder abgehen und die scharfen Kanten des frei liegenden Logos 
freigeben. Seien Sie in solch einem Fall vorsichtig bei der Handhabung 
des Computers, und vermeiden Sie es, das herausstehende beschichtete 
LCD-Logo zu berühren. Legen Sie keine Gegenstände in die Trageta-
sche, da diese während des Transports gegen den Computer drücken 
können. Wenden Sie sich in einem solchen Fall von Abnutzung an Ihr 
Service Center.

Содержание W230ST

Страница 1: ......

Страница 2: ...n vorne links rechts hinten und unten 33 Windows Systemsteuerung 34 Windows Startbildschirm und Desktop 34 Apps und Kacheln 35 Windows 8 Charms Leiste 35 Grafikfunktionen 36 Audiofunktionen 38 Energieoptionen 39 Installation der Treiber 40 3G Modul 41 Fehlerbehebung 42 Technische Daten Sommaire A propos de ce Guide Utilisateur Concis 45 Guide de démarrage rapide 48 Carte du système Vue de face ave...

Страница 3: ...talación de controladores 84 Módulo 3G 85 Solución de problemas 86 Especificaciones Sommario Informazioni su questa guida rapida 89 Guida di avvio rapido 92 Descrizione del sistema Vista anteriore con pannello LCD aperto 93 Indicatori LED 94 Tastiera 95 Tasti funzione 96 Control Center Centro di controllo 97 Descrizione del sistema Vista anteriore sinistra destra posteriore e inferiore 99 Pannello...

Страница 4: ... aren t or you are planning to re configure or re install portions of the system refer to the expanded User s Manual The Device Drivers Utilities User s Manual disc does not contain an operating system Regulatory and Safety Information Please pay careful attention to the full regulatory notices and safety information contained in the expanded User s Man ual on the Device Drivers Utilities User s M...

Страница 5: ...puter Safety Information Only use an AC DC adapter approved for use with this computer Use only the power cord and batteries indicated in this manual Do not dispose of batteries in a fire They may explode Check with local codes for possible special disposal instructions Do not continue to use a battery that has been dropped or that appears damaged e g bent or twisted in any way Even if the compute...

Страница 6: ...mperature envi ronments and do not store unused batteries for extended periods Battery Disposal Caution The product that you have purchased contains a recharge able battery The battery is recyclable At the end of its use ful life under various state and local laws it may be illegal to dispose of this battery into the municipal waste stream Check with your local solid waste officials for details in...

Страница 7: ...her hand as illustrated in Figure 1 to support the base of the computer Note Never lift the computer by the lid LCD 7 Press the power button to turn the computer on System Software Your computer may already come with system software pre installed Where this is not the case or where you are re configuring your computer for a different system you will find this manual refers to Microsoft Windows 8 F...

Страница 8: ...3 PC Camera LED When the PC camera is in use the LED will be illuminated in red 4 LCD 5 LED Indicators 6 Power Button 7 Keyboard 8 Touchpad Buttons 5 7 6 2 1 3 7 4 Wireless Device Operation Aboard Aircraft The use of any portable electronic transmission devices aboard aircraft is usually prohibited Make sure the WLAN Bluetooth module s are OFF if you are using the computer aboard aircraft by put t...

Страница 9: ... Adapter is Plugged In Green The Computer is On Blinking Green The Computer is in Sleep Mode Orange The Battery is Charging Green The Battery is Fully Charged Blinking Orange The Battery Has Reached Critically Low Power Status Green Hard Disk Activity Green Airplane Mode is ON the WLAN Bluetooth Modules are OFF Icon Color Description Blue Number Lock Numeric Keypad Acti vated Blue Caps Lock Activa...

Страница 10: ... Figure 3 Keyboard eric ad Function Keys NumLk ScrLk Numeric Keypad Fn Key Windows Logo Key Menu Application Key Windows Logo Keyboard Shortcut Use the Windows Logo Key D key combination to switch between the Start screen and Win dows Desktop Menu Application Keyboard Shortcut When the Desktop app is running you can use the Menu Application key on the keyboard to dis play the context menu as per a...

Страница 11: ... Visual Indicators Keys Function Visual Indicators Keys Function Visual Indicators Fn Play Pause in Audio Video Programs Fn F8 F9 Brightness Decrease Increase Fn F1 Touchpad Toggle Fn F10 PC Camera Power Toggle Fn F2 Turn LCD Backlight Off Press a key to or use Touchpad to turn on Fn F11 Airplane Mode Toggle Fn F3 Mute Toggle Fn NumLk Number Lock Toggle Fn F4 Sleep Toggle Fn ScrLk Scroll Lock Togg...

Страница 12: ...you to quickly turn modules on off Figure 4 Control Center Click on any button to turn any of the modules e g TouchPad Camera on off Click on Power Conservation to switch between Performance Balanced or Energy Star modes Click on the buttons or just click and hold the mouse button to adjust the slider for Brightness Volume Click on Display Switch Time Zone Desktop Background to bring up the approp...

Страница 13: ...upports Energy Star power management features that place computers CPU hard drive etc into a low power sleep mode after a designated period of inac tivity Click either the Performance Balanced or Ener gy Star button Sleep Click the Sleep button to bring up the Hibernate or Sleep buttons and click either button to have the computer enter the appropriate power saving mode Display Switch Click the Di...

Страница 14: ... Slot 16 Battery 17 Component Bay Cover 18 Speakers 2 8 4 6 3 Left Right 5 Rear 10 12 9 7 13 15 17 4 18 18 2 Overheating To prevent your computer from overheating make sure nothing blocks any vent while the computer is in use Disc Emergency Eject If you need to manually eject a disc e g due to an unexpected power interruption you may push the end of a straightened paper clip into the emergency eje...

Страница 15: ...nel Windows Start Screen Desktop The Apps control panels utilities and programs within Windows 8 are accessed from the Start screen and or Windows Desktop app The Desktop which runs as an app within the Start screen can be accessed by clicking the Desktop item in the Start screen or by using the Windows Logo Key D key combination Move the mouse to the bottom left of the screen and right click to a...

Страница 16: ...ew all the necessary Apps Windows 8 Charms Bar The right side of the screen displays the Windows 8 Charms Bar The Charms Bar contains the Search Share Start Devices and Settings menus To access up the Charms Bar move the cursor to the upper or lower right corners of the screen and then hover over one of the items in the Charms Bar to activate it the bar will be black when it is active or use the W...

Страница 17: ...ick Display icon in the Appearances and Personalization category 3 Click Adjust Screen Resolution Adjust resolution OR 4 Right click the desktop use the Windows Logo Key D key combination to access the desktop and select Screen resolution 5 Use the dropbox to select the screen resolution 6 Click Advanced settings To access the Intel Graphics and Media Control Pan el 1 Go to the Control Panel 2 Cli...

Страница 18: ...modes this is particularly useful when attaching a projector in Win dows 1 Attach your external display to the external monitor port HDMI Out port and turn it on 2 Press the P or Fn F7 key combination 3 An on screen menu will pop up 4 Use the cursor keys P to select the appropriate configuration from the menu and press Enter to confirm the selection Screen Resolution for Metro Style Apps Windows 8...

Страница 19: ...n the application from the shortcut in the Start screen and make sure you are connected to the internet then click Next and follow the on screen instructions to update the software Sound Blaster Cinema Application Run the Sound Blaster Cinema control panel from the notification area of the taskbar or from the item in the Start screen Click on the tabs to access any of the control panel menus Figur...

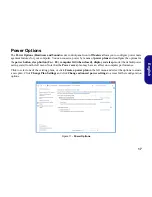
Страница 20: ...ton sleep button Fn F4 computer lid when closed display and sleep mode the default power saving state from the left menu Note that the Power saver plan may have an affect on computer performance Click to select one of the existing plans or click Create a power plan in the left menu and select the options to create a new plan Click Change Plan Settings and click Change advanced power settings to ac...

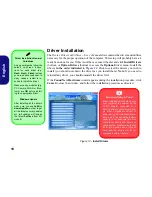
Страница 21: ...river Installation General Guidelines As a general guide follow the default on screen instruc tions for each driver e g Next Next Finish unless you are an advanced user In many cases a restart is re quired to install the driver Make sure any modules e g PC Camera WLAN or Blue tooth are ON before install ing the appropriate driver Windows Update After installing all the drivers make sure you enable...

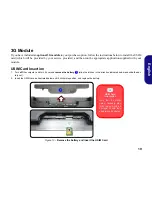
Страница 22: ...e USIM Card Insertion 1 Turn off the computer and turn it over and remove the battery slide the latches in the direction indicated below and slide the bat tery out 2 Insert the USIM card as illustrated below until it clicks into position and replace the battery Figure 13 Remove the battery and Insert the USIM Card 1 Model A USIM Card Orientation Note that the USIM card s readable side with the gol...

Страница 23: ... is off Press the Fn F10 key combination in order to enable the module see Table 3 on page 8 Run the camera application to view the camera picture The captured video files from the PC Camera are taking up too much disk space Note that capturing high resolution video files requires a substantial amount of disk space for each file Note that the Windows system requires a minimum of 16GB 32bit or 20GB...

Страница 24: ...tel Pentium Processor 2030M 2 50GHz 2020M 2 40GHz 2MB L3 Cache 22nm DDR3 1333MHz TDP 35W Core Logic Intel HM76 Chipset BIOS 48Mb SPI Flash ROM AMI BIOS Memory Two 204 Pin SO DIMM Sockets Supporting DDR3 1333 1600MHz Memory Memory Expandable up to 16GB The real memory operating frequency depends on the FSB of the processor Storage Factory Option One Changeable 12 7mm h Super Multi Optical Device Dr...

Страница 25: ... Stick MS Pro MS Duo Communication Built In Gigabit Ethernet LAN 2M HD PC Camera Module Factory Option 3G Mini Card Module WLAN Bluetooth Half Mini Card Modules Factory Option Intel Centrino Advanced N 6235 Wireless LAN 802 11a g n Bluetooth 4 0 Factory Option Intel Centrino Wire less N 2230 Wireless LAN 802 11b g n Bluetooth 4 0 Factory Option Third Party Wireless LAN 802 11b g n Factory Option T...

Страница 26: ...ation ohne Vorankündigung zu überarbeiten und den Inhalt zu verändern Einige oder alle Funktionen des Computers sind bereits eingerichtet worden Falls das nicht der Fall ist oder wenn Sie ein zelne Teile des Systems neu konfigurieren oder neu installieren möchten finden Sie eine Anleitung im erweiterten Benut zerhandbuch Die Disc Device Drivers Utilities User s Manual enthält nicht das Betriebssys...

Страница 27: ...ldschirms Wenn ein ungewöhnlicher Geruch Hitze oder Rauch aus dem Computer entweicht Sicherheitsinformationen Verwenden Sie nur einen AC DC Adapter der für die Verwendung mit diesem Computer zugelassen ist Verwenden Sie nur das Netzkabel und die Akkus die in diesem Benut zerhandbuch spezifiziert sind Entsorgen Sie die Akkus nicht in Feuer Sie können explodieren Richten Sie sich nach den regional g...

Страница 28: ...utzten Akkus über längere Zeiträume Entsorgen der Akkus Batterien Achtung Das von Ihnen gekaufte Produkt enthält einen aufladbaren Akku Dier Akku ist wiederverwertbar Nach verschiedenen na tionalen und regionalen Getzgebungen kann es verboten in einen nicht mehr gebrauchsfähigen Akku in den normalen Hausmüll zu werfen Informieren Sie sich bei Ihrem regionalen Entsorgungsunternehmen über Recycling ...

Страница 29: ...ren Hand halten Sie das Unterteil des Computers fest siehe Abb 1 Hinweis Heben Sie den Computer niemals am Deckel LCD hoch 7 Drücken Sie auf den Netzschalter um den Computer einzuschalten Systemsoftware Möglicherweise wurde das Notebook bereits mit vorin stallierter Software ausgeliefert Ist das nicht der Fall oder wenn Sie das Notebook für ein anderes System neu konfigu rieren möchten finden Sie ...

Страница 30: ...Kamera Wenn die PC Kamera verwendet wird leuchtet die LED rot 4 LCD Bildschirm 5 Netzschalter 6 LED Anzeigen 7 Tastatur 8 Touchpad mit Tasten Die Benutzung drahtlos angeschlossener Geräte in Flugzeugen In der Regel ist die Benutzung jeglicher tragbarer elektronischer Funkgeräte in Flugzeugen verboten Stellen Sie sicher dass das WLAN und das Bluetooth Modul durch Aktivie ren des Flugzeugmodus ausge...

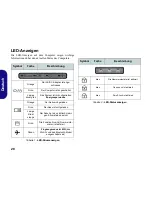
Страница 31: ...ngeschaltet Lampe blinkt grün Das System ist im konfigurierten Energiesparmodus Orange Der Akku wird geladen Grün Der Akku ist voll geladen Lampe blinkt orange Der Akku hat einen kritisch niedri gen Stromstatus erreicht Grün Die Funktion NumLk Nummernta statur ist aktiviert Green Flugzeugmodus ist EIN das WLAN und das Bluetooth Modul ausgeschaltet sind Symbol Farbe Beschreibung blau Die Nummerntas...

Страница 32: ...lten können Abb 3 Tastatur eric ad pad Windows Logo Taste Menü Anwendungstaste Tastenkürzel Windows Logo Durch Drücken der Tastenkombination Windows Logo Taste D können Sie zwischen dem Startbild schirm und dem Windows Desktop wechseln Tastenkürzel Menü Anwendung Wenn die Desktop App läuft können Sie mit der Menü Anwendungstaste der Tastatur wie mit einem Rechtsklick mit einer Maus das Kontextmenü...

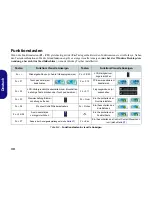
Страница 33: ...e in Audio Videoprogrammen Fn F8 F9 LCD Helligkeit ver ringern erhöhen Fn F1 Touchpad aktivieren deaktivieren Fn F10 PC Kamera aktivieren deaktivieren Fn F2 LCD Hintergrundlicht ausschalten zum Einschalten beliebige Taste drücken oder Touchpad berühren Fn F11 Flugzeugmodus ein ausschalten Fn F3 Stummschaltung Stumm schaltung aufheben Fn Num Ein Ausschalten der Nummerntastatur Fn F4 Wechsel Schlaf ...

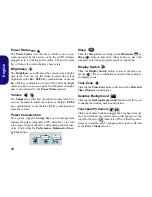
Страница 34: ...ine beliebige Taste um ein Modul z B Touchpad Kamera ein auszuschalten Klicken Sie auf Power Conservation Strom sparen um einen der Modi Performance Leistung Balanced Ausgeglichen oder Energy Star auszuwählen Klicken Sie auf die Tasten oder drücken Sie nur auf die Maustaste und halten Sie diese gedrückt um die Helligkeit Lautstärke Brightness Volume einzustellen Klicken Sie auf Display Switch Anze...

Страница 35: ...tionen die Computer CPU Festplatte usw nach einer längeren Zeit der Inaktivität in einen Ruhemodus versetzen bei dem weniger Strom verbraucht wird Klicken Sie entwe der auf die Taste Performance Balanced oder Energy Star Sleep Schalter Klicken Sie auf den Schalter für den Ruhezustand um die Schaltflächen Ruhezustand oder Schlaf aufzuru fen Klicken Sie dann auf eine der beiden Tasten um den Compute...

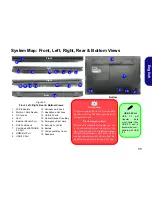
Страница 36: ...tenfachabdekkung 18 Lautsprecher Überhitzung Zum Schutz vor Überhitzung Ihres Computers dürfen die Luftungsoffnung en nicht während das Notebook in Betrieb ist verdeckt werden Disc Notauswurf Wenn eine Disc manuell entnommen werden muß z B wegen eines Stromausfalls können Sie mit dem Ende einer geradegebogenen Bü roklammer in das Notauswurfloch drükken Verwenden Sie hierzu aber keinen spitzen Blei...

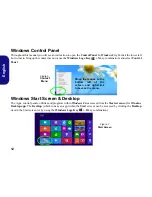
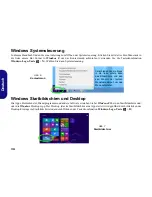
Страница 37: ...ldschirm und Desktop Die Apps Bedienfenster Dienstprogramme und andere Software erreichen Sie bei Windows 8 über den Startbildschirm und oder die Windows Desktop App Der Desktop der im Startbildschirm eine App startet wird geöffnet durch Anklicken des Desktop Eintrags im Startbildschirm oder durch Drücken der Tastenkombination Windows Logo Taste D Verschieben Sie die Maus in die linke untere Ecke ...

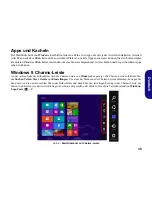
Страница 38: ...ps sehen zu können Windows 8 Charms Leiste An der rechten Seite des Bildschirms wird die Charms Leiste von Windows 8 angezeigt Die Charms Leiste enthält die Me nüs Suchen Teilen Start Geräte und Einstellungen Um eines der Menüs aus der Charms Leiste aufzurufen bewegen Sie den Cursor in die unteren rechten Ecken des Bildschirms und dann über den jeweiligen Eintrag in der Charms Leiste um diesen zu ...

Страница 39: ...4 Klicken Sie mit der rechten Maustaste auf den Desktop der Desktop wird aufgerufen indem Sie die Windows Logo Taste und gleichzeitig auf D drucken und dann die Option Bildschirmauflösung wählen 5 Wählen Sie aus dem Drop down Menü die Bildschirmauflösung 6 Klicken Sie auf Erweiterte Einstellungen So rufen Sie die Intel Steuerung für Grafik und Medien auf 1 Rufen Sie die Systemsteuerung auf 2 Klick...

Страница 40: ...enn Sie einen Projektor anschließen 1 Schließen Sie das externe Anzeigegerät an die Schnittstelle für externen Monitor oder an den HDMI Ausgangsanschlussan an und schalten Sie es ein 2 Drücken Sie die Tastenkombination P oder Fn F7 3 Auf dem Bildschirm erscheint ein Menü 4 Wählen Sie mit den Cursor Tasten oder P eine geeignete Konfiguration aus dem Menü aus und bestätigen Sie die Auswahl durch Drü...

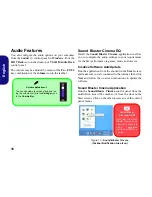
Страница 41: ...wendung über das Shortcut auf dem Start Bildschirm Stellen Sie eine Verbindung zum Internet her klicken Sie auf Weiter und folgen Sie den Anweisungen auf dem Bildschirm um die Software zu aktualisieren Anwendung Sound Blaster Cinema Starten Sie das Sound Blaster Cinema Bedienfenster aus dem Infobereich der Taskleiste heraus oder über das ent sprechende Symbol auf dem Start Bildschirm Klicken Sie a...

Страница 42: ...es Dekkels und den An zeige und Energiesparmodus die Standardeinstellung Energie sparen konfigurieren Beachten Sie dass sich die Ener giesparpläne Energiesparmodus auf die Computerleistung auswirken Wählen Sie einen bestehenden Plan aus oder klicken Sie im linken Menü auf Energiesparplan erstellen und wählen Sie die Optionen um einen neuen Plan zu erstellen Klicken Sie auf Energieplaneinstellungen...

Страница 43: ...f Abbrechen um das Fenster zu schließen Befolgen Sie dann die Installa tionsanweisungen Allgemeine Hinweise zur Treiberinstallation Wenn Sie keine fortge schrittenen Kenntnisse haben folgen Sie für jeden Treiber den Anweisungen auf dem Bildschirm z B Weiter Weiter Fertig stellen In vielen Fällen ist es erforderlich den Computer nach der Treiberinstallation neu zu starten Alle Module z B PC Kamera ...

Страница 44: ...ehen Sie es herum und nehmen Sie den Akku heraus schieben Sie die Riegel in die unten angezeigte Richtung und ziehen Sie den Akku heraus 2 Schieben Sie die USIM Karte wie unten abgebildet hinein und lassen Sie sie einrasten Setzen Sie den Akku wieder ein Abb 13 Herausnehmen des Akkus und einsetzen der USIM Karte 1 Model A Ausrichtung der USIM Karte Die lesbare Seite der USIM Karte die Seite auf de...

Страница 45: ...haltet Mit der Tastenkombination Fn F10 können Sie das PC Kamera Modul einschalten siehe Tabelle auf Seite 31 Starten Sie die Kamera Anwendung um das Kamerabild zu sehen Die mit der PC Kamera aufgenommenen Dateien benötigen zu viel Speicherplatz Videodateien die mit hoher Auflösung aufgenommen werden erfordern sehr viel Speicherplatz Beachten Sie dass das Betriebssystem Windows mindestens 16GB 32b...

Страница 46: ...40GHz 2MB L3 Cache 22nm DDR3 1333MHz TDP 35W Core Logic Intel HM76 Chipsatz BIOS AMI BIOS 48Mb SPI Flash ROM Speicher Zwei 204 Pin SODIMM Sockel Unterstützung von DDR3 1333 1600MHz Speicher Speicher auf bis zu 16GB erweiterbar Die tatsächliche Speicherarbeitsfrequenz hängt vom FSB des Prozessors ab Speicher Werkseitige Option Ein austauschbares Super Multi optisches Laufwerk 12 7mm Höhe Eine austa...

Страница 47: ...Kommunikation 1 Gbit Ethernet LAN eingebaut 2M HD PC Kamera Modul Werkseitige Option 3G Mini Card Modul WLAN Bluetooth Half Mini Card Module Werkseitige Option Intel Centrino Advanced N 6235 Bluetooth 4 0 und WLAN 802 11a g n Werkseitige Option Intel Centrino Wireless N 2230 Bluetooth 4 0 und WLAN 802 11b g n Werkseitige Option Wireless LAN 802 11b g n andere Hersteller Werkseitige Option Wireless...

Страница 48: ...e publication ou de modifier son conte nu sans préavis Certains ou tous les éléments de l ordinateur peuvent avoir été déjà installés Si ce n est pas le cas ou si vous avez l intention de reconfigurer ou réinstaller des portions du système reportez vous au Manuel de l Utilisateur complet Le disque Device Drivers Utilities User s Manual ne contient pas de système d exploitation Informations de régl...

Страница 49: ...son Si une odeur inhabituel de la chaleur ou de la fumée apparaissait sor tant de votre ordinateur Informations de sécurité Utilisez uniquement un adaptateur AC DC agréé avec votre ordina teur Utilisez uniquement le cordon d alimentation et les batteries indiqués dans ce manuel Ne jetez pas les batteries dans le feu Elles peuvent exploser Consultez la réglementation locale pour des instructions de...

Страница 50: ...atteries non utilisées pendant de longues périodes Elimination de la batterie avertissement Le produit que vous venez d acheter contient une batterie re chargeable Cette batterie est recyclable Quand elle n est plus utilisable en fonction des lois locales des différents états et pays il peut être illégal de s en débarrasser en la jetant avec les ordures ménagères normales Vérifiez auprès du respon...

Страница 51: ...ans la Figure 1 main tenez la base de l ordinateur Remarque Ne soulevez jamais l ordinateur par le couvercle LCD 7 Pressez le bouton de mise en marche pour allumer Logiciel système Votre ordinateur peut être livré avec un logiciel système pré installé Si ce n est pas le cas ou si vous re configurez votre ordinateur pour un système différent vous constaterez que ce manuel fait référence à Microsoft...

Страница 52: ...r à bord d un avion en mettant le sys tème en Mode Avion Figure 2 Vue de face avec l écran LCD ouvert 1 Caméra PC 2 Microphone 3 Indicateur LED de caméra PC Quand la caméra PC est en cours d utilisation le Indicateur LED sera illuminé en rouge 4 Écran LCD 5 Bouton d alimentation 6 Indicateurs LED 7 Clavier 8 Pavé tactile Touchpad et boutons 5 7 6 2 1 3 4 8 7 8 Remarquez que la zone d utilisa tion ...

Страница 53: ...ordinateur est allumé Vert clignotant Le système est dans le mode de Veille configuré Orange La batterie est en charge Vert La batterie est complètement char gée Orange clignotant La batterie a atteint le niveau bas critique Vert Le disque dur est en cours d utilisa tion Vert Mode Avion activé les modules WLAN Bluetooth sont désactivés Icône Couleur Description Bleue Verrouillage numérique pavé nu...

Страница 54: ...lavier eric ad eric pad Touche Logo de Windows Touche Menu Application Raccourci clavier du logo de Windows Utilisez la combinaison de touches Touche Logo de Windows touche D pour permuter entre l écran d accueil et Bureau de Windows Raccourci clavier de Menu Application Lorsque l application Bureau est en cours d exécution vous pouvez utiliser la touche Menu Application du clavier pour afficher l...

Страница 55: ... visuels Fn Lecture Pause dans les programmes audio vidéo Fn F8 F9 Diminution Augmentation de la luminosité de l écran LCD Fn F1 Activer Désactiver le Touchpad Fn F10 Activer Désactiver le module caméra PC Fn F2 Eteindre le rétroéclairage LCD Appuyez sur une touche ou utilisez le Touchpad pour allumer Fn F11 Permutation du mode Avion Fn F3 Allume Éteind le son Fn Verr Num Activer Désactiver le pav...

Страница 56: ...Figure 4 Control Center Cliquez sur un bouton pour activer désactiver l un des modules par exemple Touchpad Appareil photo Cliquez sur Power Conservation Économie d énergie pour basculer entre les modes Performance Performances Balanced Equilibré ou Energy Star Cliquez sur les boutons ou cliquez et maintenez simplement le bouton de la souris pour ajuster le curseur de Luminosité Brightness Volume ...

Страница 57: ...nt les ordinateurs CPU disque dur etc dans des modes veille à faible consommation d énergie après une période d inactivité donnée Cliquez sur le bouton Performance Performances Balanced Equilibré ou Energy Star Sleep Veille Cliquez sur le bouton Veille pour faire apparaître les boutons Veille Prolongée ou Veille et cliquez sur l un des boutons pour que l ordinateur entre dans le mode d économie d ...

Страница 58: ...ercle de baie de composant 18 Haut parleurs 1 14 16 2 8 4 6 3 5 10 12 11 9 7 13 15 17 4 18 18 2 16 Face Gauche Arrière Dessous Droit Surchauffe Afin de ne pas causer une surchauffe de votre ordinateur verifiez que rien ne bouche la les ventilation s quand le systeme est allumé Ejection d urgence du disque Si vous devez éjecter manuellement un disque par ex suite à une coupure de cou rant vous pouv...

Страница 59: ...ccueil bureau de Windows Les applications les panneaux de contrôle les utilitaires et les programmes dans Windows 8 sont accessibles depuis l écran d accueil et ou l application Bureau de Windows Le Bureau qui fonctionne comme une application dans l écran d accueil est accessible en cliquant sur l élément Bureau dans l écran d accueil ou en utilisant la combinaison de touches Touche Logo de Window...

Страница 60: ...ns nécessaires Barre des charmes de Windows Le côté droit de l écran affiche la Barre des charmes de Windows 8 La Barre des charmes contient les menus Rechercher Partager Accueil Périphériques et Paramètres Pour accéder à la Barre des charmes déplacez le curseur vers les coins supérieurs ou inférieurs à droite de l écran puis passez la souris sur l un des éléments de la Barre des charmes pour l ac...

Страница 61: ...ez sur Modifier la résolution de l écran Ajuster la résolution OU 4 Cliquez droit sur le bureau utilisez la combinaison de touches Touche Logo de Windows touche D pour accéder au bureau et sélectionnez la Résolution d écran 5 Utilisez le menu déroulant pour sélectionner la résolution d écran 6 Cliquez sur Paramètres avancés Pour accéder au panneau de configuration graphiques et média Intel 1 Allez...

Страница 62: ...r sous Windows 1 Connectez votre écran externe au port moniteur externe ou à la prise de sortie HDMI et allumez le 2 Appuyez sur la combinaison de touches P ou Fn F7 3 Un menu d écran apparaîtra 4 Utilisez les touches du curseur ou P pour sélectionner la configuration appropriée dans le menu et appuyez sur Entrée pour confirmer la sélection Résolution de l écran des applications de style Metro Win...

Страница 63: ...tir du raccourci sur l écran d ac cueil et assurez vous que vous êtes connecté à Internet puis cliquez sur Suivant et suivez les instructions à l écran pour mettre à jour le logiciel Application Sound Blaster Cinema Exécutez le panneau de configuration Sound Blaster Cine ma dans la zone de notification de la barre des tâches ou à partir de l élément sur l écran de d accueil Cliquez sur les onglets...

Страница 64: ... fermé mode Affichage et Veille l état d économie d énergie par défaut dans le menu de gauche Remarquez que le mode de gestion d éco nomie d énergie peut avoir un impact sur les performances de l ordinateur Cliquez pour sélectionner l un des modes existants ou cliquez sur Créer un mode de gestion d alimentation dans le menu gauche et sélectionnez les options pour créer un nouveau mode Cliquez sur ...

Страница 65: ... Directives générales pour l installation du pilote D une manière générale suivez les instructions par défaut à l écran pour chaque pilote par exemple Suivant Suivant Terminer à moins que vous ne soyez un utilisateur avancé Dans la plupart des cas un redé marrage est nécessaire pour installer le pilote Assurez vous que les mo dules par exemple caméra PC WLAN ou Bluetooth sont allumés avant d insta...

Страница 66: ...ez l ordinateur retournez le et retirez la batterie faites glisser le loquet dans la direction indiquée en dessous et sortez la batte rie 2 Insérez la carte USIM comme illustré ci dessous jusqu à ce qu elle se clique en position et remettez la batterie Figure 13 Retirer la batterie et insérer la carte USIM 1 Orientation de la carte USIM Notez que le côté lisible de la carte USIM avec les contacts ...

Страница 67: ...st désactivé Utilisez la combinaison de touches Fn F10 pour activer le module voir le Tableau 3 à la page 52 Exécutez l application Caméra pour voir l image de l appareil photo Les fichiers vidéo capturés depuis la caméra PC prennent trop de place sur le disque Notez que la capture de fichiers vidéo à haute résolution nécessite un espace substantiel sur le disque pour chaque fichier Notez que le s...

Страница 68: ...el Pentium 2030M 2 5GHz 2020M 2 4GHz Cache L3 2Mo 22nm DDR3 1600MHz TDP 35W Core logic Chipset Intel HM76 BIOS AMI BIOS SPI Flash ROM de 48Mb Mémoire Deux emplacements SODIMM 204 broches supportant la mémoire DDR3 1333 1600MHz Mémoire extensible jusqu à 16Go La fréquence réelle d opération de la mémoire dépend du FSB du processeur Stockage Option d usine Un module de Super Multi lecteur optique éc...

Страница 69: ...ory Stick MS Pro MS Duo Communication 1Gbit réseau Ethernet intégré 2M caméra PC HD Option d usine Module Mini carte 3G Modules Half Mini carte LAN sans fil Bluetooth Option d usine Bluetooth 4 0 et LAN sans fil 802 11a g n Intel Centrino Advanced N 6235 Option d usine Bluetooth 4 0 et LAN sans fil 802 11b g n Intel Centrino Wireless N 2230 Option d usine LAN sans fil 802 11b g n tiers Option d us...

Страница 70: ...o a revisar esta publicación o cambiar su contenido sin previo aviso Algunas o todas las características del ordenador pueden haberse configurado de antemano Si no lo están o si desea reconfigurar o reinstalar partes del sistema consulte el Manual del usuario completo El disco Device Drivers Utilities User s Manual no contiene un sistema operativo Información de regulación y seguridad Por favor pr...

Страница 71: ...mación de seguridad Utilice solamente un adaptador de alimentación aprobado para su uso con este ordenador Utilice solamente el cable de corriente y las baterías indicados en este manual No tire las baterías al fuego Podrían explotar Con sulte los códigos locales para posibles instrucciones para desechos especiales Nunca utilice una batería que se haya caído o que parezca dañada p ej doblada o ret...

Страница 72: ...n temperatura ambiental alta y no guarde las baterías sin usar durante mucho tiempo Eliminación de la batería Cuidado El producto que usted ha comprado contiene una batería recargable La batería es reciclable Terminada su vida útil según las leyes locales y estatales puede ser ilegal desecharla junto con los residuos ordinarios Verifique con las autoridades locales responsables de los desechos sól...

Страница 73: ...dos mientras utiliza la otra mano como se muestra en la Figura 1 para sostener la base del ordenador Nota Nunca levante el ordenador por la tapa LCD 7 Presione el botón de encendido para encender Software de sistema Puede ser que su ordenador tenga instalado un software de sistema Si no es el caso o si desea reconfigurarlo con otro sistema este manual se refiere a Microsoft Windows 8 Figura 1 Abri...

Страница 74: ... el equipo en un avión ajustando el sistema al modo Avión Figura 2 Vista frontal con panel LCD abierto 1 Cámara PC 2 Micrófono incorporado 3 LED de cámara PC Cuando la cámara PC esté en uso el LED se iluminará en rojo 4 Panel LCD 5 Botón de encendido 6 Indicadores LED 7 Teclado 8 Touchpad almohadilla táctil y botones Tenga en cuenta que el área válida de operación del Touchpad y los botones es la ...

Страница 75: ...encendido Verde parpadeante El ordenador está en modo Sus pensión Naranja La batería se está cargando Verde La batería está completamente cargada Naranja parpadeante La batería ha alcanzado el estado crítico de poca energía Verde El disco duro está en uso Verde El modo Avión está activado los módulos WLAN y Bluetooth están apagados Icono Color Descripción Azul El teclado numérico NumLk está acti v...

Страница 76: ...Teclado eric ad pad Tecla de Windows Tecla Menú Aplicación Acceso directo del teclado al logotipo Windows Utilice la combinación Tecla de Windows tecla D para cambiar entre la pantalla Inicio y el Escritorio de Windows Acceso directo del teclado a Menú Aplicación Cuando la app Escritorio esté ejecutándose podrá usar la tecla Menú Aplicación en el teclado para mos trar el menú contextual como con u...

Страница 77: ... Función indicadores visuales Fn Reproducir pausar en los programas audio vídeo Fn F8 F9 Reducción aumento brillo LCD Fn F1 Activar desactivar el Touchpad Fn F10 Activar desactivar el módulo cámara PC Fn F2 Apagar luz de fondo del LCD presione una tecla o utilice el Touchpad para encenderlo Fn F11 Cambiar modo Avión Fn F3 Conmutación mudo Fn Bloq Num Activar disactivar el teclado numérico Fn F4 Co...

Страница 78: ...ntrol Center Haga clic en cualquier botón para activar o desactivar cualquiera de los módulos p ej Touchpad Cámara Haga clic en Power Conservation Ahorro de energía para cambiar entre los modos Performance Rendimiento Balanced Equilibrado o Energy Star Haga clic en los botones o simplemente haga clic y mantenga presionado el botón del ratón para ajustar el control deslizante del Brightness Volume ...

Страница 79: ...de energía Energy Star que hace que los equipos CPU disco duro etc entren en modos de ahorro de energía y suspensión tras el período de tiempo de inactividad designado Haga clic en el botón Performance Rendimiento Balanced Equilibrado o Energy Star Sleep Suspender Haga clic en el botón Suspender para abrir los botones Hibernar o Suspender y haga clic en uno de esos botones para que el equipo entre...

Страница 80: ...6 Ubicación de la batería 17 Tapa de la bahía componente 18 Altavoces incorporados 1 16 2 8 4 6 3 5 9 7 17 4 18 18 2 16 Recalentamiento Para evitar que su ordenador se recaliente compruebe que nada bloquea la s rejilla s con el equipo encendido Expulsión de emergencia del disco Si necesita expulsar un disco manualmente p ej por un corte de corriente inesperado puede introducir la punta de un clip ...

Страница 81: ...icio y escritorio de Windows A las apps paneles de control utilidades y programas en Windows 8 se accede desde la pantalla Inicio y o desde la app Escritorio de Windows Al Escritorio que se ejecuta como una app dentro de la pantalla Inicio se puede acceder haciendo clic en Escritorio en el menú Inicio o usando la combinación Tecla de Windows tecla D Mueva el ratón a la esquina inferior izquierda d...

Страница 82: ...esarias Barra Charms de Windows 8 El lado derecho de la pantalla muestra la barra Charms de Windows 8 La barra Charms contiene los menús Buscar Compartir Inicio Dispositivos y Configuración Para acceder a la barra Charms mueva el cursor hacia la esquina superior o inferior derecha de la pantalla y luego mueva uno de los elementos hacia la barra Charms para activarla la barra estará en negro cuando...

Страница 83: ...ía 3 Haga clic en Ajustar resolución de pantalla Ajustar resolución O 4 Haga clic con el botón derecho en el escritorio utilice la combinación Tecla de Windows tecla D para acceder al escritorio y seleccione Resolución de pantalla 5 Utilice el cuadro desplegable para seleccionar la resolución de la pantalla 6 Haga clic en Configuración avanzada Para acceder al Panel de control de gráficos y multim...

Страница 84: ...ndo se coloca un proyector en Windows 1 Conecte una pantalla externa al puerto para monitor externo o puerto de salida de HDMI y enciéndala 2 Pulse la combinación de teclas P o Fn F7 3 Aparecerá un menú en pantalla 4 Utilice las teclas del cursor o P para seleccionar la configuración apropiada en el menú y presione Entrar para confirmar la selección Resolución de pantalla para Apps de estilo Metro...

Страница 85: ...directo en la pantalla Inicio y asegúrese de estar conectado a Internet luego haga clic en Siguiente y siga las instrucciones en pantalla para actualizar el software Aplicación Sound Blaster Cinema Ejecute el panel de control de Sound Blaster Cinema desde el área de notificación de la barra de tareas o desde el elemento en la pantalla Inicio Haga clic en las fichas para acceder a cualquiera de los...

Страница 86: ...rarla pantalla y modo de suspensión el estado de ahorro de energía predeterminado en el menú de la izquierda Tenga en cuenta que el plan economizador puede afectar al rendimiento del ordenador Haga clic para seleccionar uno de los planes existentes o haga clic en Crear un plan de energía en el menú izquierdo y seleccione las opciones para crear un plan nuevo Haga clic en Cambiar la configuración d...

Страница 87: ...s para la instalación del controlador Como guía general siga las instrucciones predeter minadas en pantalla para cada controlador p ej Si guiente Siguiente Fi nalizar a menos que sea usuario avanzado En mu chos casos necesitará rei niciar para instalar el controlador Asegúrese de que los mó dulos p ej cámara PC WLAN o Bluetooth estén ENCENDIDOS antes de instalar el controlador apropiado Windows Up...

Страница 88: ...l ordenador y gírelo para quitar la batería deslice los pestillos en la dirección indicada abajo y saque la batería 2 Inserte la tarjeta USIM como se ilustra a continuación hasta que haga clic en su posición y vuelva a colocar la batería Figura 13 Quitar la batería e insertar la tarjeta USIM 1 Orientación de la tarjeta USIM Tenga en cuenta que el lateral le gible de la tarjeta USIM con los contact...

Страница 89: ...ice la combinación de teclas Fn F11 para activar el módulo vea la Tabla 3 en la página 74 Ejecute la aplicación de la cámara para ver la imagen de la cámara Los archivos de vídeo capturados de la cámara PC ocupan demasiado espacio en el disco Tenga en cuenta que capturar archivos de vídeo de alta resolución requiere una cantidad sustancial de espacio en el disco para cada archivo Tenga en cuenta q...

Страница 90: ...20M 2 40GHz Caché de nivel 3 de 2MB 22nm DDR3 1333MHz TDP 35W Núcleo logic Chipset Intel HM76 BIOS AMI BIOS SPI Flash ROM de 48Mb Memoria Dos zócalos de 204 pins SODIMM para memoria DDR3 1333 1600MHz Memoria expansible hasta 16GB La frecuencia de operación de memoria real depende del FSB del procesador Almacenamiento Opción de fábrica Un dispositivo óptico Super Multi de 12 7mm h intercambiable Un...

Страница 91: ... Ethernet de 1Gbit incorporada Módulo cámara PC 2M HD Opción de fábrica Módulo Mini Card 3G Módulos Half Mini Card WLAN Bluetooth Opción de fábrica Bluetooth 4 0 y LAN inalámbrica 802 11a g n Intel Centrino Advanced N 6235 Opción de fábrica Bluetooth 4 0 y LAN inalámbrica 802 11b g n Intel Centrino Wireless N 2230 Opción de fábrica LAN inalámbrica 802 11b g n tercera parte Opción de fábrica Blueto...

Страница 92: ...are la presente pubblicazione o di modificarne il contenuto senza preavviso È possibile che alcune o tutte le funzionalità del computer siano già state configurate In caso contrario o se si sta pianificando di riconfigurare o reinstallare componenti del sistema fare riferimento al Manuale per l utente completo Il disco Device Drivers Utilities User s Manual non contiene il sistema operativo Inform...

Страница 93: ...Informazioni di sicurezza Utilizzare esclusivamente un adattatore approvato per l utilizzo di questo computer Utilizzare solo il cavo di alimentazione e le batterie indicate in que sto manuale Non gettare le batterie nel fuoco poiché potrebbero esplodere Fare riferimento alle normative locali per istruzioni spe ciali in tema di smaltimento rifiuti Non continuare a usare in alcun modo una batteria ...

Страница 94: ...rature ele vate e non conservare le batterie inutilizzate per periodi di tempo pro lungati Smaltimento della batteria Attenzione Il prodotto acquistato contiene una batteria ricaricabile La batteria è riciclabile Al termine della durata di uso in base alle diverse leggi locali e statali può essere illegale smaltire questa batteria insieme ai rifiuti comuni Controllare i requisiti previsti nella pr...

Страница 95: ...tra mano come illustrato nella Figura 1 si mantiene la base del computer Nota Non sollevare mai il computer tenendolo dal coperchio LCD 7 Premere il pulsante di alimentazione per accendere Software del sistema È possibile che il software sia già pre installato sul computer In caso contrario oppure in casi di riconfigurazione del computer per un sistema diverso questo manuale si riferisce a Microso...

Страница 96: ...ilizza il computer a bordo di un aereo inserendo il sistema nella modalità aereo Figura 2 Vista anteriore con pannello LCD aperto 1 Camera PC opzionale 2 Microfono incorporato 3 LED della camera PC Quando si utilizza la camera PC l indicatore LED si illumina in rosso 4 Schermo LCD 5 Pulsante di alimentazione 6 Indicatori LED 7 Tastiera 8 Touchpad e pulsanti Si noti che l area operativa vali da del...

Страница 97: ... Verde Il computer è acceso Verde lam peggiante Il computer è in modalità Sospen sione Arancione La batteria è in carica Verde Batteria completamente carica Arancione lampeggiante La batteria ha raggiunto lo stato critico di carica bassa Verde Il disco rigido è in uso Verde La modalità aereo è ON i moduli WLAN Bluetooth sono OFF Icona Colore Descrizione Blu La funzione blocco numerico tastierino n...

Страница 98: ...tive Figura 3 Tastiera eric ad Tasto logo Windows Scorciatoia da tastiera Windows Logo Usare la combinazione di tasti Tasto logo Windows D per passare dalla schermata Start al Windows Desktop Menu Scorciatoia tastiera applicativo Quando la Desktop app è in esecuzione è possibile usare il tasto Menu Applicazione sulla tastiera per visualizzare il menu contestuale analogamente al clic del pulsante d...

Страница 99: ... programmi audio video Fn F8 F9 Riduzione Aumento luminosità LCD Fn F1 Attiva disattiva touchpad Fn F10 Attiva disattiva la camera PC Fn F2 Spegne la retroilluminazione dello schermo LCD pre mere un tasto o utilizzare il touchpad per ripristinare lo schermo Fn F11 Commutazione moda lità aereo Fn F3 Commutazione mute Fn Bloc Num Attiva disattiva il tastie rino numerico Fn F4 Commutazione Sospendi F...

Страница 100: ...puter Figura 4 Control Center Fare clic su uno dei pulsanti per attivare disattivare i moduli ad esempio il Touchpad o la fotocamera Fare clic su Power Conservation Risparmio energetico per selezionare le modalità Performance Prestazioni Balanced Bilanciate o Energy Star Fare clic sui pulsanti oppure semplicemente fare clic e tenere premuto il tasto del mouse per regolare il cursore di Luminosità ...

Страница 101: ...tema supporta le funzionalità della gestione energetica Energy Star che pone i computer CPU disco rigido ecc in una modalità di sospensione a basso consumo dopo un certo periodo di inattività impostato Fare clic sul pulsante Prestazioni Bilanciato o Energy Star Sospensione Fare clic sul pulsante Sospensione per mostrare i pulsanti Ibernazione e Sospensione quindi scegliere uno dei pulsanti per por...

Страница 102: ...corporati 1 14 16 2 8 4 6 3 5 10 12 9 7 13 15 17 4 18 18 2 16 12 11 Lato anteriore Lato sinistro Lato posteriore Parte inferiore Lato destro Surriscaldamento Per prevenire il surriscaldamento del computer accertarsi che non vi sia nulla che ostruisca la le ventola ventole durante l uso del computer Espulsione di emergenza del disco Se si desidera estrarre manualmente un disco per esempio a causa d...

Страница 103: ... controllo Schermata Start e Desktop di Windows Le app i pannelli di controllo utilità e programmi dentro Windows 8 sono accessibili dalla schermata Start e o Windows 8 Desktop app Il Desktop che viene eseguito come app all interno della schermata Start è accessibile cliccando l oggetto del Desktop nella schermata Start o tramite la combinazione di tasti Tasto logo Windows D Spostare il mouse in b...

Страница 104: ...imento nella parte inferiore dello schermo Charms Bar di Windows 8 Il lato destro dello schermo visualizza la Charms Bar di Windows 8 La Charms Bar contiene i menu Ricerca Condivisione Start Dispositivi e Impostazioni Per accedere alla Charms Bar spostare il dispositivo di scorrimento negli angoli superiore e inferiore dello schermo e quindi passare sopra a uno degli oggetti nella Charms Bar per a...

Страница 105: ...ca risoluzione O 4 Fare clic con il pulsante destro del mouse sul Desktop utilizzare la combinazione di tasti Tasto logo Windows D per accedere al Desktop e scegliere Proprietà grafiche dal menu 5 Utilizzare la casella di riepilogo a discesa per selezionare la risoluzione dello schermo 6 Fare clic su Impostazioni avanzate Per accedere al Pannello di controllo grafica e multimedia Intel 1 Andare al...

Страница 106: ...mente utile quando si collega un proiettore in Windows 1 Collegare lo schermo alla porta per monitor esterno o porta uscita HDMI quindi accenderlo 2 Premere la combinazione di tasti P o Fn F7 3 Viene visualizzato un menu a comparsa 4 Utilizzare i tasti cursore o P per selezionare la configurazione appropriata dal menu quindi premere Invio per confermare la selezione Risoluzione dello schermo per l...

Страница 107: ... l applicazione dal collegamento nella schermata Start e verificare che sia attiva la connessione a Internet quindi scegliere Avanti e seguire le istruzioni visualizzate per aggiornare il software Applicazione Sound Blaster Cinema Eseguire il pannello di controllo Sound Blaster Cinema dall area di notifica del sistema operativo o dalla voce corrispondente nel menu Start Fare clic sulle schede per ...

Страница 108: ...sione Fn F4 coperchio del computer chiuso schermo e modalità sospensione lo stato di risparmio di energia predefinito Nota la funzione Risparmio di energia può influire sulle prestazioni del computer Fare clic su una delle combinazioni esistenti o su Crea combinazione per il risparmio di energia sul menu di sinistra e personalizzarla per creare una nuova combinazione Fare clic su Modifica impostaz...

Страница 109: ... installazione dei driver Come guida generale attener si alle istruzioni predefinite vi sualizzate sullo schermo per ogni driver ad esempio Avanti Avanti Fine finché le pro prie conoscenze non consenti ranno di operare come utente più avanzato Per installare il driver spesso sarà necessario riavviare il computer Verificare che tutti i moduli ad esempio camera PC WLAN o Bluetooth siano ACCESI pri m...

Страница 110: ...o e rimuovere la batteria rilasciare i fermi nella direzione indicata sotto e sganciare la batteria facendola scorrere 2 Inserire la carta USIM come illustrato sotto finché non scatta in posizione e installare nuovamente la batteria Figura 13 Rimozione della batteria e inserimento della carta USIM 1 Orientamento della scheda USIM Si noti che il lato leggibile della scheda USIM quello con i contatt...

Страница 111: ...ssibile rilevare il modulo camera PC II modulo è disattivato Utilizzare la combinazione di tasti Fn F10 per attivare il modulo vedere la Tabella 3 a pagina 96 Lanciare l applicativo fotocamera per visualizzare l immagine della fotocamera I file video catturati dalla camera PC prendono troppo spazio sul disco Nota catturare file di video ad altra risoluzione molto spazio disco disponibile per ogni ...

Страница 112: ...0GHz Cache L3 da 2MB 22nm DDR3 1333MHz TDP 35W Logica del core Chipset Intel HM76 BIOS AMI BIOS SPI Flash ROM da 48Mb Memoria Due prese SODIMM 204 pin dotate di supporto per la memoria DDR3 1333 1600MHz Memoria espandibile fino a 16GB La frequenza operativa reale della memoria dipende dal bus FSB del processore Periferica di memorizzazione Opzione di fabbrica Una unità ottica Super Multi sostituib...

Страница 113: ...municazione LAN 1Gbit Ethernet Modulo di camera PC 2M HD Opzione di fabbrica Modulo 3G Mini Card Moduli Half Mini Card WLAN Bluetooth Opzione di fabbrica Intel Centrino Advanced N 6235 Bluetooth 4 0 e Wireless LAN 802 11b g n Opzione di fabbrica Intel Centrino Wireless N 2230 Bluetooth 4 0 e Wireless LAN 802 11b g n Opzione di fabbrica Wireless LAN 802 11b g n terze parti Opzione di fabbrica Bluet...

Отзывы: