PULSAR
®
III-P/III-PE and VI-P/VI-PE PRESSURE CABINETS
Page 19
© 2019 CLEMCO INDUSTRIES CORP.
www.clemcoindustries.com
Manual No. 21527, Rev. I, 02/19
6.2
Daily Inspection During Blasting – Have
Someone Do the Following:
6.2.1 Inspect couplings and blast hose:
Inspect
blast-hose couplings and coupling gaskets for air leaks.
WARNING
Air leaks around couplings and nozzle holders
indicate worn or loose-fitting parts. Nozzle
holders and couplings that do not fit tightly on
hose, as well as nozzles that do not fit tightly in
nozzle holders, can disconnect while under
pressure. Impact from objects (nozzles,
couplings, hoses, or media) disconnected by
pressure during operation can cause severe
injury.
6.2.2 Inspect blast machine for air leaks:
Check the
blast machine for air leaks. If leaks are found around the
pop-up valve, inspection door, or pipe fittings at the
bottom of the cone, stop blasting immediately and repair
or replace worn parts.
NOTICE
If leaks are allowed to continue, abrasive
erosion can cause extensive or irreparable
damage to the blast machine.
6.2.3
Inspect cabinet for dust leaks:
During
operation, inspect cabinet door seals for media leaks.
Dust leaking from the inlet damper or other places on
the cabinet indicates saturated filter cartridge. Refer to
Section 6.2.6 for additional pulsing.
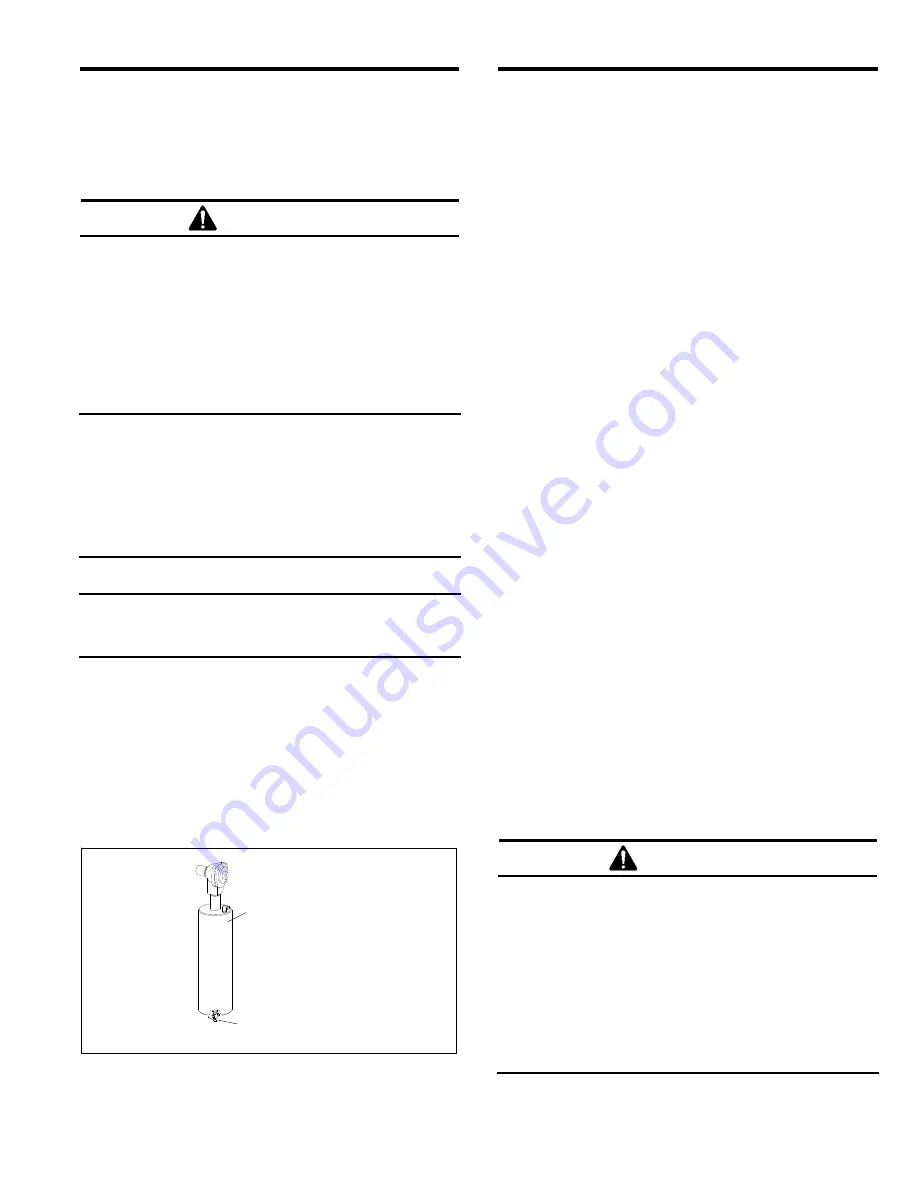
6.2.4
Drain pulse reservoir
: Open the petcock to
drain the pulse reservoir at the end of each shift. Refer to
Figure 23.
Figure 23
6.2.5 Check exhaust air for dust:
Dust discharge at
the outlet indicates a leaking or damaged filter cartridge.
Check immediately. Note that a small amount of dust
egress is normal for a short time before a new cartridge is
seasoned.
6.2.6
Additional cartridge pulsing
: The cartridge is
pulsed each time the foot pedal is pressed or released.
Additional pulsing should be performed per the following
instructions every eight hours, or more often under dusty
conditions, to prevent clogging of the cartridge.
1.
Turn OFF exhauster.
2.
Hold the nozzle holder and rapidly press and release
the foot pedal three times. Activating the pedal more
than three times may cause dust to escape from the
enclosure.
3.
Start the exhauster and let it run until all airborne dust
is cleared from the cabinet.
4.
Repeat the process several times.
6.3
Weekly Inspection and Maintenance Before
Blasting with Air OFF
6.3.1 Inspect view-window cover lens:
Inspect
view-window cover lens. Replace as needed, per
Section 7.4.
6.3.2 Inspect gloves:
Inspect gloves for wear. The
first sign of deterioration may be excessive static
shocks. Replace as needed, per Section 7.1.
6.3.3 Inspect nozzle:
Remove the nozzle and inspect
nozzle for wear. Replace the nozzle when the orifice
diameter is worn 1/16” larger than original size. Before
replacing the nozzle, inspect the nozzle washer. Make
sure the nozzle washer is in good condition, not worn or
otherwise damaged, and in place before reattaching the
nozzle.
WARNING
The threads on the nozzle and nozzle holder
must be inspected each time the nozzle is
secured to the holder. A loose-fitting nozzle
may eject under pressure and cause severe
injury. Check the threads for wear and make
sure the nozzle holder securely holds the
nozzle. The nozzle washer must also be
inspected for wear. When nozzle washers are
worn or missing, abrasive can erode nozzle
threads.
Drain
Pulse Reservoir


