23
CLEARSPAN
™
GREENHOUSES
Revision date: 07.29.14
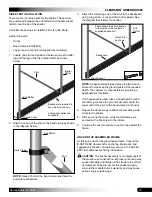
INSTALL CORRUGATED ROOF PANELS (continued)
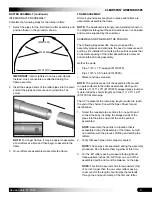
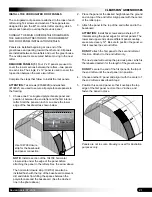
10. Continue installing the corrugated polycarbonate roof
panels and securing the overlap seams until all roof
panels are installed.
11. Verify that all panels are properly secured and continue
with the ASSEMBLE AND INSTALL SLIDING DOORS
procedure.
ASSEMBLE AND INSTALL SLIDING DOORS
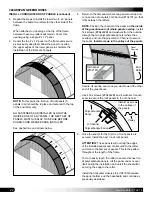
The general steps to install the door are as follows:
1. Assemble the door rollers and attach the brackets to
the door frames.
2. Assemble each door panel by installing the corrugated
polycarbonate panels and closure strips.
3. Optional Step: Install door profile (#104548) along door
frame of end wall to cover the gaps created by the
corrugated end wall panels.
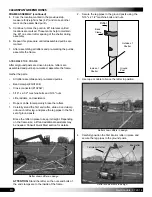
4. Attach the sliding door track to the end wall.
5. Hang the sliding doors in the door track.
6. Install Tek screws (#FA4482B) through track to prevent
door from sliding out of the track.
NOTE:
The following photos show a door frame without the
polycarbonate panels installed. The installation of the roller
assemblies can occur before or after the panel installation.
If you decide to install the panels
before
installing the roller
assemblies, you must drill holes through the panel at the
top edge of the door frame to allow the mounting bolts for
the roller assembly to be installed properly.
If a rib of the corrugated panel falls where the mounting
bolts are located, nuts of the bolts will fall under the rib.
The roller assembly mounting bolts must be tightened
against the flat surface of the door frame.
Do not install the bolts through a rib of the corrugated
panel.
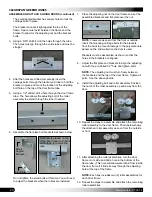
PREPARE THE DOOR FRAMES
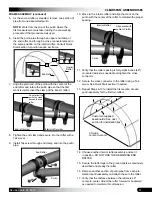
1. Locate the two door frames (#102923) and the roller
hardware kits for the top of the door frames.
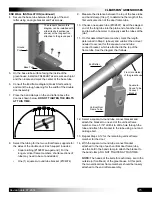
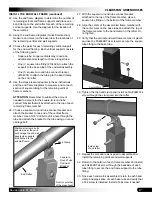
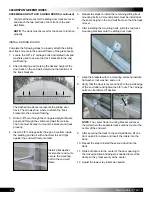
Photo shows an assembled roller attached to the top of
a door frame. The view is from the inside/backside of
the door. The small angled bracket is installed on the
back of the door or to the inside of the building.
NOTE:
Each box includes two roller assemblies for
each door frame.
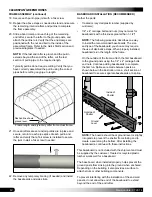
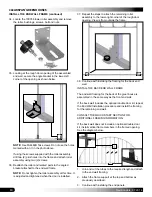
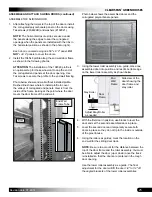
2. Position the small angled bracket on the top of the door
frame (with its square holes on the inside surface of the
frame tube) a few inches from the end of the frame (as
desired). Align the holes of the bracket with the center
of the square door frame tube.
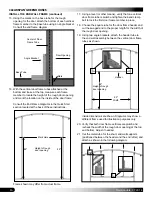
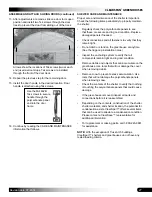
To prevent
damage to the
end panels,
install the heads
of the carriage
mounting bolts
to the inside of
the door frames.
Small Angled
Bracket
End View of Door
Top of Door Frame
Dashed line shows the center of tube.

