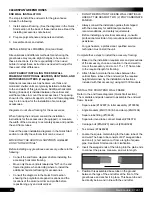
CLEARSPAN
™
GREENHOUSES
12
Revision date: 07.29.14
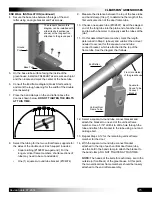
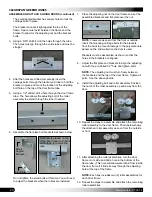
18. Secure each purlin pipe joint with a Tek screw.
19. Repeat the above steps as needed to stand and secure
the remaining interior rafters and purlins to complete
the frame assembly.
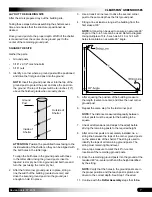
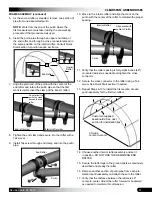
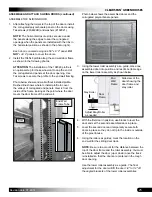
20. Slide a band clamp onto each leg of the remaining
end rafter, secure the rafter to the ground posts, and
attach the purlins to it. Verify that the end clamps are
positioned with the nut and bolt to the inside of the
assembled frame. Refer to the Quick Start section and
previous diagrams if needed.
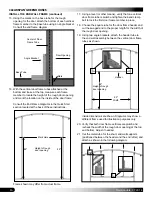
NOTE:
If the last end rafter is plumb and the purlin
extends beyond the end of the rafter, cut the last
section of purlin pipe to the required length.
Typically purlins do not require cutting. Verify that you
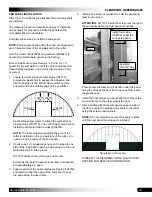
have correctly assembled the purlin using the correct
pipes
before cutting any pipe to length
.
FRAME ASSEMBLY (continued)
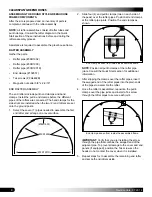
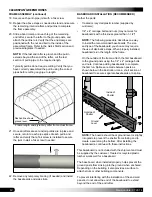
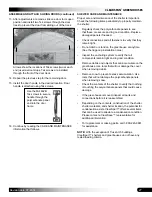
Dashed line shows
ground level.
Frame length and style may differ from actual frame.
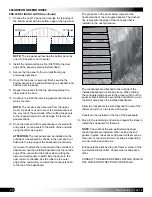
21. Once all rafters are set and all purlins are in place and
secure, return to each pipe splice of each purlin and
rafter and verify that a Tek screw is installed to secure
the joint. Install a Tek screw if needed.
22. Remove any temporary bracing (if needed) and install
the baseboards and side struts.
BASEBOARD INSTALLATION (RECOMMENDED)
Gather the parts:
• Treated or recycled plastic lumber (supplied by
customer).
• 1/4" x 4" carriage bolts and nuts (may not work for
baseboards with a thickness greater than 1-1/2")
NOTE:
The following procedure describes one way
to install the recommended baseboards. The size
and type of the baseboard you choose may require
the use of alternative steps. When properly installed,
baseboards run the length of the frame.
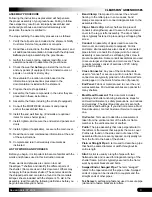
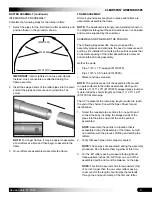
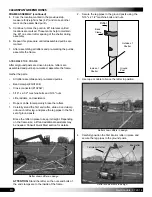
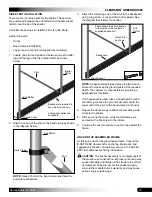
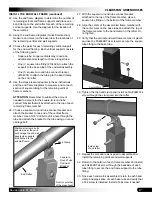
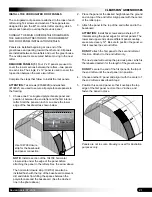
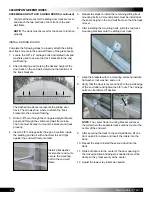
On the outside of the frame, attach the first baseboard
to the ground posts using the 1/4" x 4" carriage bolts
and nuts. Continue adding baseboards to complete
the first run. Splices are made between posts as
shown below in the illustration. Use a short section of
baseboard to secure separate baseboards at a splice.
Ground
Level
Inside of
Shelter
Outside of
Shelter
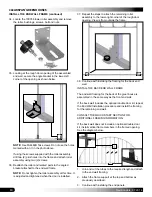
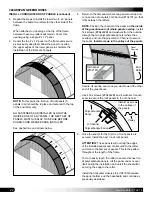
NOTE:
The boards should be at ground level or slightly
into grade to prevent the shelter from sinking and to
create a seal along the bottom. After installing the
baseboards, continue with these instructions.
This baseboard is
not included
with the shipment and must
be supplied by the customer. Treated or recycled plastic
lumber works well for a baseboard.
The baseboard, when installed properly, helps prevent the
ground posts from sinking into the ground when anchored.
Depending on the building, it also provides a surface to
attach struts or other building components.
To prevent interfering with the installation of the end wall
panels,
do not allow the end of the baseboard to extend
beyond the end of the end rafter.


