2
|
INSERT BEAM LOCK
Adjust cable tray to approximate width of surface. Insert the screw
through the overlapping beam slots and into the black plastic
piece. Slightly tighten the screw with only a few turns.
DO NOT
fully tighten.
1 | ATTACH CABLE TRAY HANGERS AND END CAPS*
Align slots on the cable tray and secure with 2 bolts from the
bottom. These hangers will mount to the workstation. Insert Beam
Grommet Covers.
*NOTE: End Caps (BTEC) are optional, follow the same install
process with or without end caps.
C
A
B
L
E
T
R
AY
O
P
T
IO
NAL
5
Содержание BL-3
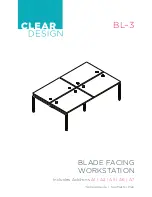
Страница 1: ...Includes Add ons A1 A2 A5 A6 A7 BLADE FACING WORKSTATION BL 3 General Guide See Master Plan...
Страница 17: ...CONFERENCE BLADE FINAL STEPS Insert final wood screws and tighten beam locks 14...
Страница 18: ...END PANELS BL 3 A6 PARTS LIST QTY PRODUCT CODE 4 LEPBL1 1 GBEP or WABEPIS A D Quantities are for one panel 15...
Страница 20: ...END PANELS BL 3 A6 PARTS LIST QTY PRODUCT CODE 4 LEPBL1 1 GBEPSS or WABEPDH A D Quantities are for one panel 17...
Страница 22: ...END PANELS BL 3 A7 PARTS LIST QTY PRODUCT CODE 1 BEP or BCEP Quantity is for one panel 19...
Страница 24: ...210 648 2095 mycleardesign com 2021 Clear Design All rights reserved...


