10
|
SECURE THIRD SURFACE
Place the surface on top of the frame and position according to the
guidelines. Insert wood screws into the leg brackets and secure to
the underside of the surface.
FA
C
IN
G
B
L
AD
E
11
|
CLAMP BRACKETS TO SIDE EDGES
Clamp bracket to the surface's side edge and tighten the vertical
bolt against the surface to secure the bracket. Repeat for all 3
brackets.
Lower screen into brackets and tighten horizontal bolt to clamp the
brackets onto the screens.
9
Содержание BL-3
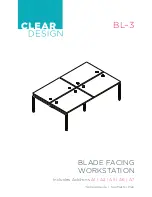
Страница 1: ...Includes Add ons A1 A2 A5 A6 A7 BLADE FACING WORKSTATION BL 3 General Guide See Master Plan...
Страница 17: ...CONFERENCE BLADE FINAL STEPS Insert final wood screws and tighten beam locks 14...
Страница 18: ...END PANELS BL 3 A6 PARTS LIST QTY PRODUCT CODE 4 LEPBL1 1 GBEP or WABEPIS A D Quantities are for one panel 15...
Страница 20: ...END PANELS BL 3 A6 PARTS LIST QTY PRODUCT CODE 4 LEPBL1 1 GBEPSS or WABEPDH A D Quantities are for one panel 17...
Страница 22: ...END PANELS BL 3 A7 PARTS LIST QTY PRODUCT CODE 1 BEP or BCEP Quantity is for one panel 19...
Страница 24: ...210 648 2095 mycleardesign com 2021 Clear Design All rights reserved...


