background image

E

N

G

LI

S

H

GPS Receiver Back Track 

QUICK-START GUIDE

Art.no. 6-761  Model Back Track

Please read the entire instruction manual before use and save it 
for future reference. We reserve the right for any errors in text or 
images and for making any necessary technical changes to this 
document. If you should have any questions concerning technical 
problems please contact our Customer Services. 

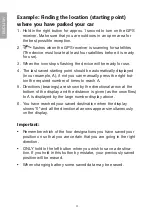
Example: Saving the location (starting point) 

where you have parked your car

1.  Hold in the right button for approx. 1 second to turn on the GPS. 

Make sure that you are outdoors in an open area for the best 
possible reception.

2. 


will flash while the GPS receiver scans for satellites. 

(The GPS receiver must “lock onto” at least 4 satellites before 
being ready for use).

3.  When the icon stops flashing the device will be ready for use.
4.  Press the right button the required number of times to reach 

navigation assistance: Select A – B – C or D as a designation 
for a starting point to be saved. In this example we will select 

A.

5.  Hold in the left button for about 3 seconds to save your current 

location. When the distance display shows “

0”, the current start-

ing location will have been saved under the designation 

A.

6.  You may now shut off the GPS receiver if you wish by holding in 

the right button until the display turns off. Once the buttons are 
not pressed for more than 30* minutes, the device will turn off 
automatically for saving power. 
*30 minutes if you have a satellite lock or 5 minutes if you do not 
have a satellite lock.

Содержание Back Track 36-3761

Страница 1: ...OR SK SUOM I GPS Receiver BackTrack Quick start Guide GPS mottagare Back Track Snabbguide GPS mottaker Back Track Hurtigguide GPS vastaanotin Back Track Pikaopas Ver 200908 www clasohlson com Art no Model 36 3761 Back Track ...

Страница 2: ......

Страница 3: ...ans for satellites The GPS receiver must lock onto at least 4 satellites before being ready for use 3 When the icon stops flashing the device will be ready for use 4 Press the right button the required number of times to reach navigation assistance Select A B C or D as a designation for a starting point to be saved In this example we will select A 5 Hold in the left button for about 3 seconds to s...

Страница 4: ...manually press the right but ton the required number of times to reach A 5 Directions bearings are shown by the directional arrow at the bottom of the display and the distance is given as the crow flies to A is displayed by the large number display above 6 You have reached your saved destination when the display shows 0 and all the directional arrows appear simultaneously on the display Important ...

Страница 5: ...ottagaren måste hitta och låsa minst 4 st satelliter innan den är klar för användning 3 När symbolen slutar att blinka är mottagaren klar för användning 4 Tryck på den högra knappen flera gånger för att växla till rätt användningssätt Välj A B C eller D som benämning för ut gångspunkten som skall sparas Här i exemplet väljer vi A 5 Håll in den vänstra knappen i 3 sekunder för att spara platsen där...

Страница 6: ...unkten visas automatiskt i vårt exempel A Om den inte kommer upp får du stega till A manu ellt med den högra knappen 5 Riktningen bäringen visas med riktningspilen längst ner på dis playen och avståndet fågelvägen till A visas de stora siffrorna på displayen 6 När du kommer fram till den sparade destinationen är avståndet 0 och alla riktningspilarna visas på displayen Viktigt Obs Kom ihåg under vi...

Страница 7: ...tter satel litter GPS mottakeren må finne minst 4 stk satellitter før den er klar til bruk 3 Når symbolet slutter å blinke er mottakeren klar til bruk 4 Trykk på den høyre knappen gjentatte ganger for å skifte funk sjon Velg A B C eller D for å lagre utgangspunktet I vårt ek sempel velger vi A 5 Hold den venstre knappen inne i 3 sekunder for å lagre plassen du nå befinner deg på Når distansen vise...

Страница 8: ...A Dersom det ikke kommer opp må du gå til A manuelt med den høyre knappen 5 Retningen vises med retningspilen som er lengst nede på displayet Avstanden i rett luftlinje til A vises med store tall på displayet 6 Når man kommer fram til ønsket lagret destinasjon viser avstanden 0 og alle retningspiler vises samtidig på displayet Viktig Obs Man må selv huske hvilke destinasjoner som er lagret på de f...

Страница 9: ...anotin ha kee satelliitteja GPS vastaanottimen tulee löytää ja lukita vä hintään neljä satelliittia ennen kuin sitä voidaan käyttää 3 Kun symboli lakkaa vilkkumasta vastaanotin on käyttövalmis 4 Paina oikeaa painiketta useita kertoja vaihtaaksesi eri käyttö tapojen välillä Valitse tallennettavalle paikalle nimi A B C tai D Tässä esimerkissä valitaan kirjain A 5 Paina vasenta painiketta kolmen seku...

Страница 10: ...ttisesti tässä tapauk sessa A Mikäli sijainti A ei ilmesty näytölle hae sijainti manu aalisesti oikealla painikkeella 5 Suunta suuntima näkyy näytön alalaidassa suuntanuolen avulla ja etäisyys linnuntie kohteeseen A näkyy suurin kirjaimin näytöllä 6 Kun saavut tallennettuun kohteeseen etäisyys kohteeseen on 0 ja kaikki suuntanuolet näkyvät näytöllä Tärkeää Huom Muista minkä kirjaimen alle olet tal...

Страница 11: ...11 ...

Страница 12: ...nter clasohlson no INTERNETT www clasohlson no POST Clas Ohlson AS Postboks 485 Sentrum 0105 OSLO SUOMI ASIAKASPALVELU Puh 020 111 2222 Faksi 020 111 2221 Sähköposti info clasohlson fi Internet www clasohlson fi OSOITE Clas Ohlson Oy Yrjönkatu 23 A 00100 HELSINKI GREAT BRITAIN For consumer contact please visit www clasohlson co uk and click on customer service Internet www clasohlson co uk www cla...

Отзывы: