


4
UNPACKING & ASSEMBLY
TOOLS REQUIRED
Phillips screwdriver
13mm spanner
WARNING: Due to the weight of the stove it is recommended that
two people perform the un-packing and assembly.
Unpack the stove and remove packing materials.
Open the doors and remove the 3 legs, grate, flue
outlet and adaptor. The fixings kit can also be found
inside the stove.
1.
Place the stove on a soft surface such as the
polystyrene packing materials from the crate
and tilt the stove back.
2.
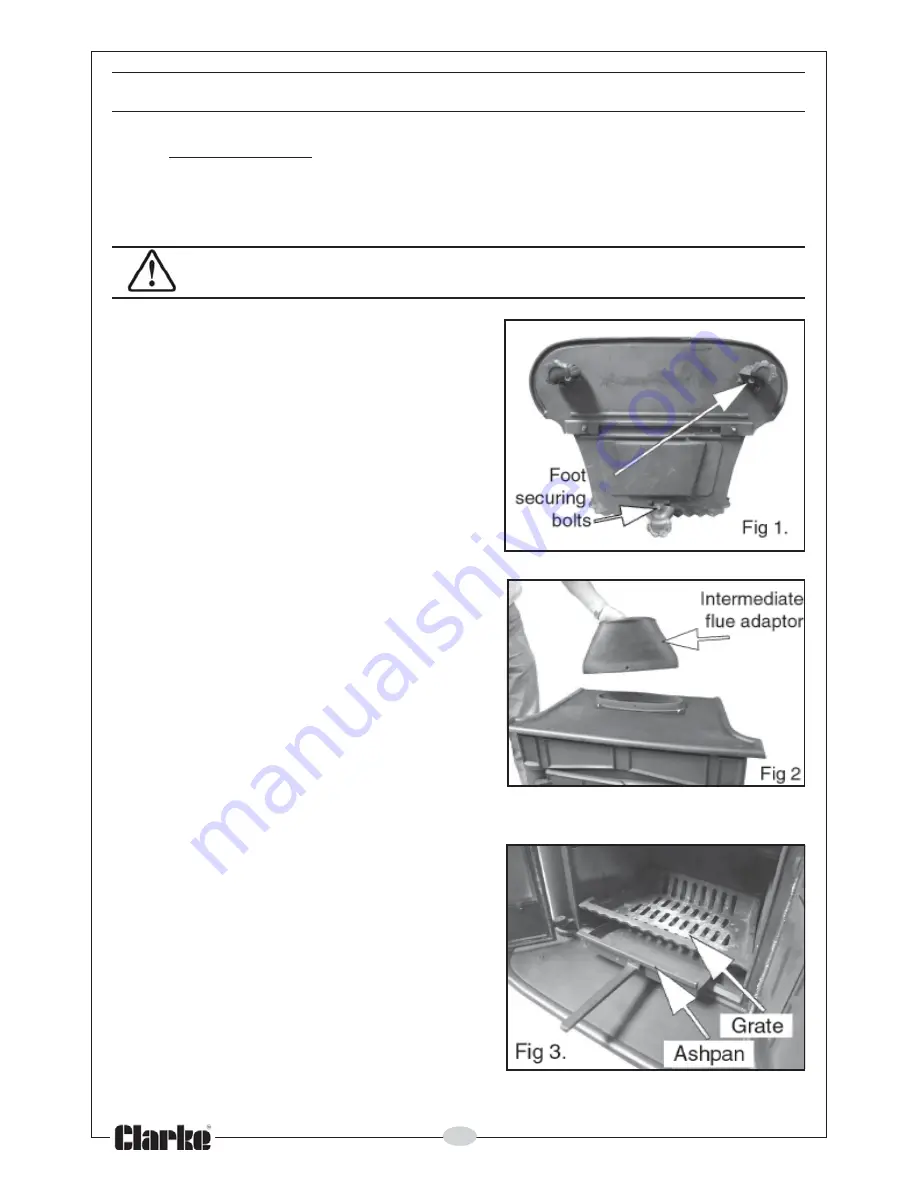
Attach the legs using the bolts and large
washers supplied as shown in Fig 1.
3.
Sit the stove upright and attach the 3 flue
components (rectangular flue adaptor,
intermediate and upper flue as shown in
Fig 2 using the self tapping screws
supplied. Ensure the fireproof gasket is
correctly seated in the base of the flue
adaptor.
These parts can be used for either top or rear
mounting of the flue, according to the chimney
position in the building. Refer to PLACEMENT
AND INSTALLATION.
4.
Set the grate and ashpan in position as in Fig
3.
5.
Place stove in desired location.
Note; All stoves should be installed in accordance
with the local building regulations.
Содержание JUNIOR FRANKLIN
Страница 1: ...USER GUIDE JUNIOR FRANKLIN PART NO 6910120 10 08 Classic Cast Iron Stove ...
Страница 6: ...6 fig 5 ...
Страница 12: ......