DOC ID - 1896
• Rev 01 • DRAFT 00.08
5 / 10
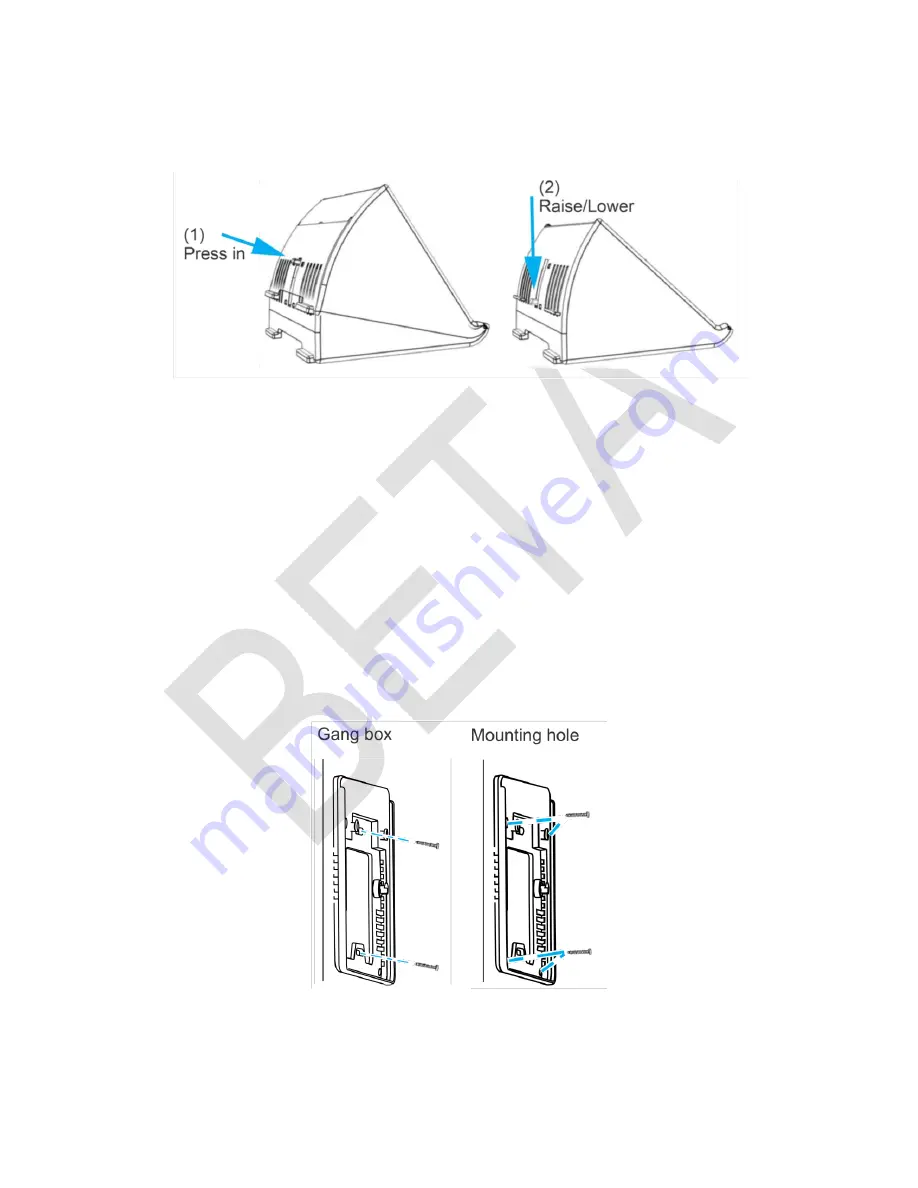
9. (Optional) The viewing angle of the panel can be adjusted by pressing the tab
in on the kickstand and sliding the base up or down to the desired position,
locking it into place.
Installation option 2: Wall mounted
Option 2 uses the included wall mount bracket. The recommended height for
mounting the panel is 48 in. +/- 12 in. based on the comfort level of the end user.
To wall mount the panel:
1. Select a location for the panel that is close to an outlet, and then run a
connection from the 12VDC supply to the selected installation location.
2. Place the mounting bracket against the
selected location’s wall or gang box,
ensuring the power cable goes through the center of the mounting bracket.
Note
: If the power cable does not run through the wall, then the cable does
not need to go through the mounting bracket.
3. Using included screws securely attach the bracket to the wall/gang box. See
the methods below.
a.
Gang box
: Using 2 of the included machine screws, secure the
bracket to the existing gang box.


