Page 26 of 27
Multiverse Transmitter Quick Start Guide
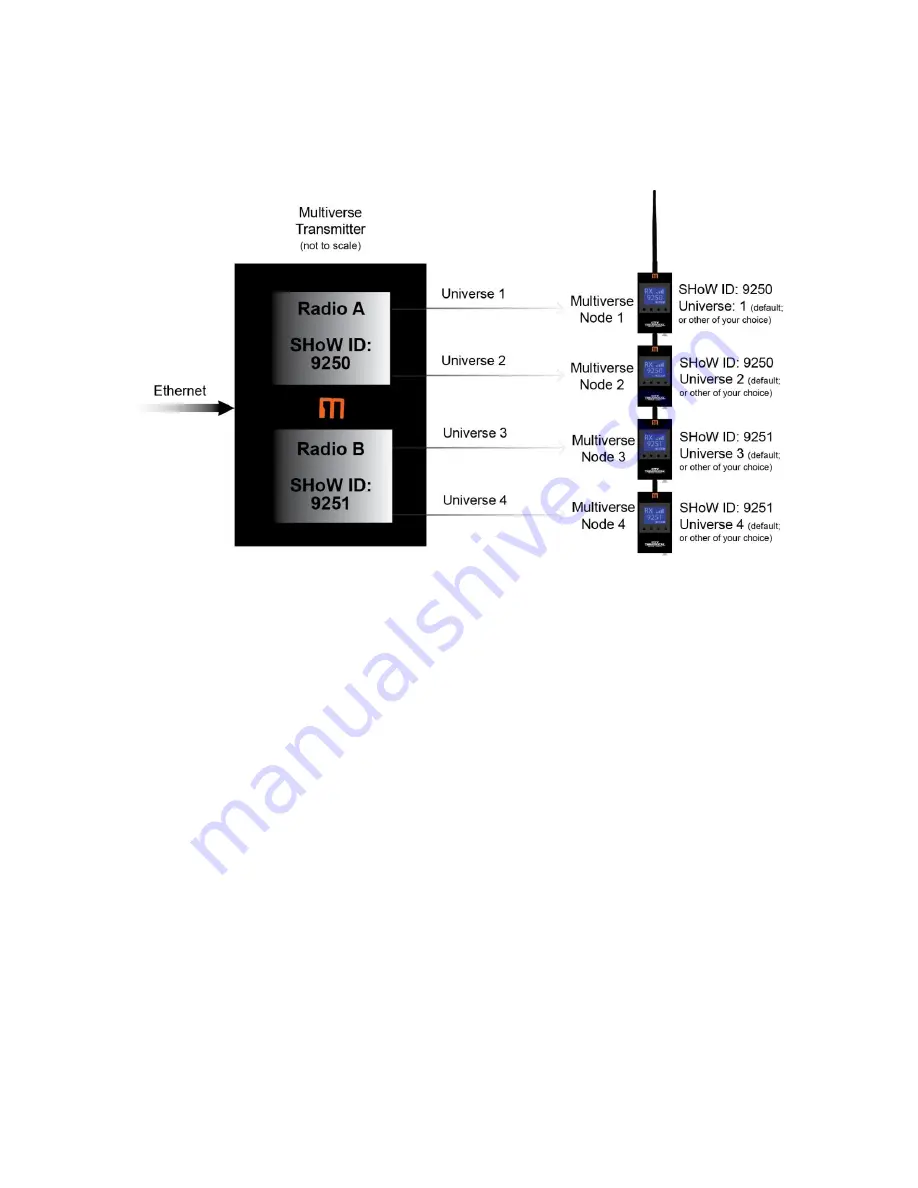
Here is how to set up a basic wireless DMX distribution system with one Multiverse Transmitter
and four Multiverse Nodes as receivers. Here is a layout of the system, starting from factory
defaults on all devices:
Figure 11: Basic Multiverse System Setup in Default Mode
1. Install the Multiverse Transmitter in a convenient location within range of the desired
Receiver location. Transmitter and Receivers should be elevated above the audience
(or other barriers) and located within sight of each other whenever possible. Keep
transmitter and receiver antennas vertical and parallel to each other.
2.
Connect the DMX lighting console’s streaming ACN or Art-Net output to the Multiverse
Transmitter via an Ethernet cable.
3. Install the Multiverse Nodes in the desired locations. Avoid placing the Receivers so
that there is a radio barrier between it and the Transmitter. It is permitted to place the
Receiver inside or behind an object (such as a prop or set piece), providing the
Receiver has adequate ventilation and the object is not a radio barrier. Radio barriers
include metal, some glass, and water. Broadcast fidelity is always improved by having
Transmitter and Nodes in line of sight of each other and above people and other
obstructions.
4. Connect the
Multiverse Nodes’ DMX Outputs to the DMX inputs of equipment you
want to control. Just as with any other DMX device, set the DMX address and
termination as needed.
5. Configuring the Multiverse Transmitter:
a. Power up the Transmitter.
b. Connect to your Transmitter with your DMXcat app. The serial number of your
Multiverse Transmitter should appear as a selectable device on the Device List
in the Settings menu of your DMXcat. You may need to tap
“SCAN” to refresh
the list of devices.


