background image

12 

13 

M6

M8

Attach the horizontal piece to your screen and tighten the thumb nuts

Attachez la pièce horizontal à l’écran et serrez les écrous à ailettes / Befestigen Sie das 

horizontale Stück auf den Bildschirm und ziehen Sie die Muttern fest / Fissare l’elemento 

orizzontale allo schermo e serrare i dadi / Fije la pieza horizontal en la pantalla y apriete las 

tuercas / Instale a peça horizontal no ecrã e aperte as porcas

i

ii

iii

If your screen is thinner than 40 mm (1.6 in.) you must add more than one spacer. Add as many 

spacers as required to align the mediabar support with the screen (see page 15).

Ajoutez plus d’une entretoise si l’écran est plus fin que 40 mm. Ajoutez autant d’entretoises que nécéssaire, 

afin d’aligner le support de la mediabar avec l’écran (voir page 15). / Wenn Ihr Bildschirm dünner als 40 mm 

ist, müssen Sie mehrere Abstandshalter hinzufügen. Fügen Sie so viele Abstandshalter hinzu wie erforderlich, 

um die Medienleiste am Bildschirm auszurichten (siehe Seite 15). / Se lo schermo è più sottile di 40 mm è 

necessario aggiungere più di un distanziale. Aggiungere un numero di distanziali sufficiente per allineare il 

supporto della barra multimediale con lo schermo (vedere pagina 15). / Si su pantalla tiene un grosor inferior 

a 40 mm tiene que agregar más de un espaciador. Agregue los separadores que necesite para adaptar el 

soporte de la barra multimedia a la pantalla (consulte la página 15). /  Se o ecrã tiver uma espessura inferior 

a 40 mm, terá de adicionar mais do que um espaçador. Adicione os espaçadores necessários para alinhar a 

barra de suporte da barra multimédia com o ecrã (ver página 15).

Содержание Webex on Flip

Страница 1: ...Cisco Webex Room Kit Mini and Webex on Flip Installation Guide FR Guide d installation DE Installationshandbuch IT Guida per l installazione ES Guía de instalación PT Manual de Instalação ...
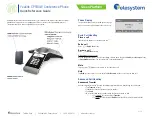
Страница 2: ... pasos Conteúdo da caixa From the Samsung Flip accessories box À partir de la boîte d accessoires Samsung Flip Aus der Zubehörbox von Samsung Flip Dalla cassetta degli accessori di Samsung Flip De la caja de accesorios de Samsung Flip Da caixa de acessórios do Samsung Flip From the Samsung Flip Wall Mount Bracket WMN4277SE box À partir de la boîte de support de montage mural Samsung Flip WMN4277SE...

Страница 3: ...uede instalar encima o debajo de la pantalla O Room Kit Mini foi concebido para espaços informais e salas pequenas Recomenda se a utilização de um ecrã com um máximo de 65 polegadas Pode montar o Room Kit Mini na parede ou diretamente no ecrã montagem de ecrã encomendada em separado Em ambos os casos pode montar acima ou abaixo do ecrã WARNING Do not to cover the mediabar To prevent overheating th...

Страница 4: ...f dem Bildschirm montieren möchten Andare al passaggio 1B se si desidera montare la barra multimediale direttamente sullo schermo Si quiere montar la barra multimedia directamente en la pantalla vaya al paso 1B Avance para o Passo 1B se pretender montar a barra multimédia diretamente no ecrã A causa delle dimensioni e del peso di questo prodotto è importante che il sistema a parete sia installato ...

Страница 5: ...rte o parafuso na parte superior Place the mediabar Placez la mediabar Platzieren Sie die Medienleiste Posizionare la barra multimediale Coloque la barra multimedia Coloque a barra multimédia Flip to place below the screen Faites pivoter la barre pour la faire passer sous l écran Zur Platzierung unterhalb des Bildschirms drehen Sie sie um Capovolgere la barra multimediale per effettuare l installa...

Страница 6: ...ontada en un soporte VESA estándar puede colocar el soporte de la pantalla de la barra multimedia entre la pantalla y el soporte de la pantalla VESA Se o ecrã estiver montado num suporte VESA padrão pode colocar o suporte de ecrã da barra multimédia entre o ecrã e o suporte de ecrã VESA Using the screen mount may change central gravity of the screen Check the stability after mounting the Room Kit ...

Страница 7: ...ire afin d aligner le support de la mediabar avec l écran voir page 15 Wenn Ihr Bildschirm dünner als 40 mm ist müssen Sie mehrere Abstandshalter hinzufügen Fügen Sie so viele Abstandshalter hinzu wie erforderlich um die Medienleiste am Bildschirm auszurichten siehe Seite 15 Se lo schermo è più sottile di 40 mm è necessario aggiungere più di un distanziale Aggiungere un numero di distanziali suffi...

Страница 8: ...use you need to adjust the mounting position later Ne serrez pas les vis de suite car vous devez ajuster la position de montage plus tard Ziehen Sie die Schrauben nicht fest da Sie die Montageposition noch anpassen müssen Non serrare per ora la vite perché dopo sarà necessario regolare la posizione di montaggio No apriete los tornillos ahora porque tendrá que ajustar la posición de montaje más ade...

Страница 9: ...ung Fissare il supporto dello schermo Fije el soporte a la pantalla Aperte o suporte do ecrã Tighten the screw on the top Serrez la vis du haut Ziehen Sie die Schraube oben fest Serrare la vite nella parte superiore Apriete los tornillos de la parte superior Aperte o parafuso na parte superior ...

Страница 10: ...e a barra multimédia Flip to place below the screen Faites pivoter la barre pour la faire passer sous l écran Zur Platzierung unterhalb des Bildschirms drehen Sie sie um Capovolgere la barra multimediale per effettuare l installazione sotto lo schermo Voltear para colocarlo debajo de la pantalla Inverta a posição para colocar por baixo do ecrã ...

Страница 11: ...guiendo los pasos 1 y 2 de la Guía de instalación del soporte de montaje en pared WMN4277SE incluida con Samsung Flip Inicie a montagem seguindo os passos 1 e 2 no Manual de instalação do suporte de montagem na parede WMN4277SE fornecido juntamente com o Samsung Flip We recommend two people working together to mount this system Follow local regulations Nous recommandons que deux personnes travaill...

Страница 12: ... supporto dello schermo Monte el soporte de la pantalla Monte a montagem de ecrã Flip 65 WMR65 Attach the screen mount to the Flip Fixez le support d écran au Flip Befestigen Sie die Bildschirmhalterung an dem Flip Fissare il supporto dello schermo a Flip Una el soporte de la pantalla a Flip Instale a montagem de ecrã no Flip ...

Страница 13: ... supporto dello schermo Monte el soporte de la pantalla Monte a montagem de ecrã Flip 55 WMR55 Attach the screen mount to the Flip Fixez le support d écran au Flip Befestigen Sie die Bildschirmhalterung an dem Flip Fissare il supporto dello schermo a Flip Una el soporte de la pantalla a Flip Instale a montagem de ecrã no Flip ...

Страница 14: ...Coloque a barra multimédia Flip 65 WMR65 Flip 55 WMR65 See step 4 in the Flip wall mounting guide WMN4277SE for details Voir l étape 4 dans le guide de montage mural Flip WMN4277SE pour plus d informations Weitere Informationen finden Sie in Schritt 4 der Flip Anleitung für Wandmontage WMN4277SE Per ulteriori informazioni vedere il passaggio 4 della Guida per il montaggio a parete di Flip WMN4277S...

Страница 15: ... Netzwerkkabel für den Touch Controller Folgen Sie nachdem Sie alle notwendigen Kabel angeschlossen haben den Anweisungen auf dem Bildschirm um Ihr Gerät einzurichten Wenn Sie das Room Kit Mini als USB Kamera verwenden verbinden Sie das USB C Ende des Kabels mit der Mediabar Weitere Methoden zum Verbinden von Touch 10 finden Sie im Administratorhandbuch für Room Kit Mini Assicurarsi di connettere ...

Страница 16: ...ini Vergewissern Sie sich dass die Netzwerkkabel an den richtigen Ports angeschlossen sind und verwenden Sie das flache Netzwerkkabel für den Touch Controller Folgen Sie nachdem Sie alle notwendigen Kabel angeschlossen haben den Anweisungen auf dem Bildschirm um Ihr Gerät einzurichten Weitere Methoden zum Verbinden von Touch 10 finden Sie im Administratorhandbuch für Room Kit Mini Assicurarsi di c...

Страница 17: ...olare l angolo di inclinazione della videocamera per ottimizzare la visualizzazione Ajuste el ángulo de inclinación de la cámara para optimizar la visión Ajuste do ângulo de inclinação da câmara para otimizar a vista Release the mediabar Retirez la mediabar Lösen der Medienleiste Rimuovere la barra multimediale Retire la barra multimedia Retirar a barra multimédia ...

Страница 18: ...efestigen Sie die selbstklebende magnetische Platte Attaccare la piastra magnetica autoadesiva Fije la placa magnética autoadhesiva Instale a placa magnética autoadesiva Place the magnetic privacy cover Placez le cache magnétique Befestigen Sie die magnetische Datenschutz Abdeckung Posizionare la copertura magnetica per la privacy Coloque la cubierta de privacidad magnética Coloque a cobertura de ...

Страница 19: ...eld Pannello del connettore Panel conector Painel de conectores Power 0 VAC 50 60 Hz 1 2 3 4 5 6 7 8 9 10 Troubleshooting Dépannage Fehlerbehebung Risoluzione dei problemi Solución de problemas Solução de problemas If you don t see the on screen display check that you have selected the HDMI input you have connect the mediabar to as the input on your screen The device powers up automatically If the...

Страница 20: ...r meeting room for video conferencing Consultez le portail Cisco Project Workplace pour trouver des conseils et recommendations lorsque vous préparez votre bureau ou votre salle de réunion pour une vidéoconférence Erkunden Sie Cisco Project Workplace um Inspiration und Richtlinien für die Vorbereitung Ihres Büros oder Ihres Konferenzraums für Videokonferenzen zu finden Consultare il Cisco Project ...

Страница 21: ...anderer Anbieter sind Eigentum der jeweiligen Inhaber Die Verwendung des Begriffs Partner impliziert keine gesellschaftsrechtliche Beziehung zwischen Cisco und anderen Unternehmen 1110R Cisco e il logo Cisco sono marchi o marchi registrati di Cisco e o dei relativi affiliati negli Stati Uniti e in altri paesi Per visualizzare l elenco di marchi Cisco visitare il sito Web all indirizzo www cisco co...

Отзывы: