47
Cisco Unity Express 8.0 Voicemail User’s Guide for Advanced Features
OL-23857-01
Administering Broadcast Messages
Sending Broadcast Messages to Select Locations
Note
Not all menu items are valid for all users. If you receive a “Networking messaging is disabled” message,
this feature is disabled.
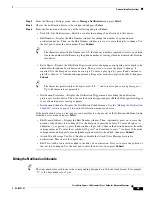
To record and send a broadcast message to select locations:
Step 1
Perform the steps in the
“Logging In To VoiceView Express” section on page 33
to display the Personal
Mailbox menu.
Step 2
From the Personal Mailbox menu, choose
Administer Broadcast Msgs
and press
Select
. The Send
Broadcast Messages menu appears.
Step 3
Choose
Select Locations
.
Step 4
Address message by location ID number or (optionally) press
Name
, then:
•
To address by location ID, use the dial pad to enter the exact location ID number.
•
To address by location name, use the dial pad to enter the location name or partial location name to
search for matching names. Each key represents one or more characters. Continue to rapidly press
the key to select the desired letter from the menu.
Step 5
Press
Submit
. The Matching Address menu appears.
Step 6
Choose the desired address and press
Add
to build a recipient list.
Step 7
After adding an address, press any of the following soft keys:
•
AddMore
—Return to Address by Number window and add another address to the recipient list.
•
Remove
—Remove address from list. You cannot empty the list by removing the only recipient.
•
Cancel
—Cancel operation.
•
Record
—Switch on the microphone and begin recording. Say your message, then press
Stop
. To
cancel recording, press
Stop
immediately, then press
Cancel
.
Step 8
After recording the message, review start and end time for the broadcast message. Press
Cancel
to cancel
the message or press
OK
to display the Send Broadcast Message menu.
Step 9
To send the message immediately, press
Send
; otherwise, choose one of the following and press
Select
.
•
Listen to Recorded Message
—Play message to be sent.
•
Record Again
—Switch on the microphone and begin recording. Say your message, then press
Stop
.
•
Edit Recipients
—Return to Recipient List menu where you can add or remove recipients.
•
Review Start & Stop Time
—Display window, then press
Cancel
to cancel the message or press
OK
to accept the start and end time for the broadcast message.
•
Set Start Time
—Display the Set Start Time menu. See the
“Specifying Start or End Time” section
on page 48
to modify the start time.
•
Set End Time
—Display the Set End Time menu. See the
“Specifying Start or End Time” section on
page 48
to modify the end time.

