8
Cisco TelePresence Content Server Release 7.0 Quick Start Guide
Completing the Initial Configuration
Step 1
Log in to the Content Server Windows Server Manager by using the default password,
Cisco123
.
Step 2
Go to
Start > Control Panel > User Accounts > Change your Windows password > Change your
password
.
Step 3
In the Change your password window, enter the current password (
Cisco123
), the new password, and
confirm the new password.
Step 4
Click
Change password
.
Step 5
Click
OK
.
Task 3: Enter the Windows Server 2012 activation key
The Windows Server 2012 Physical Key is on the printed label on the Content Server top near the front.
You should have an Internet connection to access the Windows Server 2012 online activation service.
Follow these steps:
Step 1
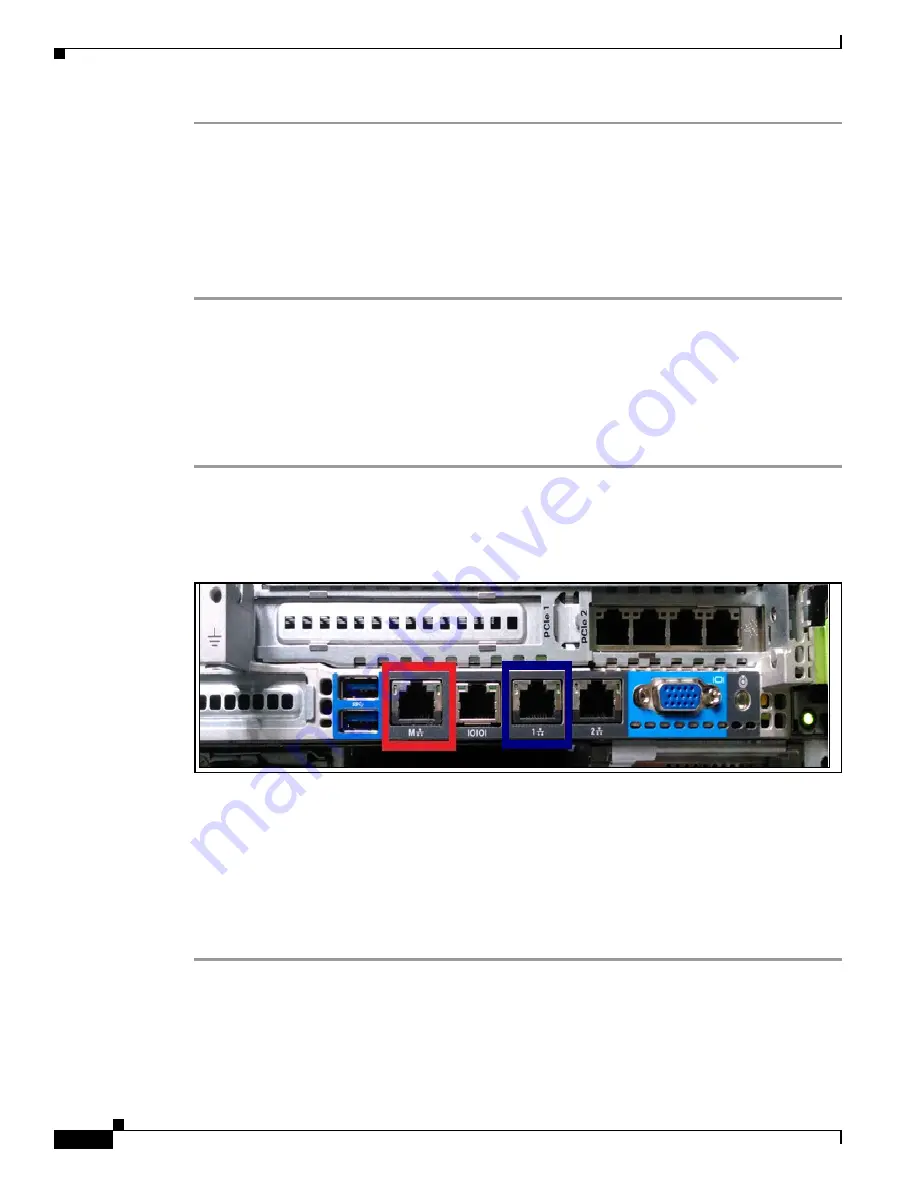
Connect the Content Server to your network. Use an Ethernet cable to connect from your LAN to the
LAN1 network port, marked with blue in
Figure 4
, on the rear panel. Use the connector marked with red
for your CIMC management connection.
Figure 4
Network Connections
Step 2
Log in to the Content Server Windows Server Manager by using the password that you set in
Task 2: Set
the local administrator password
.
Step 3
Go to
Start > Administrative Tools > Server Manager
. In the Server Manager window, click
Activate
Windows
. Enter the
Physical Key
(located on the Content Server chassis label). Click
Next
.
If the Content Server is not connected to the Internet, you can follow the on-screen instructions to
activate Windows Server 2012 by using your phone.
Step 4
When the product key is verified and activated, click
Close
.


