Configuring the PA-T3 Interfaces 8-7
Shutting Down an Interface
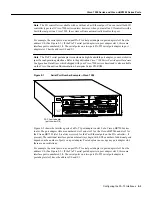
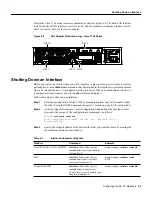
Slots in the Cisco 7140 series routers are numbered as shown in Figure 8-6. The fixed LAN interface
is slot 0, the fixed WAN interfaces are slots 1 and 2, and the modular port adapter interface is slot 4.
Slot 3 is not used. Slot 5 is the service adapter.
Figure 8-6
Port Adapter Slot Numbering—Cisco 7140 Series
Shutting Down an Interface
Before you remove an interface that you will not replace, replace a compact serial cable, or replace
port adapters, use the shutdown command to shut down (disable) the interfaces to prevent anomalies
when you reinstall the new or reconfigured interface processor. When you shut down an interface, it
is designated administratively down in the show command displays.
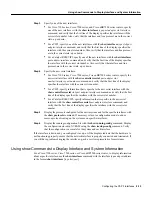
Follow these steps to shut down an interface:
Step 1
Enter the privileged level of the EXEC command interpreter (also called enable mode).
(See the “Using the EXEC Command Interpreter” section on page 8-2 for instructions.)
Step 2
At the privileged-level prompt, enter configuration mode and specify that the console
terminal is the source of the configuration subcommands, as follows:
Router# configure terminal
Enter configuration commands, one per line. End with Crtl-Z.
Router(config)#
Step 3
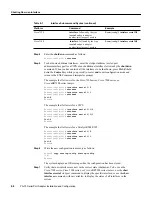
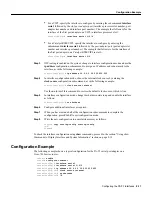
Specify the slot/port address of the first interface that you want shut down by entering the
subcommand interface as described in .
Table 8-1
Interface Subcommand Syntax
Platform
Command
Example
Cisco 7200 series or Cisco uBR7200
interface, followed by the type
(serial) and slot/port (port adapter
slot number/0)
Router(config)# interface serial 1/0
VIP2
interface, followed by the type
(serial) and slot/port (interface
processor slot number/0)
Router(config)# interface serial
1/1/0
Catalyst RSM/VIP2
interface, followed by the type
(serial) and port adapter slot
number/interface port number (port
adapter slot number/0)
Router(config)# interface serial 0/0
SLOT 0
SLOT 1
AC OK
DC OK
OTF
AC OK
DC OK
OTF
5
155 - MM
RX
RX
EN
CEL CAR ALM
TX
I
155 - MM
CONS
FE 0 / 0
FE
ACT
0 / 1
AUX
0
2
RX
7140 - 2MM3
RX
EN
CEL CAR ALM
TX
ACT
LNK
0
LNK
1
PWR
SYS
RDY
EN
ERROR
BOOT
RESET
SM-EC-DS
18499
Slot 1
Slot 0 Slot 2
Slot 4
Slot 5
Содержание PA-2T3
Страница 2: ......
Страница 10: ...Management Information Base PA T3 Serial Port Adapter Installation and Configuration 1 4 ...
Страница 20: ...FCC Class A Compliance PA T3 Serial Port Adapter Installation and Configuration 2 10 ...
Страница 28: ...Installing a Port Adapter PA T3 Serial Port Adapter Installation and Configuration 3 8 ...
Страница 44: ...Installing a Port Adapter PA T3 Serial Port Adapter Installation and Configuration 6 6 ...
Страница 70: ...Checking the Configuration PA T3 Serial Port Adapter Installation and Configuration 8 26 ...


