background image

Important Safety Instructions, Continued 

Reduced Airflow 

When mounting this equipment in the rack, do not obstruct the cooling airflow 

through the rack. Be sure to mount the blanking plates to cover unused rack space. 

Additional components such as combiners and net strips should be mounted at the 

back of the rack, so that the free airflow is not restricted. 

  CAUTION: 

Installation of this equipment in a rack should be such that the amount of 

airflow required for safe operation of this equipment is not compromised.   

Elevated Operating Ambient Temperature 

Only install this equipment in a humidity- and temperature-controlled environment 

that meets the requirements given in this equipment’s technical specifications. 

  CAUTION: 

If installed in a closed or multi-unit rack assembly, the operating ambient 

temperature of the rack environment may be greater than room ambient 

temperature. Therefore, install this equipment in an environment compatible 

with the manufacturer’s maximum rated ambient temperature.   

Handling Precautions 

When moving a cart that contains this equipment, check for any of the following 

possible hazards: 

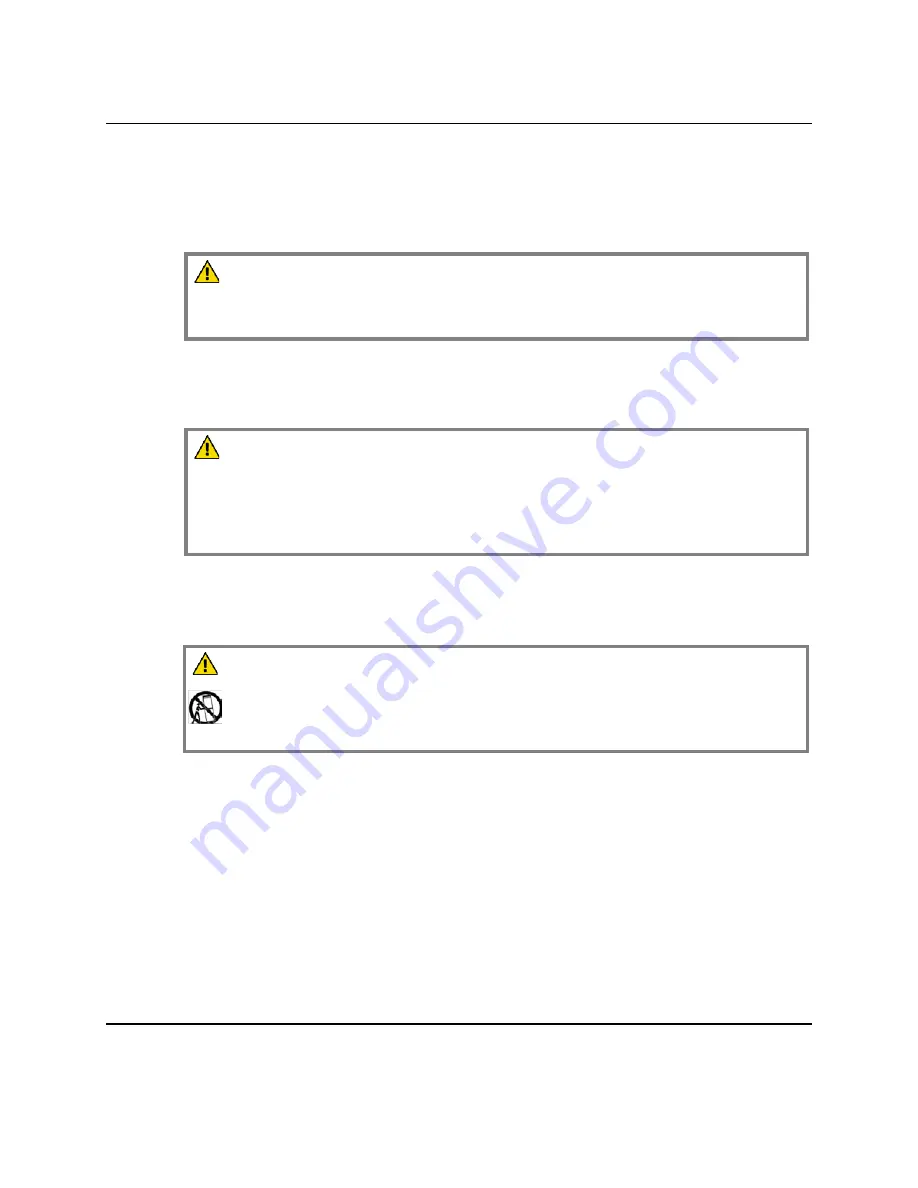
  WARNING: 

    Avoid personal injury and damage to this equipment! Move any equipment 

and cart combination with care. Quick stops, excessive force, and uneven                

surfaces may cause this equipment and cart to overturn. 


Use caution when moving this equipment/cart combination to avoid injury from 

tip-over.   


If the cart does not move easily, this condition may indicate obstructions or cables 

that may need to be disconnected before moving this equipment to another 

location.   


Avoid quick stops and starts when moving the cart.   


Check for uneven floor surfaces such as cracks or cables and cords.   

Grounding 

This section provides instructions for verifying that the equipment is properly 

grounded. 
 

Continued on next page 

OL-29669-01                                      Safety                                              ix 

Содержание OptoStar II

Страница 1: ...Cisco OptoStar II RF Switch Module RF Switch Installation and Operation Guide ...

Страница 2: ...find this symbol affixed to the product This symbol indicates a protective ground terminal You may find this symbol affixed to the product This symbol indicates a chassis terminal normally used for equipotential bonding You may find this symbol affixed to the product This symbol warns of a potentially hot surface You may find this symbol affixed to the product and in this document This symbol indi...

Страница 3: ... publication at any time without notice This document is not to be construed as conferring by implication estoppel or otherwise any license or right under any copyright or patent whether or not the use of any information in this document employs an invention claimed in any existing or later issued patent Copyright 2013 Cisco Systems Inc All rights reserved Published in China Information in this pu...

Страница 4: ... 5 Panel Functions 1 6 Chapter 2 Installation and Configuration Before You begin 2 2 Tools 2 2 Unpacking and Inspecting the Module 2 2 Installing the Chassis 2 3 Chassis Location in Rack 2 3 Operating Temperature 2 3 Verify Rack Dimensions 2 3 Installing Removing the Modules 2 4 To Install the Module 2 4 To Remove the Module 2 5 Connectors 2 6 RF cable Connections 2 6 OL 29669 01 Contents iii ...

Страница 5: ...nnel Control 3 10 Sub Menu 4 Alarm ON OFF 3 11 Sub Menu 5 Alarm List 3 12 Alarm Code List 3 13 Operating using Console Software 3 14 Before You Begin 3 14 System Requirements 3 14 Start 3 14 Software Main Interface 3 16 Local Module View 3 17 View Basic Parameters 3 18 Setup Parameters 3 20 Operating using NMS Software 3 21 Before You Begin 3 21 System Requirements 3 21 Start 3 21 Software Main In...

Страница 6: ...rmation 4 3 Equipment Needed 4 3 Additional Assistance 4 3 Troubleshooting 4 4 Chapter 5 Customer Support Information Obtaining Product Support 5 2 Support Telephone Numbers 5 2 Return for repairing 5 4 Introduction 5 4 Obtain the RMA number and mailing address 5 4 Packaging and Mailing 5 5 OL 29669 01 Contents v ...

Страница 7: ...restricted areas User and Operator The terms user and operator apply to persons other than service personnel Ground ing and Earth ing The terms ground ing and earth ing are synonymous This document uses ground ing for clarity but it can be interpreted as having the same meaning as earth ing Electric Shock Hazard This equipment meets applicable safety standards Refer to this equipment s data sheet ...

Страница 8: ...g The protective ground lead of the building s electrical installation should comply with national and local requirements Environment Condition The installation site should be dry clean and ventilated Do not use this equipment where it could be at risk of contact with water Ensure that this equipment is operated in an environment that meets the requirements as stated in this equipment s technical ...

Страница 9: ...sold with this equipment Make sure the mounting surface or rack is stable and can support the size and weight of this equipment The mounting surface or rack should be appropriately anchored according to manufacturer s specifications Ensure this equipment is securely fastened to the mounting surface or rack where necessary to protect against damage due to any disturbance and subsequent fall Ventila...

Страница 10: ...ack environment may be greater than room ambient temperature Therefore install this equipment in an environment compatible with the manufacturer s maximum rated ambient temperature Handling Precautions When moving a cart that contains this equipment check for any of the following possible hazards WARNING Avoid personal injury and damage to this equipment Move any equipment and cart combination wit...

Страница 11: ...an 18 gauge wire or larger to the grounding terminal then attach the other end of the wire to a ground such as a grounded equipment rack Safety Plugs European Union Class I Mains Powered Equipment Provided with a 3 terminal AC inlet and requires connection to a 3 terminal mains supply outlet via a 3 terminal power cord for proper connection to the protective ground Note The equipotential bonding t...

Страница 12: ...stallation instructions in this manual or in companion manuals in this series for information on connecting this equipment to nominal 48 V DC 60 V DC power sources Circuit Overload Know the effects of circuit overloading before connecting this equipment to the power supply CAUTION Consider the connection of this equipment to the supply circuit and the effect that overloading of circuits might have...

Страница 13: ...alified service personnel only Moisture Do not allow moisture to enter this equipment Cleaning Use a damp cloth for cleaning Safety Checks After service assemble this equipment and perform safety checks to ensure it is safe to use before putting it back into operation Electrostatic Discharge Electrostatic discharge ESD results from the static electricity buildup on the human body and other objects...

Страница 14: ...ct might be necessary For more information about perchlorate and best management practices for perchlorate containing substance see www dtsc ca gov hazardouswaste perchlorate Modifications This equipment has been designed and tested to comply with applicable safety laser safety and EMC regulations codes and standards to ensure safe operation in its intended environment Refer to this equipment s da...

Страница 15: ...nual Otherwise comply with the following good practices Multi conductor cables should be of single braided shielded type and have conductive connector bodies and backshells with cable clamps that are conductively bonded to the backshell and capable of making 360 connection to the cable shielding Exceptions from this general rule will be clearly stated in the connector description for the excepted ...

Страница 16: ... working with similar equipment The service personnel should have appropriate background and knowledge to complete the procedures described in this document Qualified Personnel CAUTION Allow only qualified and skilled personnel to install operate maintain and service this product Otherwise personal injury or equipment damage may occur Only appropriately qualified and skilled personnel should attem...

Страница 17: ...Overview Continued In This Chapter Topic Page Introduction 1 3 Structure 1 4 1 2 Introduction OL 29669 01 ...

Страница 18: ... improve network reliability Features 5 1003 MHz RF bandwidth providing sufficient bandwidth for new services Support automatic and manual RF port switching RF output level correction function Power down connection function LED on the front panel indicates the working status of the module with RF output test point Intelligent Communications Interface Module ICIM provides various configuration and ...

Страница 19: ...following table lists the parts of the OptoStar II RF switch module Part Function Module Housing Includes side panels front panel and rear panel Front Panel Includes RF test point LEDs and mounting screw Rear Panel Includes a 30 pin connector and RF input output Continued on next page 1 4 Introduction OL 29669 01 ...

Страница 20: ...Structure Continued Panel Illustration The following illustration shows the panels of the OptoStar II RF switch module Continued on next page OL 29669 01 Introduction 1 5 ...

Страница 21: ...e OptoStar II RF switch module front panel Description Function RF Test Point RF input test point with G type male 1 2 24 UNEF thread Mounting Screw Mounts the module in the chassis The following table lists the functions of the OptoStar II RF switch module rear panel Description Function 30 pin Connector Power and communication connecter of the module and provides module ID information RF Input P...

Страница 22: ...d Personnel Only appropriately qualified and skilled personnel should attempt to install operate maintain and service this product Otherwise personal injury or equipment damage may occur In This Chapter Topic Page Before You Begin 2 2 Installing the Chassis 2 3 Installing Removing the Modules 2 4 Connections 2 6 OL 29669 01 Installation 2 1 ...

Страница 23: ...emove the module Note Items in the packaging box include One OptoStar II RF switch module One factory test report One Mounting Instruction 3 Inspect the appearance of the module for any shipping damage In case of damage document it and inform the shipping company and our customer support See Customer Support Information on page 5 1 for details 4 Keep the shipping boxes and their inserts for any fu...

Страница 24: ...t panel of the chassis Operating Temperature Make sure the unit is operated in a temperature and humidity controlled environment See the temperature specifications in the datasheet Note The maximum operating ambient temperature is 50 C 122 F Long term reliability is best obtained with consistently cool environments Never place a unit near a heat source Do not install a unit in areas of high humidi...

Страница 25: ...3 Hold module vertically with module front towards you 4 Align the rib on lower side of the module with a guide slot in the chassis and align top rib with matching guide slot in the top of the chassis 5 Slide module in smoothly until you feel slight resistance then continue to push gently until the module connector seats completely Note Check alignment if you feel significant resistance Do not pre...

Страница 26: ...wer front panel of the module by hand or screwdriver to release the module from the chassis 3 Pull the module slightly to unseat the connector 4 Hold the module and gently remove it from the chassis Note Do not use the mounting screws as a handle when removing the module Follow the steps as shown in the following illustration OL 29669 01 Installation 2 5 ...

Страница 27: ...ed that the chassis and modules are installed prior to powering up the chassis Use a cable with F type male RF connector 3 8 32 UNEF thread to connect the RF input port A RF output port B and RF output port on the rear panel of the module See the illustration below for RF cable connections 2 6 Installation OL 29669 01 ...

Страница 28: ...nfigure on PC Using the OptoStar II network management system to configure on PC Qualified Personnel Only appropriately qualified and skilled personnel should attempt to install operate maintain and service this product Otherwise personal injury or equipment damage may occur In This Chapter Topic Page Starting up the Module 3 2 Operating using ICIM LCD 3 3 Operating using Console Software 3 14 Ope...

Страница 29: ...communication status is shut off 4 Once the initialization is completed the status indicator will return to normal Communication is enabled and the module is operational CAUTION The module must be initialized any equipment that cannot be initialized must be returned to the manufacturer for repair When everything becomes stable the module still needs to warm up for at least one hour to make sure th...

Страница 30: ...e front panel switch of the OptoStar II power supply module to ON position The power supply module and the RF switch module will initialize for about 5 seconds and the ICIM will load for about 25 seconds Note The system will achieve optimal working condition after one hour s warm up The LCD now displays ICIM loading screen as shown below 3 When the device initialization is complete remove the ICIM...

Страница 31: ...nction Button Function In menu view mode selection and function switch screens Moves the cursor up In reading configuration screen Increases numerical readings In menu view mode selection and function switch screens Moves the cursor down In reading configuration screen Decreases numerical readings Moves to the previous page Moves the cursor to the left Moves to the next page Moves the cursor to th...

Страница 32: ...ion all the local modules are located on the left side of the screen you can press button to move to the next page and view modules in other slots The statuses of 8 fans are located on the right side of the screen Press button to move the cursor down to RF Switch OptoStar II RF switch module and press the SET button to enter the sub menu of the RF switch Continued on next page ...

Страница 33: ...side of the screen shows the sub menus of the OptoStar II RF switch module By default the cursor is on sub menu 1 Press button to move the cursor down Press SET button to enter the item on the sub menu The right side of the screen shows basic information of the module including firmware version chassis ID S N module temperature and alarm code Continued on next page ...

Страница 34: ...isplay the result If the deviation is within the threshold default value is 3 dB it passes calibration and channel A starts to work in auto mode If the deviation is beyond the threshold the alarm will be triggered and channel A starts to work in auto mode The table below lists auto switching status under different conditions in the auto mode 1 stands for alarm 0 stands for normal Item Alarm Status...

Страница 35: ...input level value b is the digital signal single channel input level value c is the value of digital signal less than analog signal single channel input level P is the channel A RF input total power dBmV x is the analog channel number y is the digital channel number For example The analog channel number of RF input is x 78 and the digital channel number is y 75 The channel A RF input total power b...

Страница 36: ...is 3 dB In auto switching mode if the calibrated signal value is out of this range the module will alarm and perform auto switching according to different conditions refer to Page 3 7 1 Press SET button to start the configuration 2 Press buttons to change the value and press SET button to confirm alarm range 3 10 dB 1dB step 3 Press button to move the cursor to Set 4 Press SET button to save the c...

Страница 37: ...o keep the symbol on Auto option 2 Press button to move the cursor to Set 3 Press SET button to save the configuration To select manual switching mode 1 Press button to keep the symbol on Manual option 2 Press button to move the cursor to Set 3 Press SET button to start the configuration To switch between channel A and B manually Manual must be selected in the Mode Selection screen otherwise chann...

Страница 38: ...The illustration below shows sub menu 4 of the OptoStar II RF switch module Alarm ON OFF To change the alarm ON OFF 1 Press buttons to select alarm ON or OFF The cursor always stays on Set on the right side of the screen 2 Press SET button to save the configuration Continued on next page ...

Страница 39: ...II RF switch module Alarm List You can view the alarm information of the OptoStar II RF switch module If there is no alarm the Alarm List shows None If there is any alarm the Alarm List shows the alarm information and its code as shown in the illustration below See Alarm Code List on page 3 13 for detailed alarm codes Continued on next page ...

Страница 40: ... preset threshold Alarm LED is red 002 High RF Input Level in Channel A Channel A input level calibrated signal level preset threshold Alarm LED is red 003 Low RF Input Level in Channel B Channel B input level calibrated signal level preset threshold Alarm LED is red 004 High RF Input Level in Channel B Channel B input level calibrated signal level preset threshold Alarm LED is red 011 High Module...

Страница 41: ...ent 1 GHz Pentium or equivalent processor recommended Memory 96 MB minimum requirement 256 MB recommended Hard drive 500 MB free space required Monitor 800 x 600 256 color minimum requirement 1024 x 768 high color 32 bit recommended Start 1 Make sure that the RF cables of the OptoStar II RF switch module have been connected 2 Turn the front panel switch of the OptoStar II power supply module to ON...

Страница 42: ...el The other side of the USB cable should be connected to the USB interface on the PC Now the LCD screen shows USB connected and the keypads below the LCD screen are temporarily unavailable The illustration below shows the connection method 4 Install and start the OptoStar II console software See Cisco OptoStar II Console Installation and Operation Guide P N OL 29664 for detailed installation proc...

Страница 43: ... Main Interface The illustration below shows the main interface of the OptoStar II console The OptoStar II console main interface shows the software name menus menu shortcuts local module tree view system information chassis fan status and local module view Continued on next page ...

Страница 44: ...odule View Click to select the OptoStar II RF switch module in the Local Module Tree View on the left side of the screen or in the Local Module View on the bottom of the screen The parameter setting window of the RF switch module will pop up as shown below Continued on next page ...

Страница 45: ...Operation OL 29669 01 Operating using Console Software Continued View Basic Parameters The illustration below shows the parameter setting interface of the OptoStar II RF switch module Continued on next page ...

Страница 46: ...Name and Firmware Version Shows the module name and its firmware version Module Temperature Shows the current module temperature C S N Shows module serial number Rack ID Shows the ID of the rack where the chassis is placed Slot ID Shows the ID of the slot where the module is placed Alarm Code Shows the current module alarm code See Alarm Code List on page 3 13 Continued on next page ...

Страница 47: ...y Default Channel A B Level Value Shows channel A B level value and calibrates dB Channel A is calibration value for reference Threshold Settings Sets alarm threshold 3dB Automatic and Manual Switch Mode Selection Shows sets automatic and manual switch mode Automatic Switch Mode Channel A B Selection Shows sets channel A B Channel A B Alarm ON OFF Shows sets module alarm status ON OFF Alarm status...

Страница 48: ...minimum requirement 1 GHz Pentium or equivalent processor recommended Memory 512 MB minimum requirement 1 GB recommended Hard drive 500 MB free space required Monitor 800 x 600 256 color minimum requirement 1024 x 768 high color 32 bit recommended Start 1 Make sure that the RF cables of the OptoStar II RF switch module have been connected 2 Turn the front panel switch of the OptoStar II power supp...

Страница 49: ... Ethernet with the RJ 45 connector on the rear panel of the ICIM Connect the PC to the Ethernet The illustration below shows the connection method 4 Install and start the OptoStar II NMS software See Cisco OptoStar II NMS Installation and Operation Guide P N OL 29665 for detailed installation procedures Continued on next page ...

Страница 50: ...ng NMS Software Continued Software Main Interface The illustration below shows the main interface of the OptoStar II NMS The OptoStar II NMS main interface shows the software name menus node tree view and welcome screen Continued on next page ...

Страница 51: ...OL 29669 01 Operating using NMS Software Continued Local Module View Select the topology tree view and view the corresponding node The interface shows all the local modules as illustrated below Continued on next page ...

Страница 52: ... Continued View Basic Parameters Click to select the OptoStar II RF switch module in the interface which shows all the local modules The parameter setting interface of the OptoStar II RF switch module will display as illustrated below Continued on next page ...

Страница 53: ...dule Firmware Version Shows module firmware version Module Temperature Shows the current module temperature C RF Input Information RF Input Status in Channel A B Shows channel A B RF input status Setup Parameters The table below lists the setup parameters settings of the OptoStar II RF switch module Setup Parameters Description Factory Default RF Input Information Switch Mode Selection Shows sets ...

Страница 54: ...witch module Qualified Personnel Only appropriately qualified and skilled personnel should attempt to install operate maintain and service this product Otherwise personal injury or equipment damage may occur In This Chapter Topic Page Maintenance 4 2 General Troubleshooting Information 4 3 OL 29669 01 Troubleshooting 4 1 ...

Страница 55: ...ion Make sure all retaining screws are tight Ensure good ventilation Record data When Needed Carefully clean the module with a soft cloth Maintenance Record It may be helpful to establish a maintenance record or log for this module You may want to record RF input signal RF output signal and module temperature Significant variations in any of the parameters above should be investigated to prevent f...

Страница 56: ...es Equipment Needed You may need the following equipment to troubleshoot the module DB meter or spectrum analyzer Additional Assistance If you need additional assistance please contact our customer support team or your local service center See Customer Support Information on page 5 1 for more details Continued on next page OL 29669 01 Troubleshooting 4 3 ...

Страница 57: ...t dissipation Poor chassis ventilation Chassis fan failure Ensure good ventilation Put the chassis in a place with good ventilation In case of fan failure repair or replace the fan or contact the manufacturer for servicing Low or High RF Input Level in Channel A B RF source failure RF cable or connector failure Make sure the RF connector matches Make sure the cable works properly Inspect if the RF...

Страница 58: ... Support Information Overview This chapter contains information on obtaining product support In This Chapter Topic Page Obtaining Product Support 5 2 Return for Repairing 5 4 OL 29669 01 Customer Support Information 5 1 ...

Страница 59: ...mer Service numbers for your area Region Centers Telephone and Fax Numbers North America Atlanta Georgia United States For Technical Support call Toll free 1 800 722 2009 Local 678 277 1120 Press 2 at the prompt For Customer Service call Toll free 1 800 722 2009 Local 678 277 1120 Press 3 at the prompt Fax 770 236 5477 E mail customer service cisco com Europe Middle East Africa Belgium For Technic...

Страница 60: ...rt apr sciatl com Brazil Brazil Telephone 11 55 08 9999 Fax 11 55 08 9998 E mail fattinl cisco com or ecavalhe cisco com Mexico Central America Caribbean Mexico For Technical Support call Telephone 52 3515152599 Fax 52 3515152599 For Customer Service call Telephone 52 55 50 81 8425 Fax 52 55 52 61 0893 All other Latin America countries Argentina For Technical Support call Telephone 54 23 20 403340...

Страница 61: ...ers for your area in Obtaining Product Support on Page 5 2 2 Provide the following information to your customer service representative Company name contact person telephone number e mail address and fax number Product name model part number SN if any Number of returned products Return reason and Repairing Maintenance Permissions Any related service detail 3 When your customer service representativ...

Страница 62: ...ith damage caused during transportation and due to improper packaging will be refused and returned to the user In such case the costs will be borne by the user Note Do not return any power cable accessory cable or other accessories Your customer service representative will provide specific instructions on how to order and replace any power cable accessory cable or other accessories Please fill in ...

Страница 63: ...when shipping repaired product to the user International Transportation Fill in Cisco as International Transport Recipient and state the notified party on the waybill as international freight transport clearance contact Upon delivery of the equipment with complete RMA number the receiving department will notify the user via fax or e mail and confirm the received products and the quantity Please ca...

Страница 64: ...27 0883 This document includes various trademarks of Cisco Systems Inc Please see the Notices section of this document for a list of the Cisco Systems Inc trademarks used in this document Product and service availability are subject to change without notice 2013 Cisco and or its affiliates All rights reserved September 2013 Part Number OL 29669 01 ...

Отзывы: