background image

Security Features

The GR62 features multiple options for physically securing the access point after installation:

1. Security screw – The accessory kit includes screws that can be used to secure the access point to the mount

cradle. Engaging the security screw prevents accidental dislodging and theft.

Ethernet Ports

The GR62 features a Gigabit Ethernet RJ45 port that accepts 802.3at and 802.3af power (labeled “Eth0, PoE”). This port should be used for uplink to your WAN
connection.

Power Source Options

The GR62 access point can be powered using either the Meraki AC Adapter, PoE Injector (both sold separately), or a third-party PoE switch.

Factory Reset Button

If the button is pressed and held for at least five seconds and then released, the GR62 will reboot and be restored to its original factory settings by deleting all
configuration information stored on the unit.

LED Indicators and Run Dark Mode

Your GR62 is equipped with a multi-color LED light on the front of the unit to convey information about system functionality and performance:

• Orange - AP is booting (permanent Orange suggests hardware issue)

• Rainbow - AP is initializing/scanning

• Blinking Blue - AP is upgrading

• Green - AP in Gateway mode with no clients

• Blue - AP in Gateway mode with clients

• Blinking Orange - AP can't find uplink

The GR62 may be operated in “Run Dark” mode for additional security and to reduce the visibility of the access point. In this mode, the LED will not be
illuminated. This mode may be enabled through Meraki dashboard.

Pre-Install Preparation

You should complete the following steps before going on-site to perform an installation.

Setup your Meraki Go Account

The following is a brief overview only of the steps required to add an GR62 to your network. For detailed instructions about creating, configuring and managing
Meraki Go wireless networks, refer to the online documentation (

https://documentation.meraki.com/Go

).

1. Login to

https://account.meraki-go.com/go

. If this is your first time, create a new account.

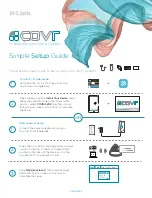
2. Once your account is created, be sure to install the Meraki Go app on your mobile device.

3. Follow the in-app instructions to scan and add your new hardware to the Meraki Go account.

4

Содержание Meraki Go GR62

Страница 1: ...62 Installation Guide The Cisco Meraki GR62 is a dual band enterprise class 802 11ax cloud managed access point Package Contents The GR62 package contains the following GR62 Cloud Managed Access Point Mount plate 1 ...

Страница 2: ... Mount Kit Wall screws wall screw anchors and security screws Understanding the GR62 Your Meraki GR62 has the following features 2 ...

Страница 3: ...3 ...

Страница 4: ... information about system functionality and performance Orange AP is booting permanent Orange suggests hardware issue Rainbow AP is initializing scanning Blinking Blue AP is upgrading Green AP in Gateway mode with no clients Blue AP in Gateway mode with clients Blinking Orange AP can t find uplink The GR62 may be operated in Run Dark mode for additional security and to reduce the visibility of the...

Страница 5: ...tures of the wireless network such as 802 1X authentication may rely on the property that the APs have static IP addresses Static Assignment Static IPs are assigned using the local web server on each AP The following procedure describes how to set the static IP 1 Using a client machine e g a laptop connect to the AP wirelessly by associating to any SSID broadcast by the AP or over a wired connecti...

Страница 6: ...e DHCP reservations Collect Tools You will need the following tools to perform an installation Collect Additional Hardware for Installation You will need the following hardware to perform an installation Installation Instructions 6 ...

Страница 7: ... other Meraki devices A Cisco Partner can help ensure that your AP placement is ideal Mount the GR62 Attach the GR62 to the Mount Cradle The GR62 attaches to the mount cradle with two tabs on the cradle that insert into the GR62 and is secured to the cradle using one screw To attach the GR62 to the mount cradle properly line up the top edge of the AP with the top tab of the mount cradle Since the ...

Страница 8: ...8 ...

Страница 9: ...9 ...

Страница 10: ...10 ...

Страница 11: ...11 ...

Страница 12: ...12 ...

Страница 13: ...13 ...

Страница 14: ...b Desk or Shelf Mount The GR62 can be placed on a desk or shelf resting on the non scratch rubber feet The mount cradle is not necessary for a desk or shelf installation Secure the GR62 Depending on your mounting environment you may want to secure the GR62 to its mount location Your GR62 can be secured in several ways If the GR62 has been installed using the mount cradle it should be secured via s...

Страница 15: ...r indoor use only and the PoE device is considered unlikely to connect to an Ethernet network with outside plant routing including campus environments FCC Compliance Statement This device complies with part 15 of the FCC rules Operation is subject to the following two conditions 1 This device may not cause harmful interference and 2 this device must accept any interference received including inter...

Страница 16: ... fonctionnement indésirable Industry Canada Caution i the device for operation in the band 5150 5250 MHz is only for indoor use to reduce the potential for harmful interference to co channel mobile satellite systems ii high power radars are allocated as primary users i e priority users of the bands 5250 5350 MHz and 5650 5850 MHz and that these radars could cause interference and or damage to LE L...

Страница 17: ...電磁波曝露量MPE標準值1mW cm2 本產品使用時建議應距離人體 20 cm 1 使用此產品時應避免影響附近雷達系統之操作 2 高增益指向性天線只得應用於固定式點對點系統 17 ...

Отзывы: