


11
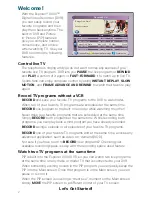
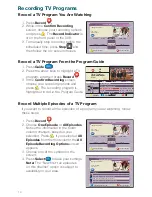
Watching Your Recordings
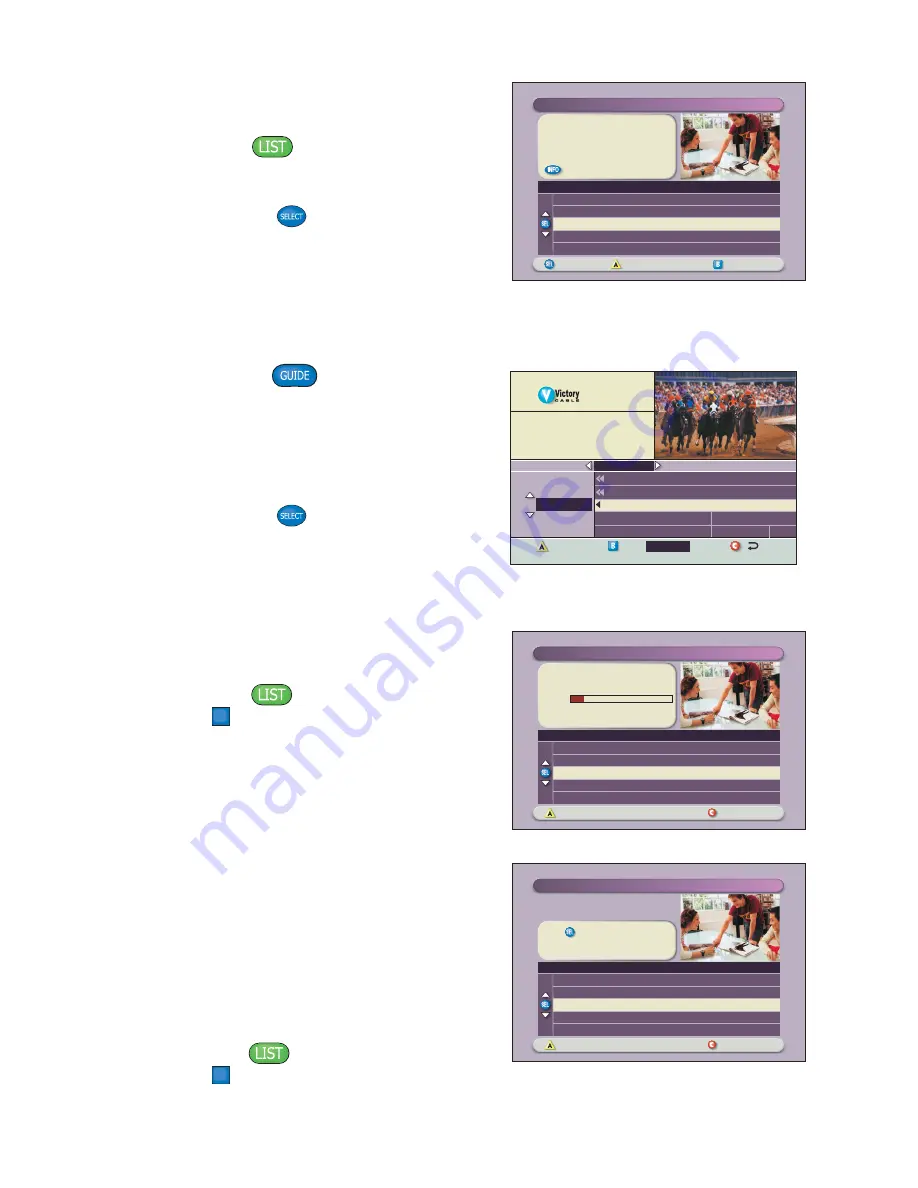
Access and Play Back Your
Recorded Programs Anytime
1. Press
List
.
2. Use the arrow keys to choose the
program you want to play back.
3. Press
Select
to display your
options.
"Design On A Dime"
Save: Until erased
Title
Options/Play
Scheduled Recordings
Preferences
Date
Time
Recorded List
Length
World Soccer
Extreme Homes
Design On A Dime
Home Matters
Thirteen Days
Wed 11/10
Wed 11/10
Mon 11/15
Sun 11/14
Mon 11/8
4:10am
8:10pm
12:00pm
12:30pm
8:00pm
30min
50min
30min
30min
1hr 30min
TUE 1/15
Recorded Programs List
Tue 3:00-9:00pm
Programs you have recorded
for later viewing.
DVR
01
Date
Browse By
PBY_A 1914
PBY_B 1915
DVR 1
WSB 2
WATL 3
World Business News
World View News
Recorded Programs List
Channel 2 Action News
Ricki Lake
Simpso
Channel 2 Action News
Steve Harvey
5:00pm
5:30pm
6:00pm
6:3
CHANNEL
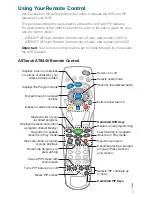
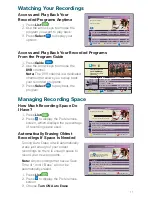
Access and Play Back Your Recorded Programs
From the Program Guide
1. Press
Guide
.
2. Use the arrow keys to choose the
DVR
channel.
Note:
The DVR channel is a dedicated
channel that allows you to play back
your recorded programs.
3. Press
Select
to play back the
program.
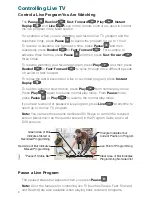
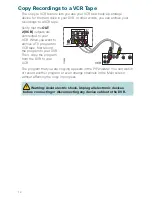
Auto Erase is OFF.
Press if you want your oldest
recordings automatically erased to
make space for new ones.
Options
Scheduled Recordings
Preferences
Schedule a new Manual Recording
Sort Recorded List by time recorded
Turn ON Auto Erase
Recording space used
Change Save Time for future recordings
Recorded List
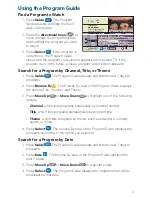
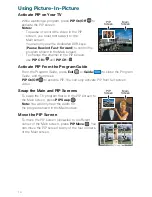
Recording Space Used:
Options
Scheduled Recordings
Preferences
Sort Recorded List by time recorded
Turn ON Auto Erase
Recording space used
Change Save Time for future recordings
Schedule a new Manual Recording
Recorded List
You currently have 10 recordings.
19%
Managing Recording Space
How Much Recording Space Do
I Have?
1. Press
List
.
2. Press
B
to display the Preferences
screen, which displays the percentage
of recording space used.
Automatically Erasing Oldest
Recordings If Space Is Needed
Turning Auto Erase on will automatically
erase just enough of your oldest
recordings so there is enough space to
record your new programs.
Note:
Any recordings that have a Save
Time of “Until I Erase” will not be
automatically erased.
1. Press
List
.
2. Press
B
to display the Preferences
screen.
3. Choose
Turn ON Auto Erase
.


