4.
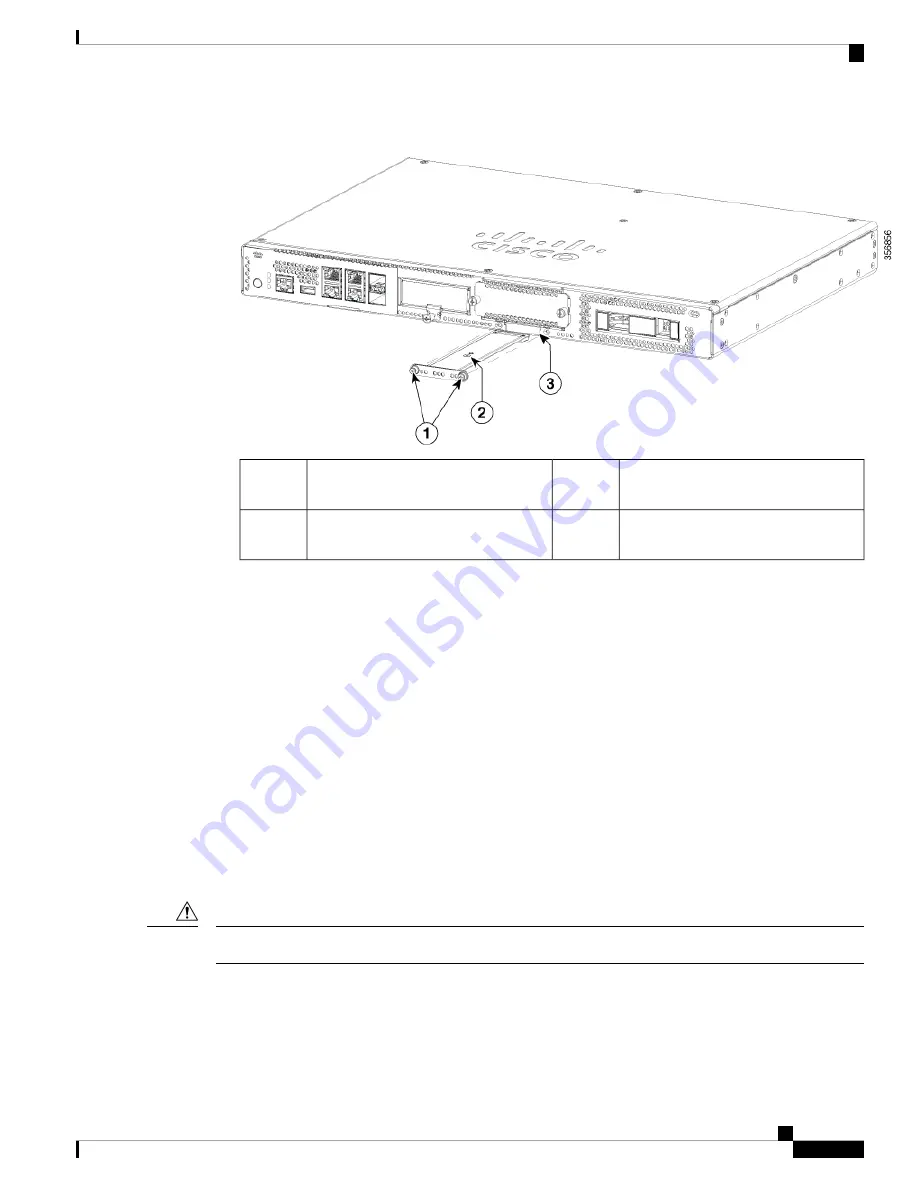
Plug in the new M.2 storage module in the same location and secure it with the screws.
M.2 module orientation with metal
carrier on top, M.2 module underneath.
2
Securing screws (torque 3.9-5.4 in-lbs)
1
Chassis cutout prevents M.2 installation
in wrong orientation.
3
Installing and Removing a NIM
These are the steps to install a NIM:
1.
Locate the NIM slot on the front panel.
2.
Loosen the screws to remove NIM blank cover.
3.
Insert the NIM into the slot.
4.
Tighten the screws to secure the NIM in the slot.
These are the steps to remove a NIM:
1.
If the NIM is up and running, issue the following command to shut down the NIM gracefully before
removing it:
hw-module subslot slot 0/2 stop
If you do not shut down the NIM gracefully before removing it, the NIM card could get damaged.
Caution
2.
Locate the NIM slot on the front panel.
3.
Loosen the screws that secure the NIM.
4.
Gently pull out the NIM from the slot.
Installing and Upgrading Field Replaceable Units
7
Installing and Upgrading Field Replaceable Units
Installing and Removing a NIM


