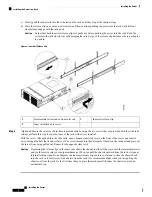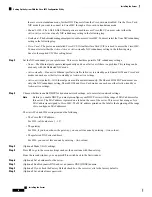
the server is in standalone mode, further DHCP requests from the Cisco card are disabled. Use the Cisco Card
NIC mode if you want to connect to Cisco IMC through a Cisco card in standalone mode.
•
Shared LOM
—The 1-Gb/10-Gb Ethernet ports are used to access Cisco IMC. You must select either the
Active-Active
or
Active-standby
NIC redundancy setting in the following step.
•
Dedicated
—The dedicated management port is used to access Cisco IMC. You must select the
None
NIC redundancy
setting in the following step.
•
Cisco Card
—The ports on an installed Cisco UCS Virtual Interface Card (VIC) are used to access the Cisco IMC.
You must select either the
Active-Active
or
Active-standby
NIC redundancy setting in the following step.
See also the required VIC Slot setting below.
Step 2
Set the NIC redundancy to your preference. This server has three possible NIC redundancy settings:
•
None
—The Ethernet ports operate independently and do not fail over if there is a problem. This setting can be
used only with the Dedicated NIC mode.
•
Active-standby
—If an active Ethernet port fails, traffic fails over to a standby port. Shared LOM and Cisco Card
modes can each use either Active-standby or Active-active settings.
•
Active-active
(default)—All Ethernet ports are utilized simultaneously. The Shared LOM EXT mode must use
only this NIC redundancy setting. Shared LOM and Cisco Card modes can each use either Active-standby or
Active-active settings.
Step 3
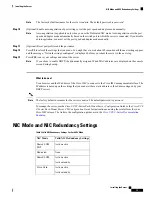
Choose whether to enable DHCP for dynamic network settings, or to enter static network settings.
Before you enable DHCP, you must preconfigure your DHCP server with the range of MAC addresses for
this server. The MAC address is printed on a label on the rear of the server. This server has a range of six
MAC addresses assigned to Cisco IMC. The MAC address printed on the label is the beginning of the range
of six contiguous MAC addresses.
Note
The
static
IPv4 and IPv6 settings include the following:
• The Cisco IMC IP address.
For IPv6, valid values are 1 - 127.
• The gateway.
For IPv6, if you do not know the gateway, you can set it as none by entering :: (two colons).
• The preferred DNS server address.
For IPv6, you can set this as none by entering :: (two colons).
Step 4
(Optional) Make VLAN settings.
Step 5
Press
F1
to go to the second settings window, then continue with the next step.
From the second window, you can press
F2
to switch back to the first window.
Step 6
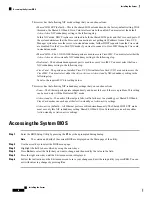
(Optional) Set a hostname for the server.
Step 7
(Optional) Enable dynamic DNS and set a dynamic DNS (DDNS) domain.
Step 8
(Optional) If you check the Factory Default check box, the server reverts to the factory defaults.
Step 9
(Optional) Set a default user password.
Installing the Server
14
Installing the Server
Setting Up the System With the Cisco IMC Configuration Utility


