background image


12

Cisco 850 Series and Cisco 870 Series Access Access Routers Hardware Installation Guide

OL-5331-01

Preface

Conventions

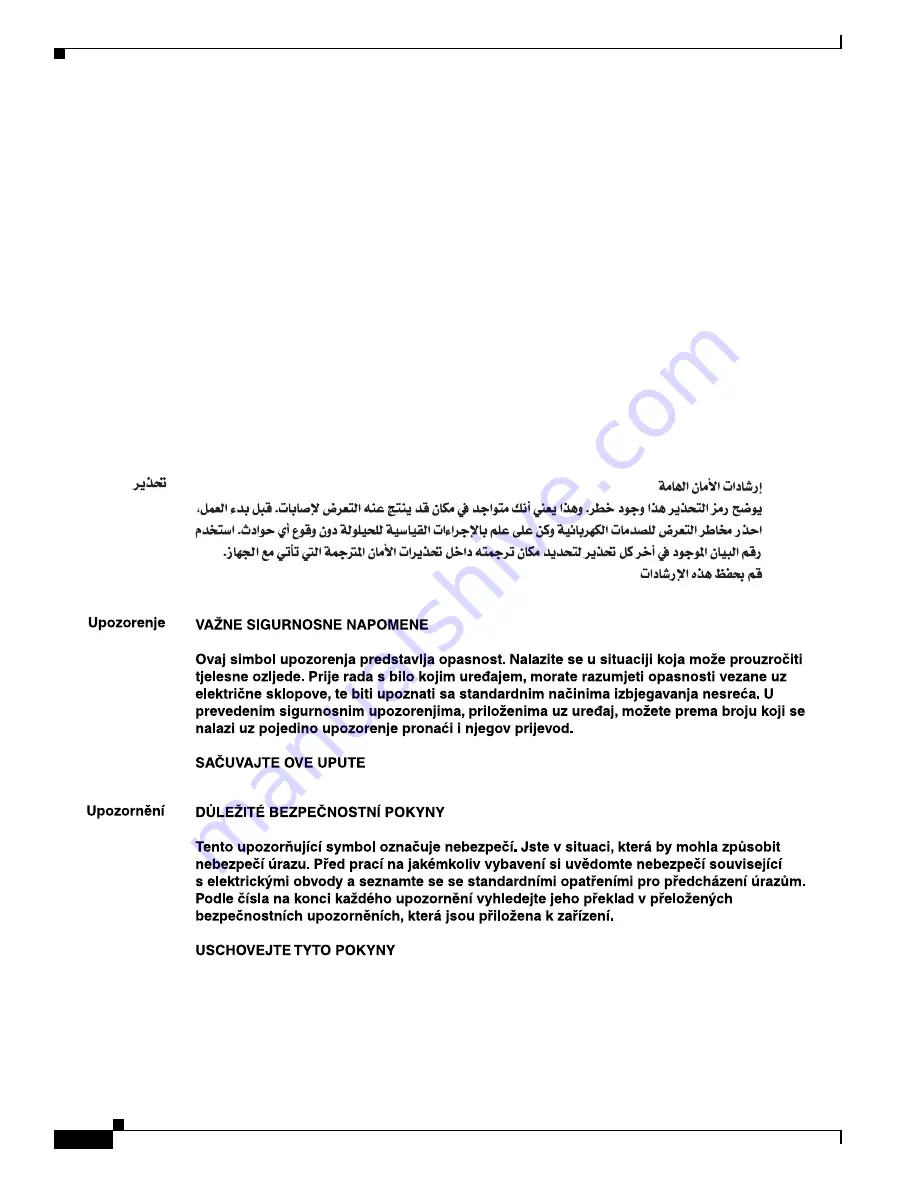
Aviso

INSTRUÇÕES IMPORTANTES DE SEGURANÇA

Este símbolo de aviso significa perigo. Você se encontra em uma situação em que há risco de lesões 
corporais. Antes de trabalhar com qualquer equipamento, esteja ciente dos riscos que envolvem os 
circuitos elétricos e familiarize-se com as práticas padrão de prevenção de acidentes. Use o 
número da declaração fornecido ao final de cada aviso para localizar sua tradução nos avisos de 
segurança traduzidos que acompanham o dispositivo.

GUARDE ESTAS INSTRUÇÕES

Advarsel

VIGTIGE SIKKERHEDSANVISNINGER

Dette advarselssymbol betyder fare. Du befinder dig i en situation med risiko for 
legemesbeskadigelse. Før du begynder arbejde på udstyr, skal du være opmærksom på de 
involverede risici, der er ved elektriske kredsløb, og du skal sætte dig ind i standardprocedurer til 
undgåelse af ulykker. Brug erklæringsnummeret efter hver advarsel for at finde oversættelsen i de 
oversatte advarsler, der fulgte med denne enhed.

GEM DISSE ANVISNINGER

Содержание 850 Series

Страница 1: ...ms Inc 170 West Tasman Drive San Jose CA 95134 1706 USA http www cisco com Tel 408 526 4000 800 553 NETS 6387 Fax 408 526 4100 Cisco 850 Series and Cisco 870 Series Access Routers Hardware Installation Guide Text Part Number OL 5331 01 ...

Страница 2: ...n the television or radio antenna until the interference stops Move the equipment to one side or the other of the television or radio Move the equipment farther away from the television or radio Plug the equipment into an outlet that is on a different circuit from the television or radio That is make certain the equipment and the television or radio are on circuits controlled by different circuit ...

Страница 3: ...DSL over POTS Routers 1 3 Router Ports on the Cisco 857 and Cisco 877 Back Panel 1 5 Cisco 876 ADSL over ISDN Router 1 5 Router Ports on the Cisco 876 Back Panel 1 6 Cisco 878 SHDSL Router 1 6 Router Ports on the Cisco 878 Back Panel 1 7 Feature Summary 1 7 Hardware Features 1 9 Serial Number Location 1 9 LED Indicators on the Routers 1 9 Integrated 802 11b g Radio Module Wireless Models Only 1 11...

Страница 4: ... 6 C H A P T E R 4 Router Cabling Procedures 4 1 Cabling for Nonwireless Routers 4 2 Typical Installations 4 2 Connecting the Radio Antennas to the Wireless Router 4 6 Connecting the Power over Ethernet Module Optional 4 7 Connecting a Server PC or Workstation 4 8 Connecting an External Ethernet Switch Optional 4 9 Connecting a Broadband Modem 4 11 Connecting a Terminal or PC to the Console Port 4...

Страница 5: ...ration 5 5 What to Do Next 5 5 C H A P T E R 6 Troubleshooting 6 1 Before You Call Your Cisco Reseller 6 1 Problems During First Startup 6 2 Problems After the Router Is Running 6 3 A P P E N D I X A Specifications A 1 Router Specifications A 1 Power over Ethernet Module Specifications A 2 LAN Port Pinouts A 3 Console Connector Pinouts A 4 ADSL Port Connector Pinouts A 4 Power Output Connector Pin...

Страница 6: ...Contents 6 Cisco 850 Series and Cisco 870 Series Access Routers Hardware Installation Guide OL 5331 01 ...

Страница 7: ...e This guide explains how to install maintain and troubleshoot your router hardware This guide describes the wireless and nonwireless Cisco 850 series and Cisco 870 series router models Some information may not apply to your particular router model For warranty service and support information see the Cisco One Year Limited Hardware Warranty Terms section in the Cisco 850 Series and Cisco 870 Serie...

Страница 8: ...ation Information Provides preinstallation information including safety warnings and guidelines and information about the items shipped with your router Chapter 3 Router and PoE Module Mounting Procedures Describes how to mount the router before connecting devices to the router Chapter 4 Router Cabling Procedures Provides information about connecting the router to various devices mounting the rout...

Страница 9: ...kuin käsittelet laitteistoa huomioi sähköpiirien käsittelemiseen liittyvät riskit ja tutustu onnettomuuksien yleisiin ehkäisytapoihin Turvallisuusvaroitusten käännökset löytyvät laitteen mukana toimitettujen käännettyjen turvallisuusvaroitusten joukosta varoitusten lopussa näkyvien lausuntonumeroiden avulla SÄILYTÄ NÄMÄ OHJEET Attention IMPORTANTES INFORMATIONS DE SÉCURITÉ Ce symbole d avertisseme...

Страница 10: ... Você está em uma situação que poderá ser causadora de lesões corporais Antes de iniciar a utilização de qualquer equipamento tenha conhecimento dos perigos envolvidos no manuseio de circuitos elétricos e familiarize se com as práticas habituais de prevenção de acidentes Utilize o número da instrução fornecido ao final de cada aviso para localizar sua tradução nos avisos de segurança traduzidos qu...

Страница 11: ...11 Cisco 850 Series and Cisco 870 Series Access Access Routers Hardware Installation Guide OL 5331 01 Preface Conventions ...

Страница 12: ...Use o número da declaração fornecido ao final de cada aviso para localizar sua tradução nos avisos de segurança traduzidos que acompanham o dispositivo GUARDE ESTAS INSTRUÇÕES Advarsel VIGTIGE SIKKERHEDSANVISNINGER Dette advarselssymbol betyder fare Du befinder dig i en situation med risiko for legemesbeskadigelse Før du begynder arbejde på udstyr skal du være opmærksom på de involverede risici de...

Страница 13: ...13 Cisco 850 Series and Cisco 870 Series Access Access Routers Hardware Installation Guide OL 5331 01 Preface Conventions ...

Страница 14: ...2 11b g Radios Upgrading Memory in Cisco 800 Routers The latest version of the Cisco IOS Release Notes You might also need to refer to the following documents Cisco Router and Security Device Manager SDM Quick Start Guide Cisco IOS Release 12 3 Quality of Service Solutions Configuration Guide Cisco IOS Security Configuration Guide Release 12 3 Obtaining Documentation and Submitting a Service Reque...

Страница 15: ...ters The Cisco 851 and Cisco 871 Ethernet to Ethernet routers can connect a corporate teleworker or a small office to an Internet service provider ISP over a broadband or Ethernet connection to a corporate LAN or to the Internet The Cisco 851 and Cisco 871 routers are switch capable routers that provide a 4 port Ethernet switch for the LAN These routers are capable of bridging and multiprotocol ro...

Страница 16: ...Router Front Panel Figure 1 2 Cisco 851 Router Back Panel Figure 1 3 Cisco 871 Router Back Panel with Antennas OK LNK PPP VPN OK DATA WLAN RXD WAN TXD CISCO 800 SERIES ETHERNET LAN 0 1 2 3 122347 122245 SN XXXNNNNXXXX LAN 4 3 2 1 Cisco 851W CONSOLE AUX RESET 5 12 VDC WAN FE4 FE0 FE1 FE2 FE3 LAN FE0 FE1 FE2 FE3 Cisco 871W CONSOLE AUX RESET 5 12 VDC LEFT RIGHT PRIMARY 1 0 WAN FE4 122241 SN XXXNNNNXX...

Страница 17: ...ded up to 500 mA Cisco 857 and Cisco 877 ADSL over POTS Routers The Cisco 857 and Cisco 877 routers are asymmetric digital subscriber line ADSL over plain old telephone service POTS routing devices The routers have an integrated 4 port Ethernet switch for the LAN and an ADSL physical interface for the WAN allowing the routers to connect a corporate telecommuter or small office to corporate LANs an...

Страница 18: ... of the Router Models Figure 1 5 Cisco 857 Router Back Panel with Antenna Installed Figure 1 6 Cisco 877 Router Back Panel with Antennas Installed ADSLoPOTS LAN FE0 FE1 FE2 FE3 Cisco 857W CONSOLE AUX RESET 5 12 VDC 122242 SN XXXNNNNXXXX ADSLoPOTS LAN FE0 FE1 FE2 FE3 Cisco 877W CONSOLE AUX RESET 5 12 VDC 127093 SN XXXNNNNXXXX LEFT RIGHT PRIMARY ...

Страница 19: ... the LAN and an ADSL physical interface for the WAN and ISDN BRI WAN connectivity This ISDN BRI interface can be used for normal WAN connections or can be configured as a backup connection for the ADSL WAN interface These features allow the routers to connect a corporate telecommuter or a small office to a central office or an Internet service provider ISP over an ADSL interface Figure 1 7 shows t...

Страница 20: ...ect a corporate telecommuter or small office to an Internet service provider ISP over multirate symmetrical high data rate digital subscriber lines G SHDSLs to a corporate LAN and to the Internet The router has an integrated 4 port Ethernet switch for the LAN a G SHDSL physical interface for the WAN and an ISDN BRI interface The ISDN BRI S T port can be used for remote management The router is cap...

Страница 21: ... ISDN S T FE0 FE1 FE2 FE3 SN XXXNNNNXXXX Table 1 1 Hardware Feature Summary Feature Description 10BASE T 100BASE T built in switch ports Provides connection to 10 100BASE T 10 100 Mbps Ethernet networks Compatible with 10 100 Mbps devices Fast Ethernet WAN port Cisco 851 and Cisco 871 routers only Provides connection to 10 100BASE T Can be connected to other network devices such as cable modem ADS...

Страница 22: ...lexer DSLAM about the impending line drop Wall mount feature Brackets for mounting the router on a wall or vertical surface USB ports Cisco 871 router only Supports USB compatible devices such as security tokens and flash memory sticks IPSec hardware accelerator The security processor implements symmetric key encryption public key encryption authentication and data compression in hardware Integrat...

Страница 23: ...hassis at the left edge see Figure 1 11 Figure 1 11 Serial Number Location LED Indicators on the Routers The router LEDs that indicate status or activity on the router are located on the front panel of the routers Table 1 2 lists and describes the LEDs 120729 78 16262 01 Rev A0 G SHDSL ISDN S T LAN FE0 FE1 FE2 FE3 Cisco 878 CONSOLE AUX RESET 5 9 VDC SN AAANNNNXXXX SN AAANNNNXXXX Table 1 2 LED Indi...

Страница 24: ...sco 878 ISDN B1 Green On when the ISDN B1 channel connects Blinks when the B1 channel receives or sends data or when data passes through ISDN channel 1 Cisco 876 Cisco 878 ISDN B2 Green On when the ISDN B2 channel connects Blinks when the B2 channel receives or sends data or when data passes through ISDN channel 2 Cisco 876 Cisco 878 PPP Green PPP over Ethernet PPPoE or PPP over ATM PPPoA client s...

Страница 25: ... SDM Quick Start Guide or the Cisco Access Router Wireless Configuration Guide for more information ETHERNET LAN 0 Green On when a device connects to the Ethernet LAN 0 port Blinks when the Ethernet LAN 0 port receives or sends data or when data passes through the port All Cisco 850 series and Cisco 870 series ETHERNET LAN 1 Green On when a device connects to the Ethernet LAN 1 port Blinks when th...

Страница 26: ...s antenna is designed for use with Cisco wireless products utilizing an RP TNC connector For more information see the Cisco 2 4 GHz Swivel Mount Dipole Antenna 23 7786 51 document AIR ANT4941 Omnidirectional 2 2 dBi Swivel mount dipole antenna operating in the 2 4 to 2 5 GHz band This antenna is designed for use with Cisco wireless products utilizing an RP TNC connector For more information see th...

Страница 27: ...e PoE module doing so may damage the hardware Figure 1 12 Power over Ethernet Module Front Panel Figure 1 13 Power over Ethernet Module Back Panel 1 Power adapter input jack 2 Cable numbers associated with the corresponding Ethernet ports on the back panel The integrated cable below the cable number label consisting of four RJ 45 connectors organized by a plastic clip is not shown in this illustra...

Страница 28: ...Installing the PoE Module 1 Cisco 870 series router 5 Router power adapter 2 Ethernet cables on the PoE module four RJ 45 connectors in series 6 PoE power plug 3 PoE module 7 Router power plug 4 PoE power adapter 122351 5 12 VDC LEFT RIGHT PRIMARY LAN FE0 FE1 FE2 FE3 Cisco 871W CONSOLE AUX RESET 1 0 WAN FE4 1 2 4 6 To LAN 3 2 1 0 PWR 3 5 7 SN XXXNNNNXXXX ...

Страница 29: ...nnecting the PoE Module to the Router 1 Cisco 870 series router 3 Four RJ 45 Ethernet plugs in series from the PoE module plug these into the Ethernet ports on the router 2 RJ 45 Ethernet ports on the router 4 PoE module 142607 5 12 VDC LEFT RIGHT PRIMARY LAN FE0 FE1 FE2 FE3 Cisco 871W CONSOLE AUX RESET 1 0 WAN FE4 1 3 SN XXXNNNNXXXX To LAN 3 2 1 0 PWR 2 4 ...

Страница 30: ... Cisco IOS software and the router configuration file The router provides two onboard StrataFlash devices one with 16 MB and the other with 4 MB of memory for a total of 20 MB of onboard flash memory Table 1 4 LED Indicators for the PoE Module LED Color and Behavior Description POE ports 0 1 2 3 None No powered device detected Solid amber Power administratively down Solid green Power provided to t...

Страница 31: ...pansion slot for a total of 28 MB of flash memory SDRAM SDRAM stores the Cisco IOS software and provides memory for data created during packet processing The router provides 128 MB of onboard SDRAM with an expansion slot that allows an additional 64 MB or 128 MB up to a maximum of 256 MB of SDRAM Router Hardware Security The Cisco 850 series and Cisco 870 series routers have a Kensington security ...

Страница 32: ...1 18 Cisco 850 Series and Cisco 870 Series Access Routers Hardware Installation Guide OL 5331 01 Chapter 1 Product Overview Regulatory Compliance ...

Страница 33: ...re installing the router and the optional Power over Ethernet PoE module read the following warnings Warning Read the installation instructions before connecting the system to the power source Statement 1004 Warning Voltages that present a shock hazard may exist on Power over Ethernet PoE circuits if interconnections are made using uninsulated exposed metal contacts conductors or terminals Avoid u...

Страница 34: ...ire use only No 26 AWG or larger telecommunication line cord Statement 1023 Warning Before working on a chassis or working near power supplies unplug the power cord on AC units disconnect the power at the circuit breaker on DC units Statement 12 Warning During this procedure wear grounding wrist straps to avoid ESD damage to the card Do not directly touch the backplane with your hand or any metal ...

Страница 35: ...odes and the safety directors of such environments Preventing Electrostatic Discharge Damage Electrostatic discharge ESD is a transfer of electrostatic charge between bodies of different electrostatic potentials such as an operator and a piece of electrical equipment It occurs when electronic components are improperly handled and it can damage equipment and impair electrical circuitry Electrostati...

Страница 36: ...SL or multirate symmetrical high data rate digital subscriber line G SHDSL Not applicable 12 2 An RJ 11 to RJ 11 straight through cable is shipped unless an RJ 11 to RJ 11 crossover cable is specified 13 3 An RJ 11 to RJ 11 straight through cable is shipped unless an RJ 11 to RJ 11 crossover cable or an RJ 11 to RJ 45 cable is specified 13 ISDN4 S T cable 4 ISDN Integrated Services Digital Network...

Страница 37: ...r Ethernet PoE module remove the PoE its power adapter and its power cord from the box Step 5 Gather the Ethernet devices to be connected to the router hub servers and workstations or PCs Make sure that there is a network interface card NIC in each device for connection to Ethernet ports Step 6 If you plan to configure the software using Cisco IOS commands using the console port provide an ASCII t...

Страница 38: ...se the cable lock feature provide a Kensington or equivalent locking cable Step 10 Read the safety warnings the Safety Warnings and Guidelines section and information about preventing damage to the router the Preventing Damage to the Router section What to Do Next Mount the router properly by following the instructions in Chapter 3 Router and PoE Module Mounting Procedures ...

Страница 39: ...nnecting Antennas to the Wireless Router Before you mount the router on a table or a wall connect the antennas to the back panel It is difficult to attach the antennas after the router has been mounted to a wall Mounting on a Table The router and the PoE module can be mounted on a table or other flat horizontal surface To mount the router on a table firmly place the router on a table Do not cover ...

Страница 40: ...he router The power supply must rest on a horizontal surface such as the floor or a table If the power supply is not supported the strain on the power adapter cable could cause it to disconnect from the connector on the router back panel Do not install the router PoE module or power supplies next to a heat source of any kind including heating vents during winter Mounting the Router on a Wall The r...

Страница 41: ...Brackets on the Bottom of the Router Figure 3 2 shows the locations of the mounting screws and the router mounting brackets and the placement of the power adapter 1 Distance between two top mounting brackets near the front panel 3 Vertical distance between the top mounting brackets and the bottom bracket 2 Midpoint between the two top mounting brackets near the front panel 127042 1 2 3 ...

Страница 42: ...between the router and the power adapter 6 ft 1 8 m 2 Distance between the top set of screws on the wall 6 Horizontal surface on which to place the power adapter 3 Vertical distance between the top screws and the bottom screw on the wall 7 Distance between the screw head and the wall 1 8 in 0 32 cm 4 Mounting brackets O K L N K P P P V P N O K D A T A W L A N R X D W A N T X D C I S C O 8 0 0 S E ...

Страница 43: ...anufacturer Step 3 Measure 3 345 in 8 5 cm from either one of the screw holes to determine the midpoint between the two top mounting screws Step 4 From the midpoint measure a vertical distance of 5 55 in 14 1 cm to determine the location for the bottom mounting screw and then drill a hole Step 5 Anchor the screws into the wall leaving 1 8 in 0 32 cm between the screw head and the wall for mounting...

Страница 44: ...rews will be anchored making sure that the marks line up vertically Drill two holes 1 70 in 4 32 cm apart on the wall using the drill bit size that is specified by the screw or hollow wall anchor manufacturer Step 3 Anchor the screws into the wall leaving 1 8 in 0 32 cm between the screw head and the wall for mounting the PoE module Step 4 Hang the PoE module on the wall and secure the screws into...

Страница 45: ...9 Connecting a Broadband Modem page 4 11 Connecting a Terminal or PC to the Console Port page 4 12 Connecting an Async Modem to the Console Port page 4 13 Connecting an ISDN S T Port page 4 14 Connecting an ADSL Line ADSLoPOTS Port page 4 16 Connecting an ADSL Line ADSLoISDN Port page 4 17 Connecting a G SHDSL Line page 4 19 Connecting the AC Adapter page 4 21 Verifying Router Operations page 4 24...

Страница 46: ...ures for connecting devices to the router are the same for wireless and nonwireless routers Typical Installations Typical installations of the Cisco 850 series and Cisco 870 series routers are depicted in Figure 4 1 through Figure 4 4 as follows Cisco 851 and Cisco 871 router See Figure 4 1 Cisco 857 and Cisco 87 router See Figure 4 2 Cisco 876 router See Figure 4 3 Cisco 878 router See Figure 4 4...

Страница 47: ...l Installation of a Cisco 851 or Cisco 871 Router 1 Ethernet connection to an external switch 4 Console port 2 Ethernet connection to a PC 5 Power adapter 3 WAN connection using a broadband modem to the Internet LAN 4 3 2 1 Cisco 871W CONSOLE AUX RESET 5 12 VDC LEFT RIGHT PRIMARY 1 0 WAN FE4 FE0 FE1 FE2 FE3 1X 2X 1X 2X 1 Internet Internet 1 2 5 3 4 122237 SN XXXNNNNXXXX ...

Страница 48: ...ns Figure 4 2 Typical Installation of a Cisco 857 or Cisco 877 Router 1 Ethernet connection to an external switch 4 Console port 2 Ethernet connection to a PC 5 Power adapter 3 ADSL over POTS connection RIGHT PRIMARY ADSLoPOTS ETHERNET LAN 3 2 1 0 Cisco 877W CONSOLE AUX RESET 5 12 VDC LEFT FE4 FE3 FE2 FE1 1X 2X 1X 2X 1 1 2 5 3 122238 4 SN XXXNNNNXXXX ...

Страница 49: ... Figure 4 3 Typical Installation of a Cisco 876 Router 1 Ethernet connection to an external switch 4 ADSL over ISDN connection 2 Ethernet connection to a PC 5 Console port 3 ISDN S T connection 6 Power adapter ADSL o ISDN ISDN S T LAN FE0 FE1 FE2 FE3 Cisco 876W CONSOLE AUX RESET 5 12 VDC LEFT RIGHT PRIMARY 1X 2X 1X 2X 1 1 2 6 122239 5 4 3 SN XXXNNNNXXXX ...

Страница 50: ...antenna to a reverse polarity threaded Neill Concelman RP TNC connector on the back of the router and tighten the antenna hand tight Step 2 Orient the antenna vertically a If the router is being mounted on a desk orient the antenna straight up b If the router is being mounted on a wall orient the antenna straight down 1 Ethernet connection to an external switch 4 G SHDSL connection 2 Ethernet conn...

Страница 51: ... PoE module power supply to the PoE module before you connect the PoE module to the router For information about connecting the power supply to the PoE module see the Connecting the AC Adapter section Figure 4 5 Connecting the Power over Ethernet Module to the Router After you connect the PoE module to the router connect the Ethernet devices to the ports on the PoE module rather than to the Ethern...

Страница 52: ...et switch port follow the steps given after Figure 4 6 which shows a Cisco 871 router connected to a PC The procedure applies to Cisco 850 series and Cisco 870 series routers Figure 4 6 Connecting a Server PC or Workstation 1 Router 4 PC 2 Yellow Ethernet cable 5 RJ 45 port on the network interface card NIC 3 Built in Ethernet switch port on the router LEFT RIGHT PRIMARY LAN 4 3 2 1 Cisco 871W CON...

Страница 53: ...e cable to the RJ 45 port on the NIC installed in the PC server or workstation Step 3 Optional Connect additional servers PCs or workstations to the other built in Ethernet switch ports Connecting an External Ethernet Switch Optional If more than four PCs need to be connected to each other in an office you may connect an external Ethernet switch to the router s built in switch to add additional Et...

Страница 54: ... router Step 2 Connect the other end of the cable to the available port on the Ethernet switch to add additional Ethernet connections Step 3 Turn on the Ethernet switch 1 Yellow Ethernet cable connecting an external Ethernet switch to a built in Ethernet switch port on the router 2 Available port on the external Ethernet switch LEFT RIGHT PRIMARY LAN 4 3 2 1 Cisco 871W CONSOLE AUX RESET 5 12 VDC 1...

Страница 55: ...m Step 1 Connect one end of the yellow cable to the Ethernet WAN FE4 port Step 2 Connect the other end of cable to an available port on the modem Step 3 Follow the instructions provided with your broadband modem to determine which port on the modem to connect to Step 4 Turn on the broadband modem if it is not already turned on Note It is recommended that you use the Cisco Router and Security Devic...

Страница 56: ...9 shows a Cisco 871 router the procedure in this section applies to all Cisco 850 series and Cisco 870 series routers To connect a terminal or PC to the console port follow the steps given after Figure 4 9 Figure 4 9 Connecting a Terminal or PC to the Console Port Perform the following steps to connect the router s console port to a terminal or PC Step 1 Connect the RJ 45 connector on the light bl...

Страница 57: ...n optional router modem cable Contact your router vendor to order this cable Although Figure 4 10 shows the async modem connection to the console port on the Cisco 857 router this connection applies to all Cisco 850 series and Cisco 870 series routers Figure 4 10 Connecting an Async Modem to the Console Port 1 Router console port 4 Wall jack connected by an RJ 11 telephone cable to a port on an as...

Страница 58: ...he ISDN S T port to the ISDN service provider as a backup link to the WAN port in case the ADSL service goes down The cabling requirements and information for the ISDN S T connection follow You must provide two unshielded Category 5 cables The first cable connects the NT1 box to the splitter and the second cable connects the splitter to the wall jack There are RJ 45 connectors at both ends of the ...

Страница 59: ...munication service port on the splitter to the wall jack to allow a link to the network service provider 1 One end of the ISDN S T cable that connects to the ISDN S T port on the router 5 ADSL splitter that is provided by the ADSL service provider 2 Network termination 1 NT1 box 6 Other end of the first unshielded Category 5 cable that connects to the telephone line port on the splitter 3 Other en...

Страница 60: ...ion Cisco Systems DSL WAN Interfaces are tested for compliance with regulatory standards such as FCC Part 68 ITU T K 21 IEC 61000 4 5 and CSA EN IEC UL 60950 1 These standards assume Primary Protection devices protect the Customer Premise Equipment CPE These devices are normally installed by the service provider local exchange carrier or qualified service person and are located at the telecom serv...

Страница 61: ... service provider Note You must provide the unshielded Category 5 cable for connecting to the ADSL ISDN splitter that is provided by the service provider Caution Cisco Systems DSL WAN Interfaces are tested for compliance with regulatory standards such as FCC Part 68 ITU T K 21 IEC 61000 4 5 and CSA EN IEC UL 60950 1 These standards assume Primary Protection devices protect the Customer Premise Equ...

Страница 62: ... for further information and installation Figure 4 14 Primary Protection Device Location Router Home or Business Service Utilities Entrance or Demarcation Point Network Interface Box Network Interface Device Station Protector Building Ground Rod connected to Service entrance and Primary Protection Alternative Underground Service Entrance Note Primary Protection may be located Outside or Inside of ...

Страница 63: ... the ADSL service provider Step 3 Connect the unshielded Category 5 cable from the outside ADSL port on the splitter to a wall jack Connecting a G SHDSL Line This section applies to the Cisco 878 router only To connect the router to a G SHDSL line perform the steps given after Figure 4 16 1 One end of the ADSL cable that connects to the router 4 RJ 11 end of the ADSL cable that connects to the spl...

Страница 64: ...remise Equipment CPE These devices are normally installed by the service provider local exchange carrier or qualified service person and are located at the telecom service provider entrance network interface box or demarcation point See Figure 4 17 for the likely location of the primary protection device The primary protection device must be suitable for the xDSL interface employed Please contact ...

Страница 65: ...eries routers Warning The device is designed to work with TN power systems Statement 19 Warning This product relies on the building s installation for short circuit overcurrent protection Ensure that a fuse or circuit breaker no larger than 120VAC 20A U S 240VAC 16 to 20A international is used on the phase conductors all current carrying conductors The fuse or circuit breaker must have adequate sa...

Страница 66: ...apter 4 Router Cabling Procedures Connecting the AC Adapter Figure 4 18 Connecting the AC Adapter No PoE Module 1 Router 4 Desktop power adapter 2 Router input jack 5 Power cord plug 3 Power cord LEFT RIGHT PRIMARY LAN Cisco 871W CONSOLE AUX RESET 5 12 VDC 1 0 WAN FE4 117975 2 1 3 5 4 FE0 FE1 FE2 FE3 ...

Страница 67: ...y cable to the router power adapter Step 3 If a PoE module is connected to the router connect the PoE module power adapter to the PoE module Step 4 Plug the power cord of the router power adapter into an electrical outlet If a PoE module is connected to the router plug the power cord for the PoE module into an electrical outlet 1 Router 5 Router power adapter 2 Ethernet cables on the PoE module 6 ...

Страница 68: ...acket To broadband modem or to an external Ethernet switch WAN LNK WAN LNK is on when the WAN port is physically connected to a broadband modem or to an external Ethernet switch WAN RXD WAN RXD blinks when the WAN port receives an Ethernet packet WAN TXD WAN TXD blinks when the WAN port sends an Ethernet packet To xDSL line ADSL or G SHDSL ADSL CD G SHDSL CD WAN xDSL carrier detect status On when ...

Страница 69: ...tallation Guide OL 5331 01 Chapter 4 Router Cabling Procedures What to Do Next What to Do Next After verifying that the router cabling is correct and the power up is successful perform the initial configuration of the router as described in Chapter 5 Initial Configuration ...

Страница 70: ...4 26 Cisco 850 Series and Cisco 870 Series Access Routers Hardware Installation Guide OL 5331 01 Chapter 4 Router Cabling Procedures What to Do Next ...

Страница 71: ...pleted the cable connections and powered up the router we recommend that you use the Cisco Router and Security Device Manager SDM web based application to configure the initial router settings To install Cisco SDM for configuring the router follow these steps Step 1 Connect a PC to the router console port Step 2 Insert the Cisco SDM software CD into the CD drive of the PC to launch an installation...

Страница 72: ...tion file After the configuration file is created you can use the CLI or Security Device Manager to perform additional configuration The prompts in the setup command facility vary depending on your router model the installed interface modules and the software image The following example and the user entries in bold are shown as examples only Note If you make a mistake while using the setup command...

Страница 73: ...sed to protect access to the router over a network interface Enter virtual terminal password xxxxxx Step 7 Respond to the following prompts as appropriate for your network Configure SNMP Network Management yes Community string public A summary of the available interfaces is displayed Step 8 Choose one of the available interfaces for connecting the router to the management network Enter interface n...

Страница 74: ...the following messages appear at the end of the startup sequence System Configuration Dialog At any point you may enter a question mark for help Use ctrl c to abort configuration dialog at any prompt Default settings are in square brackets Would you like to enter the initial configuration dialog yes no If these messages do not appear SDM and a default configuration file were installed on the route...

Страница 75: ...ing the Initial Configuration To verify that the new interfaces are operating correctly perform the following tests To verify that the interfaces are operating correctly and that the interfaces and line protocol are in the correct state up or down enter the show interfaces command To display a summary status of the interfaces configured for IP enter the show ip interface brief command To verify th...

Страница 76: ...5 6 Cisco 850 Series and Cisco 870 Series Access Routers Hardware Installation Guide OL 5331 01 Chapter 5 Initial Configuration What to Do Next ...

Страница 77: ...s Running page 6 3 For more information on problems that could occur with the software see the Cisco 850 Series and Cisco 870 Series Access Routers Software Configuration Guide Before You Call Your Cisco Reseller Some of the solutions in this chapter instruct you to contact your Cisco reseller Before you contact your reseller have the following information ready Type of Information Your Informatio...

Страница 78: ...able from Cisco or replace it with a similar cable No connection to Ethernet devices ETHERNET LAN 0 ETHERNET LAN 1 ETHERNET LAN 2 and ETHERNET LAN 3 LEDs are off A cable related problem Improperly connected cable Damaged cable Perform the following tasks in order 1 Make sure that you have cabled the device correctly See Chapter 4 Router Cabling Procedures 2 Make sure that the connectors at both en...

Страница 79: ...ecurely seated Table 6 1 Problems During First Startup continued Symptom Problem Solutions Table 6 2 Problems After the Router Is Running Symptom Problem Solutions Problems with Ethernet connection ETHERNET LAN 0 ETHERNET LAN 1 ETHERNET LAN 2 and ETHERNET LAN 3 LEDs are off A cable related problem Disconnected cable Damaged cable Perform the following tasks in order 1 Make sure that the connectors...

Страница 80: ... service Connection to the xDSL line is intermittent or lost The ADSLCD or G SHDSL CD LED on the front panel is off A cable related problem Disconnected cable Damaged cable Make sure that the Ethernet port is not configured to be administratively down Make sure that the device connected to the Ethernet port is connected powered on and properly configured Make sure that the connectors at both ends ...

Страница 81: ... Specifications page A 5 Router Specifications Table A 1 outlines the system specifications for the routers Table A 1 Router Specifications Description Design Specification Physical Dimensions Dimensions H x W x D With antenna connectors 2 0 x 10 25 x 9 13 in 51 x 260 x 232 mm Without antenna connectors 2 0 x 10 25 x 8 5 in 51 x 260 x 216 mm Weight not including desktop power supply 2 10 lb 0 95 k...

Страница 82: ...nels for Europe 14 channels for Japan Data rate 54 Mbps with fallback rates of 48 36 24 18 12 9 and 6 Mbps Media access protocol CSMA CA7 with ACK8 Power consumption typical 500 mA 3 3V at transmit mode 320 mA 3 3V at receive mode 1 ISM Industrial Scientific and Medical 2 OFDM orthogonal frequency division multiplexing 3 DQPSK differential quaternary phase shift keying 4 DBPSK differential binary ...

Страница 83: ... Table A 3 provides pinouts for the Ethernet LAN port on the routers Environmental Operating Ranges Nonoperating temperature 4 to 149 F 20 to 65 C Nonoperating humidity 5 to 95 relative humidity Nonoperating altitude 0 to 15 000 ft 4570 m Operating temperature 32 to 104 F 0 to 40 C Operating humidity 10 to 85 relative humidity Operating altitude 0 to 10 000 ft 3000 m Power AC input voltage 100 to ...

Страница 84: ... DCE device The default parameters for the console port are as follows 9600 baud 8 data bits No parity One stop bit ADSL Port Connector Pinouts Table A 5 shows ADSL connector pinouts Table A 4 Console Connector Pinouts RJ 45 to DB 9 RJ 45 Pin Function DB 9 Pin 1 RTS 8 2 DTR 6 3 TXD 2 4 GND 5 5 GND 5 6 RXD 3 7 DSR 4 8 CTS 7 Table A 5 ADSL Connector Pinouts RJ 11 to RJ 45 RJ 11 Pin Function RJ 45 Pi...

Страница 85: ...e A 6 provides pinouts for the power output connector for the power supply Cable Specifications This section provides specifications for the following Ethernet cables which you might need to provide Straight through cable Crossover cable Because of the autocrossover autosensing function both straight through and crossover cables can be used for the Ethernet LAN port 246677 1 2 3 4 5 6 Table A 6 Po...

Страница 86: ...cations that apply to both straight through and crossover Ethernet cables Maximum Cable Length The maximum length for the Ethernet cables that connect equipment to the router is 328 ft 100 m The length also indicates the maximum distance between the router and the equipment connected to it Table A 7 Ethernet Cable Specifications Type Category 10BASE T Category 3 or 5 100BASE T Category 5 or higher...

Страница 87: ...e router 6 supported 12 asymmetric digital subscriber line See ADSL async modem connecting to console port 13 autosensing feature 8 B back panel Cisco 851 2 Cisco 857 4 Cisco 871 2 Cisco 876 5 Cisco 877 4 Cisco 878 7 PoE module 13 broadband modem connecting to router 11 C cables autosensing in router 8 maximum length 6 specifications table 6 caution defined 8 Cisco reseller contacting 1 Cisco Rout...

Страница 88: ...ctrostatic damage preventing 3 Ethernet port connecting to a PC 8 description 7 Ethernet ports pinouts 3 external Ethernet switch connecting to router 9 F Fast Ethernet WAN port connecting to the Internet 11 description 7 feature summary table 7 flash memory 8 frequency specifications PoE module 3 router 2 front panel Cisco 851 and Cisco 871 2 Cisco 857 and Cisco 877 3 Cisco 876 5 Cisco 878 6 PoE ...

Страница 89: ...the CLI 4 memory flash 8 SDRAM 8 summary 16 modem connecting to router 11 mounting on a table 1 on a wall guidelines 2 PoE module 5 router 2 multirate symmetrical high data rate digital subscriber line G SHDSL 6 N nonwireless routers 2 O omnidirectional antenna 12 output voltage specifications PoE module 3 router 2 P patch antenna 12 PC connecting to router 8 pinouts ADSL connector 4 console conne...

Страница 90: ...afety warnings general 1 wireless routers 3 SDM for initial configuration 1 installing 1 SDRAM 8 security IPSec hardware accelerator 8 Kensington lock 17 software features 8 serial number location 9 server connecting to router 8 setup command facility for initial configuration 2 show configuration command 5 show interfaces command 5 show ip interface brief command 5 specifications Ethernet cable t...

Страница 91: ...0 Series Access Routers Hardware Installation Guide OL 5331 01 router 2 warnings general 1 wireless routers 3 weight specifications PoE module 2 router 1 wireless routers description 11 supported antennas 12 workstation connecting to router 8 ...

Страница 92: ...Index IN 6 Cisco 850 Series and Cisco 870 Series Access Routers Hardware Installation Guide OL 5331 01 ...

Отзывы: