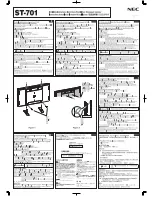
Installing flat panels on
the ML20 wall mount
The ML20 is a full-service video wall mount that can accommodate the FHD493-XE and FHD553-XE flat
panels in landscape orientation.
The modular mount system features a pull-out mechanism that provides rear screen access, and the
ability to adjust the X, Y, and Z axis alignment.
Features
Use the ML20 wall mounts to hang and adjust the flat panels, and to access the rear of the panels.
•
Modular mount for large video wall display configurations.
•
Adjustments of panels for optimal gaps.
•
Spring-loaded mechanisms secure displays.
•
Pull-out/prop-open mechanism provides quick service access.
Installing Flat Panels on the ML20 Wall Mount Instruction Sheet
1
020-102525-01 Rev. 1 (02-2017)
Copyright
©
2017 Christie Digital Systems USA Inc. All rights reserved.