background image

09

08

Assembly / Operating Instructions

Assembly / Operating Instructions

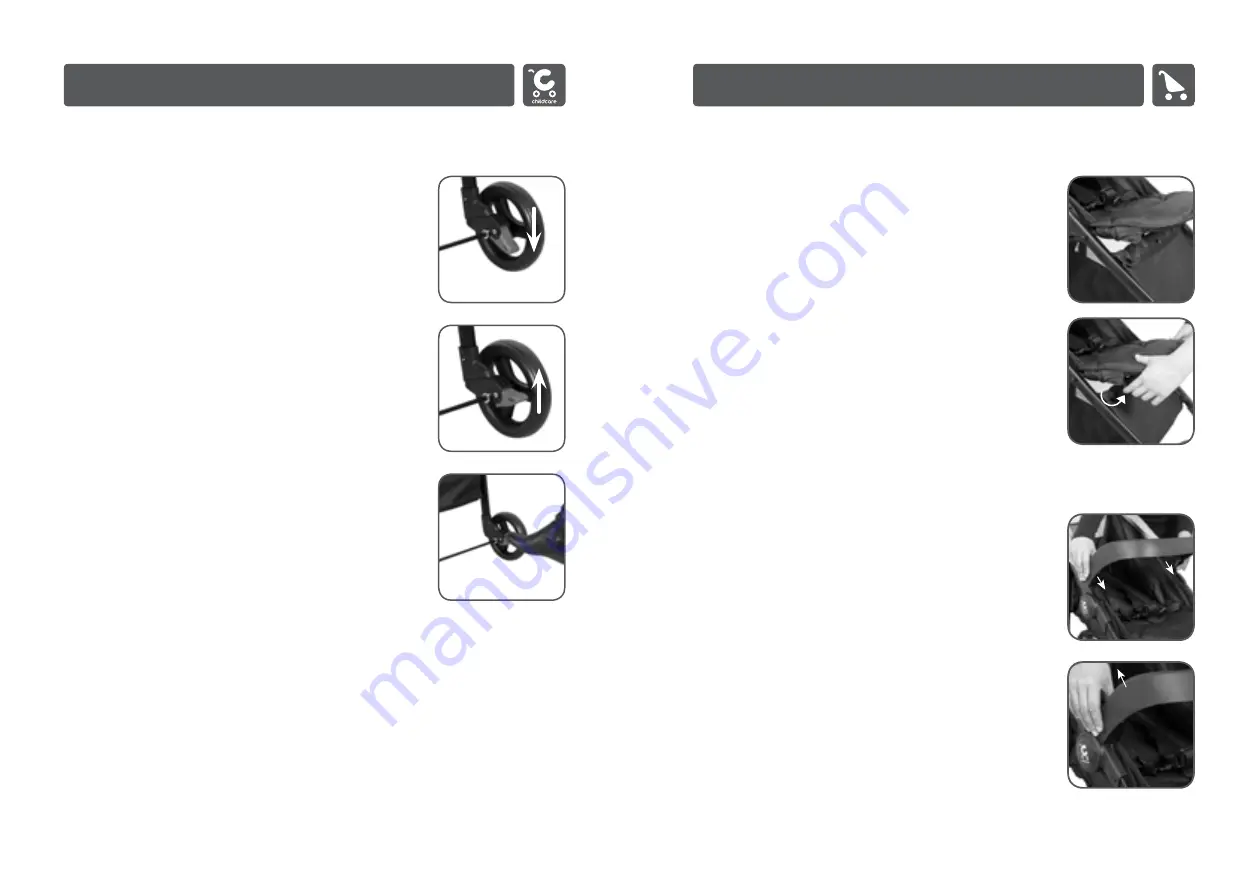
To adjust the seat extension

1. 

Lower the seat extension by pressing up the release latches 
located underneath on both sides of the seat extension and 
push down.

2. 

Raise the seat extension by pressing up the release latches and 
lift up until the release latches lock into place.

Inserting and Removing the tray 

1. 

To insert the tray, align it with the fitting on the stroller frame as 
shown in the image. Gently push the tray into the fitting until you 

hear a ‘click’ and the release buttons pop out.

2. 

To remove the tray, push in the both the release buttons and 
move the tray upward.

Using the rear brakes

1.  To lock the brakes, push down on the brakes on the rear axle 

with foot. Ensure that both brakes are engaged

2.  To unlock brakes, lift the brakes on the rear wheels with foot. 

Ensure both brakes are disengaged.

CAUTION:

 Always apply brakes when parking stroller.

Содержание Epix 015710

Страница 1: ...Epix StrollerModel 015710 IMPORTANT RETAINFORFUTUREREFERENCE READCAREFULLY...

Страница 2: ...the manufacturer Never ride with more than one child in the stroller Be aware that moving parts may cause injury if care is not taken This stroller has been designed for use on flat or gently sloped s...

Страница 3: ...567 5000 Stroller frame with the following components pre assembled on frame Canopy Five point safety harness Basket Unfolding the stroller 1 Simultaneously lift the stroller handle slightly while pre...

Страница 4: ...er into place 4 Snap the wheel hubcap into place as shown in image Pull on each wheel to ensure that each wheel is securely locked into place Assembly Operating Instructions Swivel function 1 To lock...

Страница 5: ...emoving the tray 1 To insert the tray align it with the fitting on the stroller frame as shown in the image Gently push the tray into the fitting until you hear a click and the release buttons pop out...

Страница 6: ...traints Harness 1 To secure the child in the harness place left hand buckle prong b on top of a 2 Hold both left hand buckle prongs a and b together and insert it into buckle housing e until it snaps...

Страница 7: ...arly for tightness of screws nuts and other fasteners tighten or replace if required To maintain the safety of your stroller seek prompt repairs for bent torn worn or broken parts Use only those parts...

Страница 8: ...Drive VIC 3030 Customer Service 1300 667 137 www cnpbrands com au Distributed in New Zealand by Wainhouse Distribution 2 6 Argyle St Morningside PO Box 41 014 St Lukes Auckland New Zealand Customer S...

Отзывы: