Installation Instructions
AVMW
7
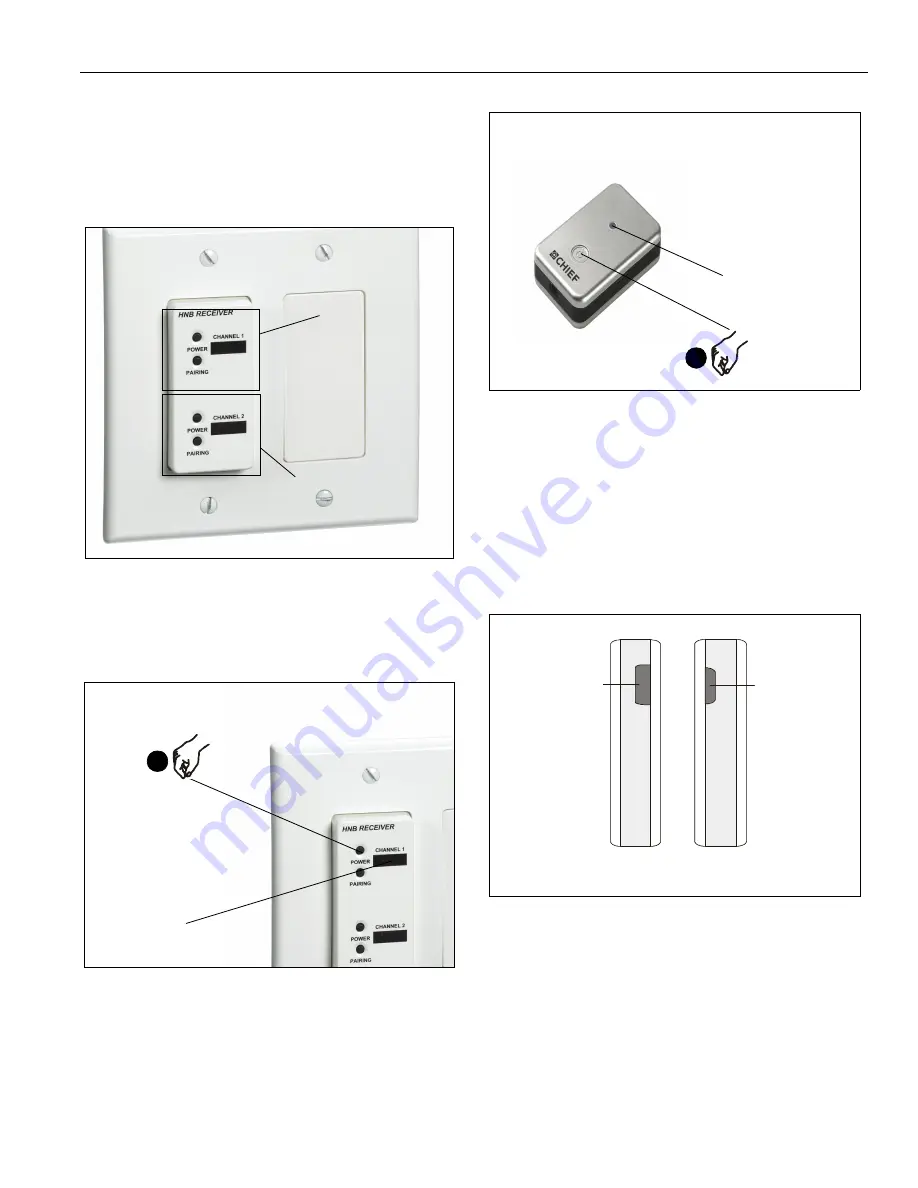
Wireless Device Activation
The AVMW module has two channels operating at independent
frequencies (2.4GHz/900MHz).
Channel 1 is for the Teacher Microphone (AVxLM)
Channel 2 is for the Student Microphone (AVxHM)
Figure 8
AVxLM (Teacher lanyard microphone)
1.
Press the POWER button on the AVMW receiver module for
Channel 1. Power On = Blue LED flashing (See Figure 8)
Figure 9
2.
Press the ON/OFF button on the transmitter for the teacher
microphone (AVxLM). ON = Blue LED flashing or Blue LED
steady.
Figure 10
NOTE:
If the LED’s on both units continue flashing, then
proceed to Step 3. If the LED’s are solid (ON, but not
flashing) then the units linked themselves and are
ready to broadcast. Go to Step 5.
3.
Press the "pairing" button for 2-3 seconds separately on
both the AVMW and on the right side of the AVxLM
transmitter until the LED flashed alternating red/blue
indicating units are ready to be paired. Pairing Ready =
alternating red/blue steady flash (See Figure 10)
Figure 11
NOTE:
Steady flash indicates that the units are looking for an
ID match.
4.
Locate the IR lens on the left side of the transmitter unit
(opposite side from the pairing button). While both units are
in the pairing-ready mode: point the transmitter IR lens at
the AVMW module from a maximum distance of 1 meter/3
feet for at least 3-4 seconds. The alternating blue/red flash
sequence will commence a fast flashing sequence for 2-3
seconds resulting in a solid blue LED condition indicating
that the link is made and broadcasting can begin. Paired =
Blue LED solid.
Channel 1
Channel 2
LED
1
2
LED blue/red
AVxLM
Right side
Left side
Pairing
Button
IR Lens
Содержание AVMW
Страница 9: ...Installation Instructions AVMW 9 ...
Страница 10: ...AVMW Installation Instructions 10 ...
Страница 11: ...Installation Instructions AVMW 11 ...
Страница 12: ...AVMW Installation Instructions 12 ...
Страница 13: ...Installation Instructions AVMW 13 ...
Страница 14: ...AVMW Installation Instructions 14 ...
Страница 16: ...AVMW Installation Instructions 16 ...


