Chicago Pneumatic CP 8730 Скачать руководство пользователя страница 4

6

7

WARNING!

OPERATION

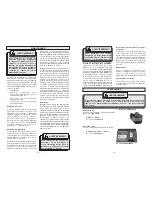
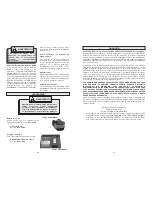
Using the Forward/Reverse Switch
(Fig. 6)

The forward/reverse switch may be set to
three positions: forward, reverse and lock.
Due to a lockout mechanism, the forward/
reverse switch can only be adjusted when
the trigger is not pressed. Always allow
the motor to come to a complete stop be-
fore using the forward/reverse switch.

1.

For 

forward 

(clockwise) rotation,

push the forward/reverse switch in
the direction shown. Check the direc-
tion of rotation before use.

2.

For 

reverse

 (counterclockwise) ro-

tation, push the forward/reverse
switch in the direction shown. Check
the direction of rotation before use.

3.

To lock the trigger, push the forward/
reverse switch to the center position.
The trigger will not work when the for-
ward/reverse switch is in the locked
position. Always lock the trigger or
remove the battery pack before per-
forming maintenance, changing acces-
sories, storing the tool and any time
the tool is not in use.

Starting, Stopping and Controlling
Speed

These tools may be operated at any speed
from 0 to full speed.

1.

To 

start

 the tool, pull the trigger.

2.

To vary the driving speed, simply in-
crease or decrease pressure on the
trigger. The further the trigger is pulled,
the greater the speed.

3.

To 

stop

 the tool, release the trigger

and the electric brake stops the tool
instantly.

Impacting Techniques

The longer a bolt, screw, or nut is impacted,
the tighter it will become. To help prevent
damaging the fasteners or workpieces,
avoid excessive impacting. Be particularly
careful when impacting smaller fasteners
because they require less impacting to
reach optimum torque.

Practice with various fasteners, noting the
length of time required to reach the de-
sired torque. Check the tightness with a
hand-torque wrench. If the fasteners are
too tight, reduce the impacting time. If they
are not tight enough, increase the impact-
ing time.

Impacting for two seconds is generally
sufficient for a 3/8" bolt and one second
for a 5/16" bolt. However, oil, dirt, rust or
other matter on the threads or under the
head of the fastener affects the degree of
tightness.

The torque required to loosen a fastener
averages 75% to 80% of the tightening
torque, depending on the condition of the
contacting surfaces.

On light gasket jobs, run each fastener
down to a relatively light torque and use a
hand torque wrench for final tightening.

To reduce the risk of injury, wear
safety goggles or glasses with
side shields.

Forward

 Reverse

Fig. 6

WARNING!

TOOL ASSEMBLY

Always lock trigger or remove
battery pack before changing or
removing accessories. Only use
accessories specifically recom-
mended for this tool. Others may
be hazardous.

Attaching and Removing Accessories

These impact wrenchs are intended only
for use with sockets designed for impact
wrenches  that have a 3/8" or 1/2" square
drive. Other sockets could shatter or break,
causing injury.

1.

To attach a socket or other acces-
sory, align the accessory with the
drive shank and push it firmly over the
retaining ring.

2.

To remove the accessory, pull the ac-
cessory off the drive shank.

WARNING!

Use only sockets and other acces-
sories specifically designed for
use on impact wrenches and driv-
ers. Other sockets and accesso-
ries might shatter or break caus-
ing injury.

Содержание CP 8730

Страница 1: ...osonnuevas noestán totalmente cargadas Cargue su bateria antes de usarla por primera vez siga las instrucciones de carga que vienen en el manueldelaherramienta OPERATOR S MANUAL MANUEL de L UTILISATEUR MANUAL del OPERADOR TO REDUCE THE RISK OF INJURY USER MUST READ AND UNDERSTAND OPERATOR S MANUAL AFIN DE RÉDUIRE LE RISQUE DE BLESSURES L UTILISATEUR DOIT LIRE ET BIEN COMPRENDRE LE MANUEL DE L UTIL...

Страница 2: ...flammable liq uids gases or dust Power tools create sparks which may ignite the dust or fumes 3 Keep bystanders children and visitors away while operating a power tool Distractions can cause you to lose control Protect others in the work area from debris such as chips and sparks Provide barriers or shields as needed 4 Do not abuse the cord Never use the cord to carry the tool Keep cord away from h...

Страница 3: ...erform best and have longest life if it is charged when the temperature is between 60 80 F 15 27 C Do not charge in temperatures below 40 F 5 C or above 105 F 40 C Under these conditions capacity will be reduced See Maintenance Removing Battery Pack from Tool Push in the release buttons and remove the battery pack Fig 2 Inserting Battery Pack into Tool Battery pack can be inserted into the tool in...

Страница 4: ... impacting smaller fasteners because they require less impacting to reach optimum torque Practice with various fasteners noting the length of time required to reach the de sired torque Check the tightness with a hand torque wrench If the fasteners are too tight reduce the impacting time If they are not tight enough increase the impact ing time Impacting for two seconds is generally sufficient for ...

Страница 5: ...attery pack or charger in liquid or allow a liquid to flow inside them Cleaning Clean dust and debris from charger and tool vents Keep tool handles clean dry and free of oil or grease Use only mild soap and a damp cloth to clean the tool battery pack and charger since certain cleaning agents and solvents are harmful to plastics and other insulated parts Some of these include gasoline turpentine la...

Страница 6: ...die avec tel autre type de batterie 6 N utilisez un outil qu avec un bloc batterie conçu spécifiquement pour lui L emploi d un autre bloc batterie peut créer un risque d incendie AIRE DE TRAVAIL SÉCURITÉÉLECTRIQUE 7 Restez alerte concentrez vous sur votre travail et faites preuve de jugement N utilisez pas un outil électrique si vous êtes fatigué ou sous l influence de drogues d alcool ou de médic...

Страница 7: ... si son interrupteur est bloqué Un outil que vous ne pouvez pas commander par son interrupteur est dangereux et doit être réparé 16 Retirez le bloc batterie ou mettez l interrupteur sur ARRÊT ou en position verrouillée avant d effectuer un réglage de changer d accessoire ou de ranger l outil De telles mesures préventives réduisent le risque de démarrage accidentel de l outil 17 Rangez les outils h...

Страница 8: ...e l outil Introduction de la batterie dans l outil Fig 1 et 2 La batterie peut être introduite dans l outil de deux façons 1 Lorsque l espace est restreint Introduisez la batterie par le devant en appuyant sur les boutons de dégagement et en la glissant dans le corps de l outil pour qu elle s enclenche Fig 1 Pour insérer la batterie dans l outil enfoncez les boutons de dégagement et glissez la dan...

Страница 9: ...tirer la batterie et verrouiller la détente de l outil avant de changer ou d enlever les accessoires L emploi d accessoires autres que ceux qui sont expressément recommandés pour cet outil peut comporter des risques MANIEMENT Pour minimiser les risques de blessures portez des lunettes à coques latérales Avant Inverse Fig 6 Démarrage arrêt et contrôle de vitesse Ces outils peuvent être utilisés à n...

Страница 10: ...d huile ou de graisse Le nettoyage de l outil du chargeur et de la batterie doit se faire avec un linge humide et un savon doux Certains nettoyants tels l essence la térébenthine lesdiluants à laque ou à peinture les solvants chlorés l ammoniaque et les détergents d usage domestique qui en contiennent pourraient détériorer le plastique et l isolation des pièces Ne laissez jamais de solvants inflam...

Страница 11: ... de cualquier otro tipo de batería puede producir riesgo de incendio SEGURIDADELECTRICA SEGURIDADPERSONAL INSTRUCCIONES GENERALES DE SEGURIDAD PARA LAS HERRAMIENTAS A BATERIAS GARANTIE Politique de garantie limitée et de service de Chicago Pneumatic Tool Company Les produits de Chicago Pneumatic Tool Company CP sont garantis contre tout défaut de matière ou de main d œuvre pendant un 1 an à partir...

Страница 12: ...en movimiento estén alineadas y no estén atascadas También debe verificarse que las partes no estén rotas o tengan cualquier otra condición que pueda afectar el funcionamiento de la herramienta Si está dañada se debe reparar la herramienta an tes de utilizarla Muchos accidentes se deben al mantenimiento incorrecto de la herramienta No utilice una herramienta dañada Colóquele una etiqueta que diga ...

Страница 13: ... F No la cargue en ambientes con temperaturas por debajo de 5 C 40 F o por encima de 40 C 105 F Si lo hace en estas condiciones reducirá la capacidad de la batería vea Mantenimiento Como se quita la batería de la herramienta Presione el botón de liberación y saque la batería Cargue solamente las baterías Chicago Pneumatic de 9 6V 12V 14 4 V y 18 V en cargadores Otros tipos de baterías pueden explo...

Страница 14: ...mpulsor y empújelo firmemente sobre el anillo de retención 2 Para extraer el accesorio tire de él para separarlo del vástago impulsor Utilice únicamente adaptadores y otros accesorios específicamente diseñados para uso con impulsores y llaves de impacto Otros adaptadores y accesorios podrían fragmentarse o romperse y ocasionar lesiones ADVERTENCIA Avance Retroceso Fig 6 3 Para bloquear el gatillo ...

Страница 15: ...dependiendo del uso dado envíe su herramienta batería y cargador al Centro de Servicio MILWAUKEE mas cercano para que le hagan Lubricación Inspección mecánica y limpieza engranes flechas baleros carcaza etc Inspección eléctrica batería cargador motor Probarla para asegurar una adecuada operación mecánicay eléctrica Mantenimiento de la herramienta Si la herramienta no arranca u opera a toda su pote...

Страница 16: ...r un año a partir de la fecha de compra Esta garantía aplica únicamente a productos nuevos adquiridos de CP o sus distribuidores autorizados Ciertamente esta garantía no aplica a productos que hayan sido abusados alterados o reparados por personas que no pertenezcan a CP o sean Representantes de Servicio Autorizados Si un producto CP se encuentra está defectuoso ya sea en el material o en la mano ...

Страница 17: ...cios de MILWAUKEE para products de CP Milwaukee Electric Tool Canada Ltd 755 Progress Avenue Scarborough Ontario M1H 2W7 Tel 416 439 4181 Fax 416 439 6210 En outre notre réseau mondial de distributeurs est à notre disposition de la clientèle d un océan à l autre Consultez les pagesjaunesdel annuairetéléphoniquepourtrouverl adresse du centre le plus près de chez vous In addition there is a worldwid...

Отзывы: