


DISPLAY MENU
The first page of the system menu allows you to make adjustments to the game’s display.
To change a setting, use
UP/DOWN
to highlight the setting, and press
ENTER
to select it. Press
UP/DOWN
to change the setting. When you are done, press
ENTER
again to save the new
setting. Press
SERVICE
advance to the next page and exit the menu.
DISPLAY COLOR
This setting changes the color of the dot matrix display in game. There are several preset
color configurations, or you can set it to a custom color.
RED, GREEN, BLUE
0 – 100, Default: GREEN
Turning each of the three colors up or down allows you to set the display to any color you
would like.
COLORIZE
ON, OFF, NOT INSTALLED
This setting turns the full colorized display on or off. ON will turn on the fully colorized
version. OFF will be the monochromatic game using the DISPLAY COLOR that is set above. If
you do not own the color upgrade, this option will be unavailable and marked NOT INSTALLED.
CUSTOM LOGO
Limited and Special Editions of Attack from Mars support custom logo display. This
requires a microSD card, formatted in FAT32.
Logo Requirements
Image must be named userlogo.bmp
Image must be 320 x 80 pixels
Image must be 24-bit color, uncompressed. This is the normal Windows format for
BMPs.
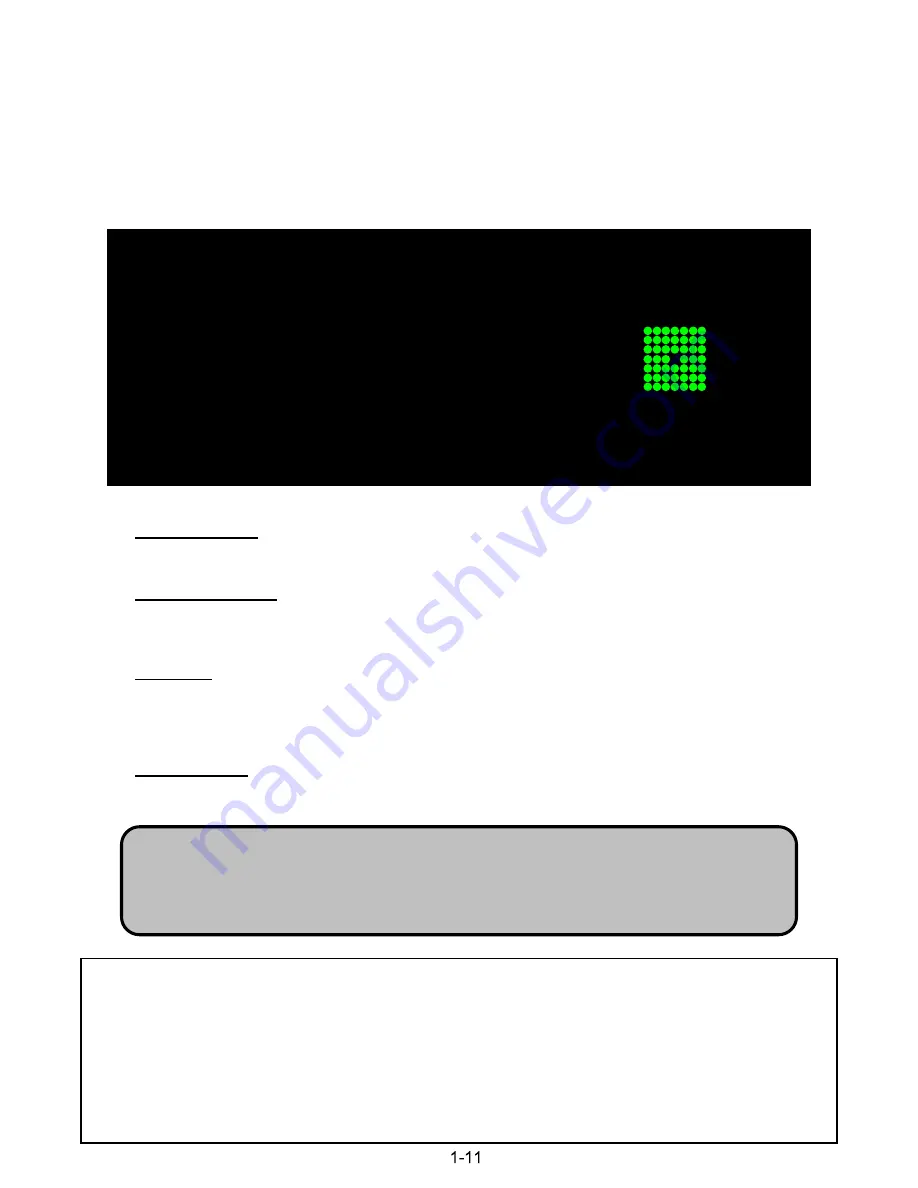
DISPLAY MENU – PRESS SERVICE TO ADVANCE
DISPLAY COLOR
GREEN
RED
0
GREEN
100
BLUE
0
COLORIZE
ON
PRESS START TO LOAD CUSTOM LOGO
Custom Logo Instructions
1) On your computer, make sure the logo you want to use matches the requirements listed on above.
2) Insert a microSD card in your computer. Check that the card is formatted as FAT32.
3) Drag and drop the logo onto the top level of he drive (not in a subdirectory). This file must be named userlogo.bmp.
4) Remove the card from your computer.
5) Remove the backbox insert from Attack from Mars.
6) With the game powered on, insert the microSD into the controller board. There is only one way the card can be
inserted.
7) Hold the
SERVICE
button for 5 seconds to enter the CGC System Menu. Press
SERVICE
again to go to the
Display Menu.
8) Press
START
.
Содержание Attack from Mars Remake
Страница 1: ......
Страница 2: ......
Страница 3: ......
Страница 4: ......
Страница 5: ......
Страница 6: ......
Страница 7: ......
Страница 8: ......
Страница 9: ......
Страница 10: ......
Страница 11: ......
Страница 12: ......
Страница 13: ......
Страница 14: ......
Страница 15: ......
Страница 16: ......
Страница 17: ......
Страница 18: ......
Страница 19: ......
Страница 20: ......
Страница 21: ......
Страница 22: ......
Страница 23: ......
Страница 24: ......
Страница 25: ......
Страница 26: ......
Страница 27: ......
Страница 28: ......
Страница 29: ......
Страница 30: ......
Страница 31: ......
Страница 32: ......
Страница 33: ......
Страница 34: ......
Страница 35: ......
Страница 36: ......
Страница 37: ......
Страница 44: ......
Страница 45: ......
Страница 46: ......
Страница 47: ......
Страница 48: ......
Страница 49: ......
Страница 50: ......
Страница 51: ......
Страница 52: ......
Страница 53: ......
Страница 54: ......
Страница 55: ......
Страница 56: ......
Страница 57: ......
Страница 58: ......
Страница 59: ......
Страница 60: ......
Страница 61: ......
Страница 62: ......
Страница 63: ......
Страница 64: ......
Страница 65: ......
Страница 66: ......
Страница 67: ......
Страница 68: ......
Страница 69: ......
Страница 70: ......
Страница 71: ......
Страница 72: ......
Страница 73: ......
Страница 74: ......
Страница 75: ......
Страница 76: ......
Страница 77: ......
Страница 78: ......
Страница 79: ......
Страница 80: ......
Страница 81: ......
Страница 82: ......
Страница 83: ......
Страница 84: ......
Страница 85: ......
Страница 86: ......
Страница 87: ......
Страница 88: ......
Страница 89: ......
Страница 90: ......
Страница 91: ......
Страница 92: ......
Страница 93: ......
Страница 94: ......
Страница 95: ......
Страница 96: ......
Страница 97: ......
Страница 98: ......
Страница 99: ......
Страница 100: ......
Страница 101: ......
Страница 102: ......
Страница 103: ......
Страница 104: ......
Страница 105: ......
Страница 106: ......
Страница 107: ......
Страница 108: ......
Страница 109: ......
Страница 110: ......
Страница 111: ......
Страница 112: ......
Страница 113: ......
Страница 114: ......
Страница 115: ......
Страница 116: ......
Страница 117: ......
Страница 118: ......
Страница 119: ......
Страница 120: ......
Страница 121: ......
Страница 122: ......
Страница 123: ......
Страница 124: ......
Страница 125: ......
Страница 126: ......
Страница 127: ......
Страница 128: ......
Страница 129: ......
Страница 130: ......
Страница 131: ......
Страница 132: ......
Страница 133: ......
Страница 134: ......
Страница 135: ......
Страница 136: ......
Страница 137: ......
Страница 138: ......
Страница 139: ......
Страница 140: ......
Страница 141: ......
Страница 142: ......
Страница 143: ......
Страница 144: ......
Страница 145: ......
Страница 146: ......
Страница 147: ......
Страница 148: ......
Страница 149: ......
Страница 150: ......
Страница 151: ......
Страница 152: ......
Страница 153: ......
Страница 154: ......
Страница 155: ......
Страница 156: ......
Страница 157: ......
Страница 158: ......
Страница 159: ......
Страница 160: ......
Страница 161: ......
Страница 162: ......


