SKU 99683
for technical questions, please call 1-800-444-3353.
Page 7
specifications
Battery Charging
Requirements
120 V~ / 60 Hz /
2.4 A
Battery
Class 2,19.2 VDC
NiCd
Motor No Load Speed
2,000 RPM
Maximum Torque
Clockwise: 14 ft-lb
Counterclockwise:
12.5 ft-lb
Screw Size Range
0.9” to 2.16”
unpacKing
When unpacking, make sure that the
item is intact and undamaged. If any parts
are missing or broken, please call Harbor
Freight Tools at the number shown on the
cover of this manual as soon as possible.
list of contents
description
Qty
Case
1
Battery
1
Battery Charger
1
Screwdriver
1
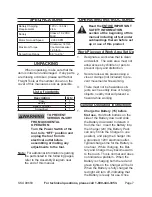
to preVent
serious injurY
from accidental
operation:
turn the power switch of the
tool to its “off” position and
unplug the tool from its
electrical outlet before
assembling or making any
adjustments to the tool.
note:
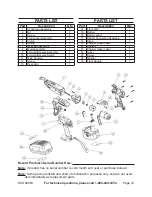
For additional information regarding
the parts listed in the following pages,
refer to the Assembly Diagram near
the end of this manual.
operating instructions
read the entire important
safetY information
section at the beginning of this
manual including all text under
subheadings therein before set
up or use of this product.
work piece and work area set up
Designate a work area that is clean
1.
and well-lit. The work area must not
allow access by children or pets to
prevent injury and distraction.
Secure loose work pieces using a
2.
vise or clamps (not included) to pre-
vent movement while working.
There must not be hazardous ob
-
3.
jects, such as utility lines or foreign
objects, nearby that will present a
hazard while working.
general operating instructions
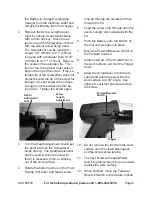
charge the Battery (15) before
1.
first use.
Hold both buttons on the
side of the Battery down and slide
the Battery downward to detach it
from the tool. Insert the Battery into
the Charger (20) (the Battery Pack
can only fit into the Charger in one
position), and plug the Charger into
a grounded, 120V electrical outlet.
Typical charge time for the Battery is
one hour. While charging, the Bat-
tery and Charger may become warm
to the touch. This is normal and does
not indicate a prob lem. When the
Battery is charging both the red and
green lights on the Charger will be lit.
When the Battery is fully charged the
red light will turn off, indicating that
the Battery is ready for use. Once


