background image

Page 10

For technical questions, please call 1-888-866-5797.

Item 69343

Sa

Fety

Opera

ti

O

n

Maintenance

Setup

Operating instructions

  read the entire iMpOrtant SaFety inFOrMatiOn section 

at the beginning of this manual including all text under 

subheadings therein before set up or use of this product.

uses

tO preVent SeriOuS inJury FrOM acciDentaL OperatiOn: 

Make sure that the trigger is in the off-position and unplug the tool from 

its electrical outlet before adjusting tool or installing accessories.

The Heat Gun can be used for:

•  Shrinking of shrink tubing, packaging 

and electrical components�

•  Deforming of articles made from 

acrylic, PVC, and polystyrene 

tubing, plates, and profiles�

•  Welding of thermoplastic polymer, 

flooring materials of PVC and 

linoleum, PVC‑coated fabric, 

wallpaper, tarpaulins and foils�

•  Soldering of tin, special silver solder, 

SMD elements, cable lugs, and for 

loosening soldered connections�

•  Paint removal� Removal of old coatings of 

oil paint, varnish, and synthetic plaster�

•  Drying of color shade samples, 

filter, adhesives, construction 

joints and stucco forms�

•  Joining adhesives� Large surface 

gluing with contact adhesives, 

activation of pressure, or heat 

sensitive adhesives, acceleration 

of bonding processes, releasing of 

bonding points as well as releasing or 

bonding of edge bond or veneer�

•  Defrosting of icy stairs and 

steps, door locks, trunk lids, car 

doors or metal water pipes�

•  Disinfection� With the tool set at the 

highest setting, animal sites/stables may 

be disinfected� Wood worm infestation 

may be controlled�  Do not heat up the 

wood surface too much or it can burn�

Workpiece and Work area Set up

1�  Designate a work area that is clean 

and well lit�  The work area must not 

allow access by children or pets to 

prevent distraction and injury�

2�  Route the power cord along a safe route 

to reach the work area without creating a 

tripping hazard or exposing the power cord 

to possible damage�  The power cord must 

reach the work area with enough extra length 

to allow free movement while working�

3�  Secure loose workpieces using a 

vise or clamps (not included) to 

prevent movement while working�

4�  There must not be objects, such 

as utility lines, nearby that will 

present a hazard while working�

5�  Remove all flammable and heat sensitive 

materials from the work area�

6�  Plan an insulated, non‑flammable surface 

for the gun to cool down on after use�

7�  Keep multiple class ABC fire 

extinguishers readily accessible while 

working and while workpiece cools�

Содержание 69343

Страница 1: ... future reference When unpacking make sure that the product is intact and undamaged If any parts are missing or broken please call 1 888 866 5797 as soon as possible Copyright 2012 by Harbor Freight Tools All rights reserved No portion of this manual or any artwork contained herein may be reproduced in any shape or form without the express written consent of Harbor Freight Tools Diagrams within th...

Страница 2: ...tion which if not avoided could result in minor or moderate injury Addresses practices not related to personal injury IMPORTANT SAFETY INFORMATION General Power Tool Safety Warnings Read all safety warnings and all instructions Failure to follow the warnings and instructions may result in electric shock fire and or serious injury Save all warnings and instructions for future reference The term pow...

Страница 3: ...uit Interrupter GFCI protected supply Use of a GFCI reduces the risk of electric shock Personal Safety 1 Stay alert watch what you are doing and use common sense when operating a power tool Do not use a power tool while you are tired or under the influence of drugs alcohol or medication A moment of inattention while operating power tools may result in serious personal injury 2 Use personal protect...

Страница 4: ...erviced by a qualified repair person using only identical replacement parts This will ensure that the safety of the power tool is maintained Heat Gun Safety Warnings 1 Hidden areas behind walls ceilings floors soffit boards and other panels may contain flammable materials that could be ignited by the heat gun when working in these locations The ignition of these materials may not be readily appare...

Страница 5: ...or drinking Do not smoke or chew tobacco in the work area i Clean up all removed paint and dust by wet mopping the floors Use a wet cloth to clean all walls sills and any other surface where paint or dust is clinging DO NOT SWEEP DRY DUST OR VACUUM Use a high phosphate detergent or trisodium phosphate TSP to wash and mop areas j At the end of each work session put the paint chips and debris in a d...

Страница 6: ...tains chemicals known to the State of California to cause cancer and birth defects or other reproductive harm Some examples of these chemicals are Lead from lead based paints Crystalline silica from bricks and cement or other masonry products Arsenic and chromium from chemically treated lumber Your risk from these exposures varies depending on how often you do this type of work To reduce your expo...

Страница 7: ...ovides a low resistance path to carry electricity away from the user reducing the risk of electric shock 2 The grounding prong in the plug is connected through the green wire inside the cord to the grounding system in the tool The green wire in the cord must be the only wire connected to the tool s grounding system and must never be attached to an electrically live terminal 3 The tool must be plug...

Страница 8: ...rked with the suffix W A W in Canada to indicate it is acceptable for outdoor use 7 Make sure the extension cord is properly wired and in good electrical condition Always replace a damaged extension cord or have it repaired by a qualified electrician before using it 8 Protect the extension cords from sharp objects excessive heat and damp or wet areas Table A Recommended Minimum Wire Gauge for Exte...

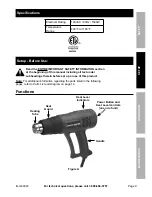
Страница 9: ...read the entire iMpOrtant SaFety inFOrMatiOn section at the beginning of this manual including all text under subheadings therein before set up or use of this product note For additional information regarding the parts listed in the following pages refer to Parts List and Diagram on page 14 Functions Handle Heating tube Heat Guard Heat Level indicators power Button and Heat Level controls on end o...

Страница 10: ...esives activation of pressure or heat sensitive adhesives acceleration of bonding processes releasing of bonding points as well as releasing or bonding of edge bond or veneer Defrosting of icy stairs and steps door locks trunk lids car doors or metal water pipes Disinfection With the tool set at the highest setting animal sites stables may be disinfected Wood worm infestation may be controlled Do ...

Страница 11: ... Stage Red LED Lit during Low Temp Settings Red LED Lit during High Temp Settings Heat Level Indicator LEDs Low Temps High Temps Buttons to Adjust Heat Settings Up or Down Power Button Figure B 4 Choose the appropriate heat level for the job and push the or to adjust the heat settings The LEDs will light up to indicate the heat level LEDs 1 2 3 4 5 6 Low Temp 430 F 550 F 650 F 700 F 730 F 800 F Hi...

Страница 12: ... cleaning procedures TO PREVENT SERIOUS INJURY FROM TOOL FAILURE Do not use damaged equipment If abnormal noise or vibration occurs have the problem corrected before further use Cleaning Maintenance and Lubrication 1 BEFORE EACH USE inspect the general condition of the tool Check for loose hardware misalignment or binding of moving parts cracked or broken parts damaged electrical wiring and any ot...

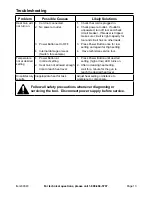
Страница 13: ...r tool and circuit has no other loads 3 Press Power Button once for low setting and again for High setting 4 Have technician service tool Temperature not at desired setting 1 Power Button at incorrect setting 2 Heat Gun not allowed enough time to reach heat level 1 Press Power Button until desired setting high or low LED turns on 2 After increasing heat setting wait for a minute for the gun to rea...

Страница 14: ...ousing 1 7 LED PCB Support 1 Part Description Qty 8 Main PCB Support 1 9 Tube Support 1 10 Heating Tube 1 13 LED PCB 1 14 Main PCB 1 15 Power Cord 1 Parts List and Diagram Parts List Record Product s Serial Number Here Note If product has no serial number record month and year of purchase instead Note Some parts are listed and shown for illustration purposes only and are not available individually...

Страница 15: ...Page 15 For technical questions please call 1 888 866 5797 Item 69343 Diagram ...

Страница 16: ...ctly or indirectly to misuse abuse negligence or accidents repairs or alterations outside our facilities criminal activity improper installation normal wear and tear or to lack of maintenance We shall in no event be liable for death injuries to persons or property or for incidental contingent special or consequential damages arising from the use of our product Some states do not allow the exclusio...

Отзывы: