24
Megohmmeter Models 6528/6529
4. MAINTENANCE
The instrument has no parts that can be replaced by personnel who are not trained and approved.
Any non-approved repair or other work, or replacement of a part by an “equivalent,” may severely
compromise safety.
4.1 Cleaning
Periodically wipe the case with a damp cloth and mild detergent. Do not use abrasives or solvents.
Dirt or moisture in the terminals can affect the readings. Dry the instrument thoroughly after cleaning
and before use.
4.2 200mA Fuse Test
To avoid electrical shock, remove the test leads and any input signals before
replacing the fuse.
1.
Turn the rotary switch to
Ω
.
2.
Short circuit both terminals.
3.
If the current measurement is 0, the fuse needs to be replaced.
4.3 Battery and Fuse Replacement
To avoid false readings, which could lead to possible electric shock or personal injury,
replace the batteries with LR6 batteries as soon as the battery indicator
appears.
To prevent damage or injury, install ONLY replacement fuses with the specified amperage,
voltage, and interrupt ratings. Disconnect test leads before removing the battery cover.
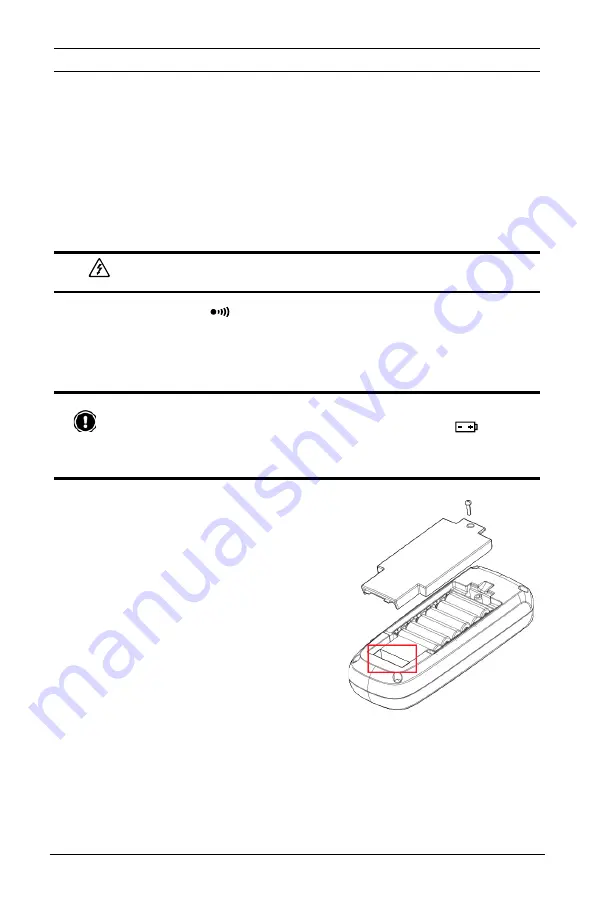
Replace the batteries and fuse as follows:
1. Using a Phillips screw driver, remove the battery
cover screw on the back of the instrument.
2. Remove the old batteries.
3. Install the batteries, respecting polarity.
4. Locate the fuse in its slot near the base of the
instrument (indicated by the red square in the
illustration to right).
5. Using a thin flathead screwdriver or similar
implement, carefully remove the fuse.
6. Insert the replacement fuse (Fast Fuse 200mA
1000V 10kA size: 6.3 x 32mm), ensuring both
ends are firmly pressed into the fuse holding
clips.
7. Replace battery door and tighten the screw.


