


29
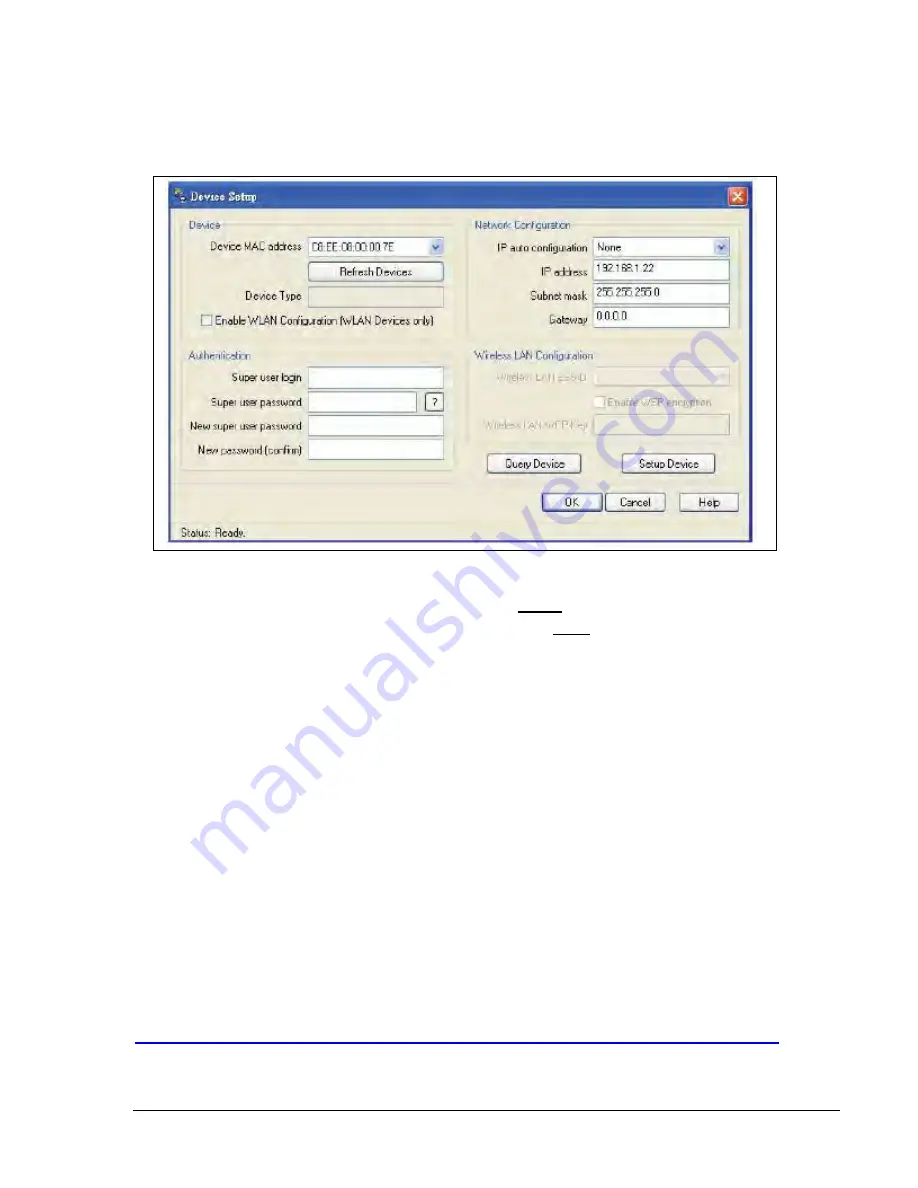
5. Under Device, Click
Refresh Devices
to search for the connected IP KVM Switch.
6. Select the MAC address of the KVM Switch that you want to setup and click
Query Device
.
(The MAC address of the KVM Switch is printed on the product label.)
7. To change the default password, under Authentication,
a. Enter the Super user login. The default is
super
(all lower case)
b. Enter the Super user password. The default is
pass
(all lower case)
c. Enter the new super user password (this will change the password).
d. Re-enter the new password (do not forget the new password)
e. Click
Setup Device
to change settings.
The software will respond “Successfully configured device” or “Permission denied”
8. To change the IP address, subnet mask, gateway, under Network Configuration,
a. Select IP auto configuration none
b. Enter the desired IP address, subnet mask and gateway (if applicable)
c. Under Authentication, enter the Super user login and password
d. Click
Setup Device
to change settings.
The software will respond “Successfully configured device” or “Permission denied”
9. To access the KVM Switch’s IP console, open your web browser and type in the switch’s IP
address. You can use HTTP or HTTPS.
10. A login screen will appear. Enter the username (super) and password (pass or as set in step
7 above).
For detailed setup of the IP Console, refer to the
37209_KVM_IP_CONSOLE_USER_MANUAL
.
Download the manual from:
http://www.chatsworth.com/uploadedFiles/Files/37209_KVM_IP_CONSOLE_USER_MANUAL.pdf


