Changhong Electric S-CK Series Скачать руководство пользователя страница 4

                                                    Laser.changhong.com


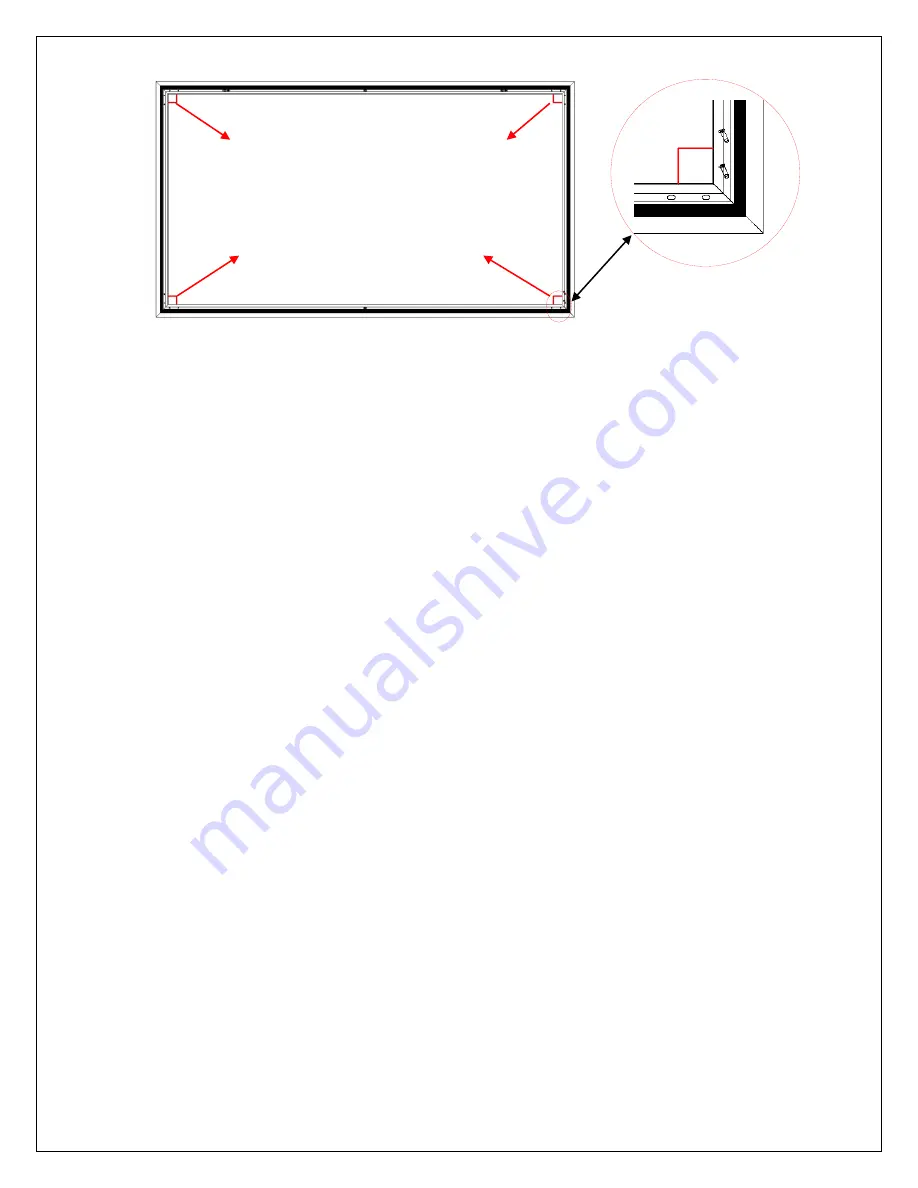
Then fasten the four angles with the 

M5x16 Screws (G)


Four corners join correctly to form a perfect 

rectangle. Use 

screwdriver 

to fasten the 

M5x16 screws (G)

 into each corner by 

aligning the frame screw holes to the holes 

in the 

elbow joint (A)

Содержание S-CK Series

Страница 1: ...rizontal structure DO NOT wipe the screen up and down or in a circular motion Wipe from left to right only 2 Please clean the dust on the screen surface with a soft brush or microfiber cloth rough tow...

Страница 2: ...2 Screw x 2pc J Screw and anchor x 6 9 pcs K Black Tape x1 bag L Bezel trim x6 pcs M Corner sleeve x4 pcs N White gloves x2 pcs Frame Assembly 1 Insert the center joint into one of the horizontal fram...

Страница 3: ...to the elbow joint A 7 Join the remaining horizontal long frame B with the frame built in the previous steps as shown below 8 Make sure all four corners are properly in place to form a perfect square...

Страница 4: ...ten the four angles with the M5x16 Screws G Four corners join correctly to form a perfect rectangle Use screwdriver to fasten the M5x16 screws G into each corner by aligning the frame screw holes to t...

Страница 5: ...flat weighted object at the edge PVC Velcro end to prevent it from moving out of place Please keep the front of the material face down 2 It is strongly recommended for two people to unroll the materia...

Страница 6: ...o connection and repeat the above steps so the frame is not exposed 7 Proceed to attach the rest of the material to the frame as described in the illustrations below Note Represents the screen materia...

Страница 7: ...lcro connections on the corners Lay the Velcro end on the screen material over the Velcro end of the frame and keep it within the edge Proceed in the following sequence Attach in the following sequenc...

Страница 8: ...on each end of the support bar with the M6 hex step nut H on the top and bottom frames Then fasten with the M6x12 screws I Pull back the screen material from the Velcro connection along the edges of...

Страница 9: ...to Figure 2 below for a visual reference NOTE Make sure the bottom edge trim with the Changhong Screens logo is installed on the correct side The back of the material should be labeled with a DOWN st...

Страница 10: ...eeves have been snapped into each corner of the frame it is ready to be wall installation Diagonal Size Note The Diagonal Size of the S100CK before and after installing the edge trim strip S120CK comp...

Страница 11: ...ojectors as illustrated in example 1 below Overhead placement or a standard projector will make the image very dark on account of the screen s absorbent layer deflecting light that is not aligned with...

Страница 12: ...the length of the horizontal frame 2 The installation height must be based on your projector s throw height and the distance between your projector and the screen since this screen is just for Ultra...

Отзывы: