Installation
14
3.
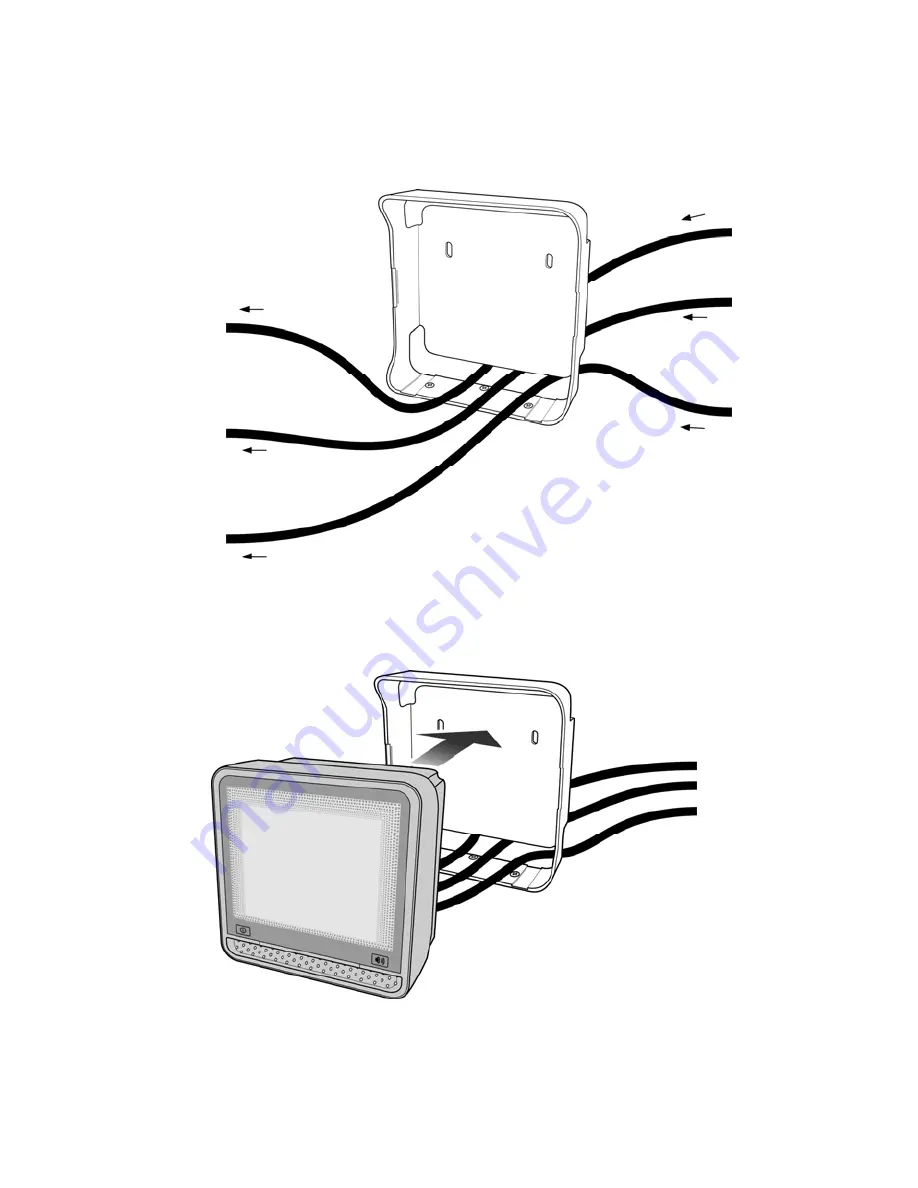
Lead the communication cable and power supply cable through the slit.
4.
Make sure that connectors and cables are placed as indicated in the figure
and attach the scanner to the bracket.
5.
Plug the remote ends of all cables into the appropriate connections of your
host POS-system.
to socket for
power supply
AUX (optional)
to Data port 1
of scanner
Coming from
power supply
Coming from
host system
Coming from AUX
equipment (optional)
Содержание N-4060
Страница 1: ......
Страница 2: ......
Страница 3: ...User s Manual...
Страница 6: ......
Страница 9: ...Chapter 1 Product Overview...
Страница 16: ...Product Overview 8...
Страница 17: ...Chapter 2 Installation...
Страница 35: ......
Страница 36: ......


