Champ DM3112 Скачать руководство пользователя страница 5


LED Indicator Definition 
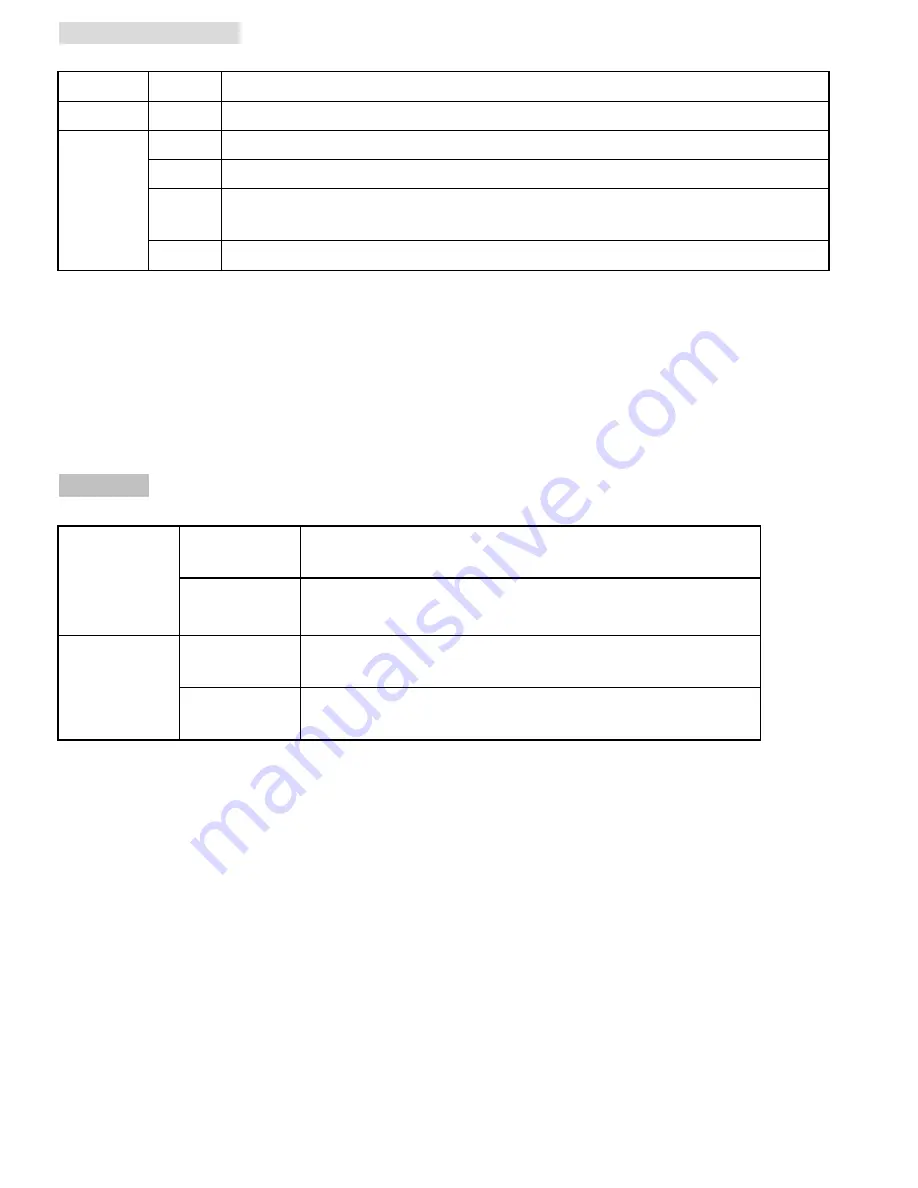
 

LED 

Color 

Indication 

Network 

Blue 

Flash blue while Network activity. 

Power 

Red 

Steady red for booting up process 

Blue 

Steady blue for booting up completion 

Purple   

Flash purple during firmware upgrading; when reset button pressed for at least 5 sec. 
to factory default 

Unlit   

When you press reset button; or Power off 

 
Reset: 

When the device is empowered, press the Reset Button to reboot the device, or hold the Reset Button for   

10 seconds to the settings back to factory default.   

Reset process: 

Press reset button until indicator Unlit

steady red (booting up process)

steady blue (booting up 

completion)   

Reset to default process: 

Press until indicator steady blue

steady red (booting up process)

steady blue (booting 

up completion) 

 
Power Mode   
 

PoE Mode                                        


Power 
Requirement 

PoE (IEEE802.3af) with Class 3                                                                

Power 
Consumption   

4.19W 

Adaptor Mode                            

Power 
Requirement 

12V/1A Adaptor                                                                                       

Power 
Consumption   

4.24W 


Содержание DM3112

Страница 1: ...1...

Страница 2: ...ing Safari Browser See P 10 Change light environment setting See P 11 Change the Web Interface into your preferred language See P 11 Application of IP Camera See P 12 Package Contents Software The fol...

Страница 3: ...ne Dome bubble Top cover Ethernet Socket Lens MicroSD SDHC Reset Power LED Indicator Network LED Indicator External I O connector DC 12V 1A Internal microphone Light Sensor IR LEDs 12units Distance 10...

Страница 4: ...ct the wires of the audio input device to GND Pin 1 and AUDIO IN Pin 3 4 Audio Output Connect the wires of the audio output device to GND Pin 1 and AUDIO OUT Pin 4 5 Digital Output 1 Uses an NPN trans...

Страница 5: ...the device is empowered press the Reset Button to reboot the device or hold the Reset Button for 10 seconds to the settings back to factory default Reset process Press reset button until indicator Unl...

Страница 6: ...lease see below figure 1 Attached the alignment sticker to the wall ceiling Drill three holes into the wall which two for screws and one for cable if you want to route cables through routing hole 2 Al...

Страница 7: ...ed screw anchors 2 Align the two holes on the L type bracket to the two plastic anchors on the wall or ceiling insert the supplied screws to the corresponding hole and fix them 3 Secure the plastic pl...

Страница 8: ...hread the network and I O cable through thread lock sealing nut claw using the claw to round all cable and cable gland To seal all cable in the claw part tightly in case of water leaking Attach the ca...

Страница 9: ...e cables through conduit hole A or B If you want to use hole A remove the plug with a screwdriver Thread the network and I O cable through thread lock sealing nut claw using the claw to round all cabl...

Страница 10: ...he wall or ceiling insert the supplied screws to the corresponding hole and screw them 4 Adjust the angle of camera to aim the shooting area F Wall mounting and Ceiling mounting f1 Without Power over...

Страница 11: ...n the lens module up and down to your desire tile position 3 Turn the lens module to adjust the image orientation to satisfied angle H Focus adjustment tool instruction To adjust lens focus place the...

Страница 12: ...ance as shown below If the image is upside down please use the image rotate function in Video Setting I Completion 1 Clean the dome bubble to remove the dust and finger print 2 Fix the tamper proof sc...

Страница 13: ...IP Camera using Intelligent IP Installer 1 Please check two settings before using Intelligent IP Installer a Browser s Internet Properties Security Default Level b Browser s Internet Properties Priva...

Страница 14: ...essing the IP Camera for the first time a yellow information bar appears below the address bar his website wants to install the following add on AxvideoView cab 5 Click the information bar and select...

Страница 15: ...g environment setting 1 Select Safari icon 2 Click Bonjour function and select the camera you wish to access 3 Enter name and password to login to the IP camera Default is admin admin 4 The monitor im...

Страница 16: ...lect the environment setting you wish Change the Web Interface into your preferred language Use the settings screen to set the language of the Web Interface Go to Setting System Maintenance 1 Go websi...

Страница 17: ...4 Application of IP Camera...

Страница 18: ...3...

Отзывы: