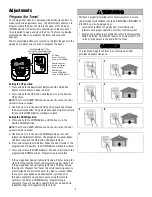
background image

1

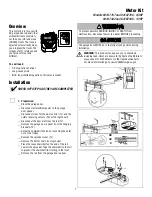
This motor kit is for use with 
AC garage door openers that 
utilize electronic controls to 
set the open (UP) and close 
(DOWN) travel. The force is 
adjusted automatically when 
you program the travel. The 
images are for reference and 
your product may look 
different.

You will need:

•  1/4" magnetic nut driver

• Long-nosed 

pliers

•  5/16" long-shafted magnetic nut driver and socket

Installation

Overview

 1. 

Preparation:


     Close the garage door.


      Disconnect all electrical power to the garage 

door opener.


      Disconnect wires for the door control (1a) and the 

safety reversing sensors (1b) at the logic board.


     Disconnect the door arm from the rail (1c).


      Remove the garage door opener from the hanging 

brackets (1d).


      Relax the chain/belt tension by loosening the outer 

nut on the trolley.


     Remove the sprocket cover (1e).


     Remove the belt or chain from sprocket.


      Place the loose chain/belt on the end of the rail 

nearest the sprocket. Tape the chain/belt to the rail 
to prevent the chain/belt from falling to the floor.


     Remove the rail from the garage door opener.

To prevent possible SERIOUS INJURY or DEATH from 
electrocution, disconnect power to opener BEFORE proceeding.

The garage door MUST be in the fully closed position during 
installation.

Motor Kit 

Models 041A7767 and 041A7766 - 3/4HP

041A7442 and 041D7440 - 1/2HP

1c

OR
OU

O

1d

1e

CHECK OFF STEPS AS THEY ARE COMPLETED

1a

1b

WARNING:

 This product can expose you to chemicals 

including lead, which are known to the State of California to 
cause cancer or birth defects or other reproductive harm. 
For more information go to 

www.P65Warnings.ca.gov

Содержание 041A7767

Страница 1: ...1d Relax the chain belt tension by loosening the outer nut on the trolley Remove the sprocket cover 1e Remove the belt or chain from sprocket Place the loose chain belt on the end of the rail nearest...

Страница 2: ...n the threaded shaft until it is finger tight Place a 7 16 open end wrench on the square end Tighten spring to a 1 1 4 tension 4e Reconnect power to the garage door opener Proceed to Adjustments 3 Ins...

Страница 3: ...garage door opener lights will flash twice and the UP Button will begin to flash 6 Press and release the UP Button When the door travels to the programmed UP position the DOWN Button will begin to fla...

Страница 4: ...system MUST be tested every month After ANY adjustments are made the safety reversal system MUST be tested Door MUST reverse on contact with 1 1 2 high 3 8 cm object or 2x4 laid flat on the floor Tes...

Страница 5: ...Pr paration Fermez la porte de garage D connectez l alimentation lectrique l ouvre porte de garage D connectez les fils de la commande de porte 1a de m me que les d tecteurs inverseurs 1b au niveau d...

Страница 6: ...t de la porte en utilisant la t l commande ou les boutons HAUT et BAS La programmation est termin e Si la porte ne s actionne pas r p ter les tapes de la programmation de la course Essai du syst me d...

Страница 7: ...s sensores 1b de seguridad Desconecte del riel 1c el brazo de la puerta Desmonte el abre puertas de las m nsulas de soporte 1d Afloje el mecanismo de cadena correa con la tuerca externa del trolley Qu...

Страница 8: ...totalmente abierta coloque una tabla de 1 1 2 de pulg 3 8 cm o de 2x4 sobre el piso centrada bajo la puerta 2 Presione el bot n pulsador del control remoto para cerrar la puerta La puerta DEBE retroce...

Отзывы: