


Chapter 2
7NJL1 User’s Guide
27
2.6 CBOX™ 2 Setup
1. Gently
insert
CBOX™2
into the regular 5-1/4” drive bay at the front
of system chassis and securely tighten the side screws.
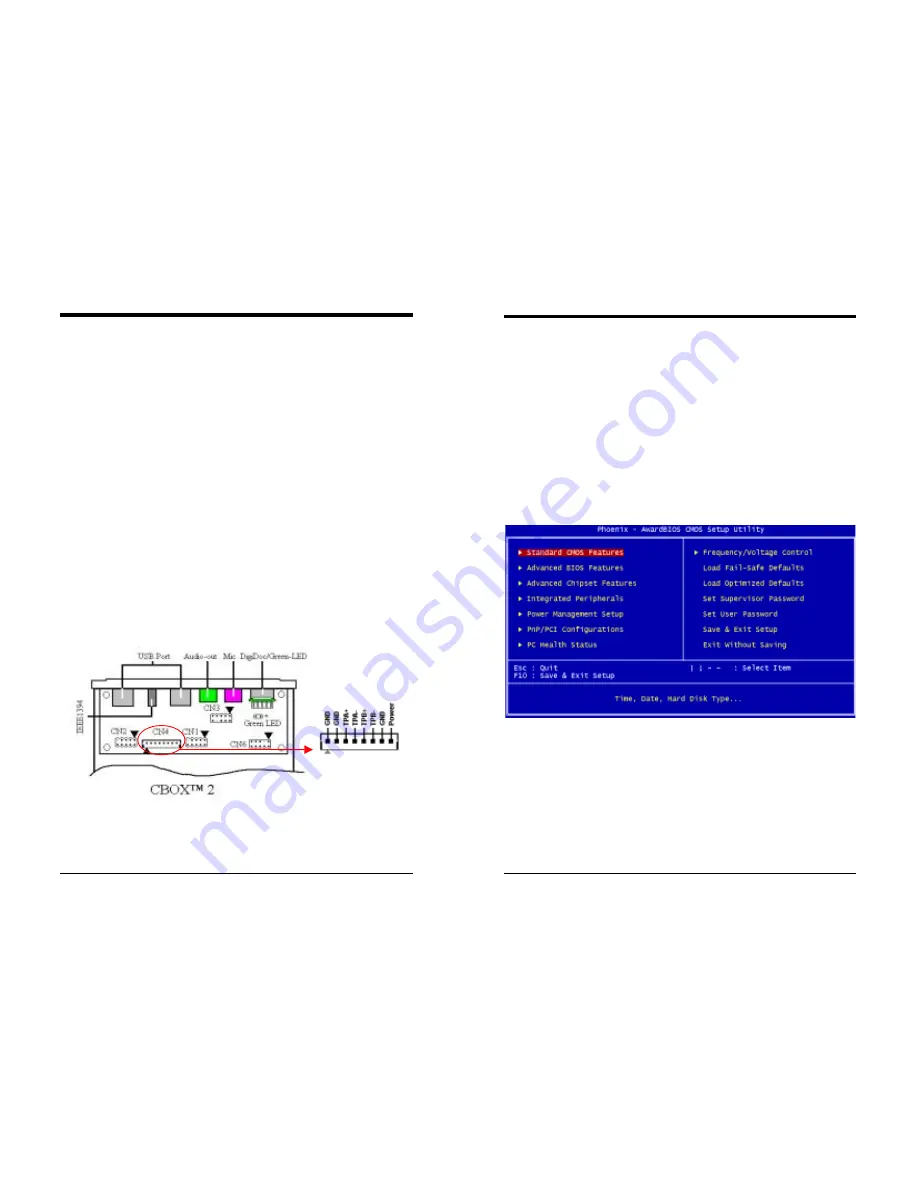
2.
Connect Motherboard to
CBOX™ 2
Function Motherboard
CBOX™
2
USB 2 & 3
CN23
CN1
USB 4 & 5
CN23A
CN2
*Front Audio
CN24
CN3
IEEE 1394
None
CN4
Green Mode LED
CN1A
2 pin
80 Port Display
CN25
CN6
Note:
The 7NJL1 excludes IEEE 1394 function. If customers require IEEE 1394
function, please purchase one IEEE 1394 card to expand the function.
*
Remove
CN24
Jumper Caps on motherboard
5-6
,
9-10
before installation.
USB Cable (10 pin)
x 2
Front Audio Cable (10 pin)
x 1
80 Port Display (10 pin)
x 1
IEEE-1394
Cable
x
1
Green Mode LED Cable (2 pin)
x 1
Note
:
Each cable got
security-proof
.
Chapter 3
28
7NJL1 User’s Guide
Chapter 3 BIOS Setup Program
Phoenix-Award BIOS ROM has a built-in setup program that allows users to
modify the basic system configuration. This information is stored in CMOS
RAM so that it can retain the setup information, even when the power is turned
off.
To enter the
Phoenix-Award BIOS
setup program press the [Delete
key
]
when you
Power on
or
reboot
the computer system. The primary screen as
shown in Figure 3-1 is a list of the menus and functions available in the setup
program. Select the desired item by your arrow keys and press enter to make the
changes. Operating commands are located at the bottom of this and all other
BIOS screens. When a field is highlighted, on-line help information is displayed
on the right side of the screen.
Figure 3-1


