background image


Programming Instructions  

for the OMEGA ACTIVE System 

- For Offline-Programming - 


Translated 

programming instructions 

version 1.41, 11/2014

Содержание Omega Active

Страница 1: ...Programming Instructions for the OMEGA ACTIVE System For Offline Programming Translated programming instructions version 1 41 11 2014...

Страница 2: ...and understood the entire contents of these Programming Instructions and other required user manuals operating and fitting instructions Depending on the configuration of your locking system you may r...

Страница 3: ...ming Instructions a number of elements are highlighted with defined layout features so you can identify at a glance whether a passage contains standard text a list or individual steps in a sequence of...

Страница 4: ...nation of the safety notes 10 Intended use 11 Remarks 11 Manufacturer 11 Service 11 Description 12 Correct door operation 15 Transport notes 15 For locking cylinder 16 For electronic shields 17 Exampl...

Страница 5: ...Concise programming guide 57 Defining the SYSTEM MASTER 57 Authorizing a PROGRAM MASTER 58 Authorizing a locking medium 59 Deleting the authorization of a PROGRAM MASTER 60 Programming of optional me...

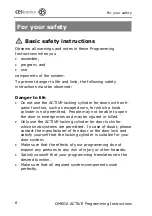
Страница 6: ...r which a knob cylinder is not permitted People may not be able to open the door in emergencies and may be injured or killed Only use the ACTIVE locking cylinder for door locks for which knob systems...

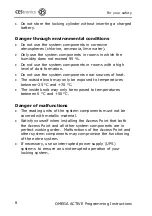
Страница 7: ...parts such as batteries or screws Danger of property damage To prevent property damage the following safety instructions should be observed Always have repairs performed by properly qualified personn...

Страница 8: ...near sources of heat The outside knob may only be exposed to temperatures between 25 C and 70 C The inside knob may only be exposed to temperatures between 0 C and 50 C Danger of malfunctions The read...

Страница 9: ...an them if necessary Observe the correct polarity when inserting the batteries Never attempt to recharge non rechargeable batteries There is a risk of explosion Never short circuit the batteries Alway...

Страница 10: ...ACTIVE Programming Instructions 10 Explanation of the safety notes These Programming Instructions include safety notes of the following types ATTENTION ATTENTION notes warn against possible property o...

Страница 11: ...r use is considered to be improper and may result in property damage or even personal injury CEStronics GmbH does not accept any liability for any damage resulting from improper use Remarks This Progr...

Страница 12: ...locking cylinders These components are the locking devices that grant or refuse access through your doors the optional CP100 programmer This accessory provides an alternative means of programming you...

Страница 13: ...r manual programming You can additionally use the CP100 programmer to program locking devices without a wireless link In this case the CP100 serves as your data communicator between your PC and the lo...

Страница 14: ...ng medium and if the locking device is a locking cylinder the outside knob is coupled with the follower and the door can be opened by rotating the outside knob if the locking device is a WT A I or WT...

Страница 15: ...ns 15 Correct door operation NOTICE Damaging the double knob cylinder by false door operation possible Use only the door handle for opening and closing the door like shown in the illustration Don t op...

Страница 16: ...lose to one another or too close to locking media This will discharge the battery To prevent interaction between cylinders during transport please observe the following notes Always keep locking cylin...

Страница 17: ...one another or too close to locking media This will discharge the battery To prevent interaction between shields during transport please observe the following notes Always keep electronic shields at...

Страница 18: ...ons 18 Example of a system overview SYSTEM MASTER PROGRAM MASTER Locking media Locking devices Prepare an overview or a locking plan for your programming This will enable you to determine at any time...

Страница 19: ...authorized for the wall terminal no 3 The locking medium no 4 was authorized for the locking devices no 4 no 5 and no 6 The PROGRAM MASTER no 3 was used to authorize the locking media no 5 and no 6 Th...

Страница 20: ...mming Instructions 20 Manual programming For manual programming you require the following components 1 your locking medium of choice 2 your locking device of choice locking cylinder shield or wall ter...

Страница 21: ...e the free access The SYSTEM MASTER 3 is used to authorize the PROGRAM MASTER 4 for the locking system Each system has one and only one SYSTEM MASTER and a maximum of ten PROGRAM MASTERS The PROGRAM M...

Страница 22: ...he locking media for one or several locking devices During the programming various acoustic and visual signals are given The SYSTEM MASTER allows you to authorize up to ten PROGRAM MASTERS for your lo...

Страница 23: ...green as long as the SYSTEM MASTER is within reading range Remove the SYSTEM MASTER for a short moment When the SYSTEM MASTER has left the reading range this is signalled with a short beep To confirm...

Страница 24: ...ed with a short beep Hold the PROGRAM MASTER in front of the reader for a short moment The LED signals green as long as the PROGRAM MASTER is within reading range When you leave the range this is sign...

Страница 25: ...rt beep Hold the locking medium in front of the reader for a short moment The LED signals green as long as the locking medium is within reading range When you leave the range this is signalled with a...

Страница 26: ...n front of the reader for a short moment The LED signals green as long as the PROGRAM MASTER is within reading range When you leave the range this is signalled with a short beep If you wish to authori...

Страница 27: ...d the SYSTEM MASTER in front of the reader The LED signals green as long as the SYSTEM MASTER is within reading range When you leave the range this is signalled with a short beep Now hold the PROGRAM...

Страница 28: ...thin reading range When you leave the range this is signalled with a short beep Hold the locking medium the authorization of which you want to delete in front of the reader until you hear two short be...

Страница 29: ...minal have been deleted Remove the PROGRAM MASTER from the reader Deleting the authorization of optional Master media In the deletion process the authorizations of the Master medium are deleted Procee...

Страница 30: ...ine the allocation to a locking system The SYSTEM MASTER grants all authorizations on the highest level For each locking system there is one and only one valid SYSTEM MASTER With the SYSTEM MASTER you...

Страница 31: ...authorize and delete the authorization of your locking media For further information on the programming of the SYSTEM MASTER and PROGRAM MASTER please refer to page 23 For further information on the...

Страница 32: ...e For wall terminals this is the period during which the relay is pulled up To set the opening time of your locking devices with the TIME MASTER proceed as follows Rotate the outside knob of the locki...

Страница 33: ...ng cylinder by at least one notch or touch the proximity sensor Hold the RELEASE MASTER for about two seconds in front of your locking device Confirmation 1 x short signal Deactivate enable condition...

Страница 34: ...the proximity sensor Hold the BLOCK MASTER for about two seconds in front of your locking device Confirmation 1 x short signal Deactivate blocked condition Rotate the outside knob of the locking cylin...

Страница 35: ...y To set the RF mode Online mode of your locking devices with the RF INI MASTER proceed as follows Turning the outer knob of the cylinder to at least a notch point or touch the proximity sensor Keepin...

Страница 36: ...ch point or touch the proximity sensor Keeping the RF INI master before the locking device until the following signaling is finished As a result you get the green signal for about five seconds as well...

Страница 37: ...d your locking devices To verify the quality of the RF link to your locking devices proceed as follows Hold the RF TRACE MASTER for about two seconds in front of your locking device The function is pe...

Страница 38: ...Server 2013 XP and Windows Server 2003 are no longer supported 1 GHz processor at least 1 GB RAM at least 1 GB free hard disk memory Network card TCP IP CD ROM drive for software installation One fre...

Страница 39: ...Programming Instructions 39 Setting up a Online radio network Setting up a system for manual programming For further information please refer to the User Manual of the CEStronics Suite which is availa...

Страница 40: ...Keeping the RF INI MASTER again longer before your locking device As result you get the green signal for about five seconds as well as an acoustic signal The online mode is now turned on To put your l...

Страница 41: ...locking medium 1 in front of the outside knob 2 of the locking cylinder The reader module in the outside knob identifies the locking medium Green LEDs in the light ring of the locking cylinder signal...

Страница 42: ...During the opening time you can open the door During this opening time the locking cylinder does not respond to any other locking media To open the door lock rotate the outside knob in the correspondi...

Страница 43: ...ration hold your authorized locking medium 1 in front of the reader 2 for about one second The green LED in the wall terminal goes on to signal enable status and the connected door system opens During...

Страница 44: ...the connected door system opens During the set opening time you can pass through the door During this opening time the wall terminal and or long range reader does not respond to any other locking medi...

Страница 45: ...the outside shield detects the locking medium The green LED and a short beep of the reader module signal the enabled status The handle is coupled with the lock Use the handle of the outside shield to...

Страница 46: ...range of the IES This range is about 70 cm You do not have to hold your locking medium in your hand Touch the proximity sensor 1 The reader module in the outside shield identifies the locking medium T...

Страница 47: ...only for the functional extension of existing online and offline systems RF Stick Set Part no 248605V Includes the OMEGA ACTIVE RF Stick RF STICK MASTER OMEGA ACTIVE SYSTEM MASTER a CD ROM with the C...

Страница 48: ...ed the RF STICK MASTER An RF STICK MASTER authorizes RF Sticks The RF Stick is always tied to your system licence One locking device can manage up to ten RF STICK MASTERs The maximum number of RF STIC...

Страница 49: ...installation You may only have to install the drivers for the RF Stick see also page 52 In case of the RF Stick Set package Part no 248605V you receive a complete set for a new installation of the sof...

Страница 50: ...cedure described below only applies to new first time software installations Please refer also to the chapter on importing locking systems in the OMEGA ACTIVE software operating instructions These are...

Страница 51: ...Opening locking devices OMEGA ACTIVE Programming Instructions 51 To work with the RF Stick proceed as follows Authorize the RF STICK MASTER at your locking device...

Страница 52: ...stem for the installation The installation is now complete and you can start using the RF Stick Launch the OMEGA ACTIVE software and log in After a few seconds the two status messages System ready and...

Страница 53: ...will be aborted If the distance between the RF Stick and the locking device is too long longer than 10 m the locking device will signal the lacking connection with a long beep and red LEDs When the l...

Страница 54: ...lled Green LEDs about 5 sec Long beep Transmission cancelled Green LEDs short flashing Green LEDs about 2 sec Short beep Data transmission in progress Acknowledgement of the end of the data transmissi...

Страница 55: ...k settings of your PC The power supply of Access Points is interrupted Check the power supply of your Access Points Locking devices are outside the radio frequency range of Access Points Check the per...

Страница 56: ...oo far away from the locking device Hold the locking medium in the reading range of the locking devices The locking cylinder is not programmed Program the authorizations for the respective locking dev...

Страница 57: ...Concise programming guide OMEGA ACTIVE Programming Instructions 57 Concise programming guide This programming overview again shows all programming procedures Defining the SYSTEM MASTER...

Страница 58: ...Concise programming guide OMEGA ACTIVE Programming Instructions 58 Authorizing a PROGRAM MASTER...

Страница 59: ...Concise programming guide OMEGA ACTIVE Programming Instructions 59 Authorizing a locking medium...

Страница 60: ...VE Programming Instructions 60 Deleting the authorization of a PROGRAM MASTER When the authorization of the PROGRAM MASTER is deleted all the authorizations of locking media that were granted with tha...

Страница 61: ...mming guide OMEGA ACTIVE Programming Instructions 61 Programming of optional media The programming sequence is the same for all optional media The medium XY MASTER is used below as an example for all...

Страница 62: ...Concise programming guide OMEGA ACTIVE Programming Instructions 62 Turn on Online mode RF INI MASTER Turn on and off Online mode RF INI MASTER No Connection found...

Страница 63: ...Concise programming guide OMEGA ACTIVE Programming Instructions 63 Deleting the authorization of a locking medium...

Страница 64: ...ization of all locking media The information and data contained in this document are subject to change without notice Without the express written permission by CEStronics no part of this document may...

Страница 65: ...1 204 229 info ces locks de CESitalia srl V d vecchie Fondamenta 4 Stra e d A Gr ndungen 4 I 39044 Egna Neumarkt BZ 39 0471 812 294 39 0471 812 294 info it ces eu www ces eu it CESrom srl Str Metalurg...

Отзывы: