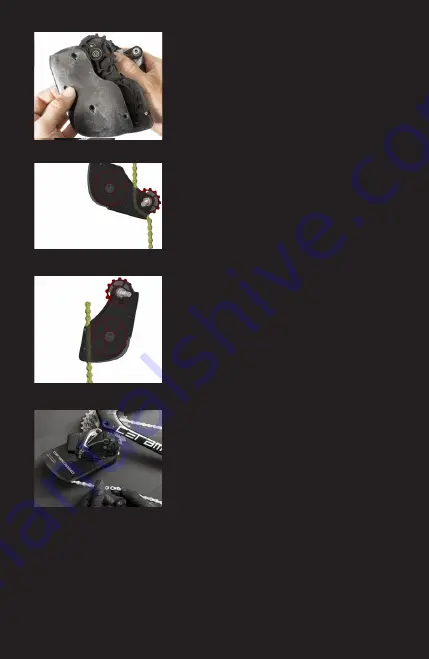
12.
Install the 15 tooth pulley on the upper post
and the 19 tooth pulley on the lower post of
the OSPW Aero cage. Ensure the etching on
the pulleys face outward (facing the cage plate
with the logo). Align the back cage plate &
install the 2.5mm screws for each pulley to a
torque of 1.5Nm, and the 2.0mm screw for the
center and lower towers to a torque of 0.9Nm .
13.
Install the derailleur onto the bike. Shift down
to the bottom (smallest cog) and install the
rear wheel. To install the chain, hold the cage
back to be horizontal to the ground. Feed the
chain from the back of the cage, between
the pulleys aiming to exit the cage in front of
the upper pulley. Pull half the chain through
the system.
14.
Ensure the remainder of the chain is not
twisted, and feed the free end into the back
of the cage and around the lower pulley.
15.
Install the derailleur onto the bike. Shift
down to the bottom (smallest cog) and
install the rear wheel. Follow the chain
length guide below to cut the chain to the
appropriate length. Ensure the derailleur
hanger is accurately aligned, check the
upper and lower stops of the derailleur, and
set the b-limit gap following the factory
SRAM guidelines; 14mm for a 26T cog,
10mm for a 28t cog, 5mm for a 33T or 36T
cog. Adjust the trim for proper alignment
between the cogs and pulley wheels.
Confirm successful shifting through all gear
combinations. If in doubt, have a qualified
mechanic make the final gear adjustments.


