background image

3

SETTING THE USER CODES AND 
PASSAGE CODE contd . . .

Repeat these steps until all eight user codes and the

passage code have been successfully set.  

Note: Each user code must be entered while the blue

backlight is on.  If light goes out, you must re-enter the

master code to unlock the lock again.

CHANGING USER CODES

In addition to the master code, each user code has the

ability to change their own code.

Step 1.

Enter the user code you want to change and press the

#

’ key.

Step 2.

After the beep stops and before the blue backlight goes

off, enter the new user code and press the ‘

*

’ key.  (Eg.  If

user one is resetting their code, the new code must

again begin with ‘

1

’)

Once you hear two beeps the new user code has been

saved into the lock.  

Note:  Door should always be ajar when adding /

changing codes.

Содержание Code lock YL-99

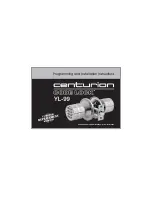
Страница 1: ...Programming and Installation Instructions Passed ISO9001 2000 international system ratification TM...

Страница 2: ...er The master code is 0 the passage code is 9 and the user codes are 1 8 The master code must be set up in order to input user codes MASTER CODE The master code is the most important code in the serie...

Страница 3: ...de will return to the manufacturer default code 0123 USER CODES AND PASSAGE CODES The user and passage codes can be any number and combination of 0 9 with a maximum of 15 digits Only the master code c...

Страница 4: ...CHANGING USER CODES In addition to the master code each user code has the ability to change their own code Step 1 Enter the user code you want to change and press the key Step 2 After the beep stops a...

Страница 5: ...nce you hear several beeps the user code selected will be erased Repeat this procedure for any other user codes you wish to delete PASSAGE MODE ONE DIGIT ACCESS The YL 99 has the ability to be set to...

Страница 6: ...IT TRAIL The lock will record the last 50 events Please contact your distributor for more information BATTERY INFORMATION The lock requires four AAA alkaline batteries which are housed in the internal...

Страница 7: ...e C Latch Assembly D Inside Rose Plate E Mounting Screws F Battery Box G Inside Knob Cover H Cover Plate Screws J Strike Plate K Wrought Box L Latch Faceplate M LED Indicator N Keypad P Emergency Powe...

Страница 8: ...e of latch plate and remove latch Fig 3a Chisel approx 3mm deep or until latch plate sits flush with door edge Fig 3b Insert latch then drill 2 x 3mm holes for mounting screws and fasten latch Fig 3c...

Страница 9: ...strike plate and mark around edge Chisel frame to approx 1 5mm depth or until strike sits flush Drill 2 x 3mm screw holes and fix strike to frame Fig 4b Fig 4a Fig 4b Step 6 Install Inside Knob Feed p...

Страница 10: ...urion Code LockTM The 12 month replacement Warranty does not cover malfunctions due to incorrect installation of the Centurion Code LockTM This Warranty applies to the original purchaser when the Code...

Страница 11: ...10 Stick template to door aligning fold correctly on door edge...

Страница 12: ...Distributed by Centurion International Wholesalers Pte Ltd 52 Horne Road 02 01 Singapore 209071 info centurioncodelock com au www centurioncodelock com au TM...

Отзывы: