background image

SKU 93760  

       For technical questions, please call 1-800-444-3353  

       PAGE 9

Anytime any maintenance or repairs are done (including clearing jams), FIRST:

1.

Disconnect the Nailer from its air supply.

2.

Empty the Magazine Assembly (73) completely.

3.

Attempt to fire the Nailer into a piece of scrap wood to ensure that it is
disconnected and is incapable of firing any Nails.

4.

Always leave the Magazine Assembly (73) open during maintenance.  The
Magazine is spring loaded, and may cause parts or a Nail to fly out of the Nailer.

CLEARING JAMS

1.

Occasionally, a Nail may become jammed in the firing mechanism of the
Nailer, making the tool inoperable.  To remove a jammed Nail, disconnect the
Nailer from its air supply.  Empty the Magazine Assembly (73) completely of
Nails.  Attempt to fire the Nailer into a piece of scrap wood to ensure it is
disconnected and is incapable of firing any Nails.

2.

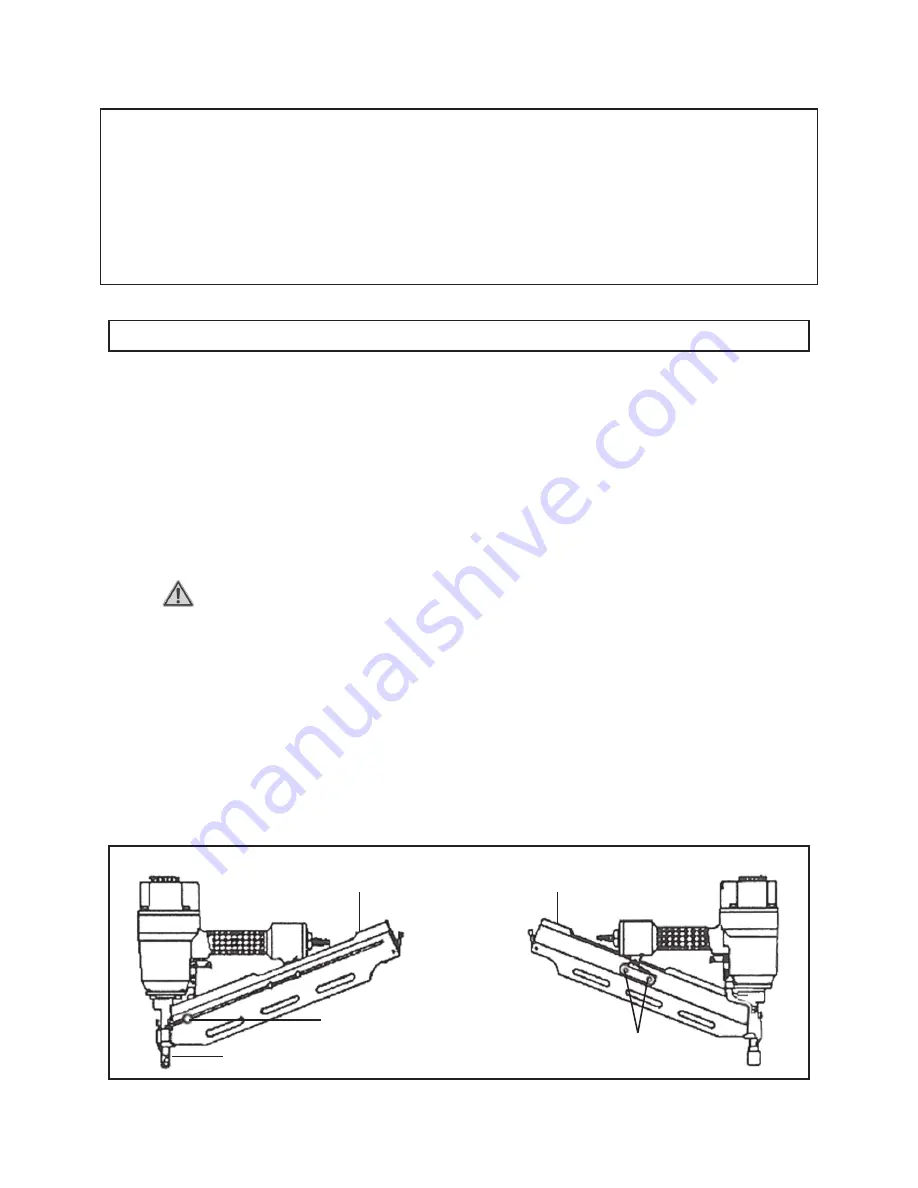
Use a pair of needle nose pliers to remove a jammed Nail 

from the back of the

Nose (40)

.  If a jammed Nail cannot be removed as described, it may be

necessary to disassemble the Magazine (73) as follows:

        CAUTION:  

If you are not clear about how to remove and re-assemble the

Magazine (73) to clear a jammed Nail, have a qualified service technician perform
this procedure.

3.

Remove the 

two Screws (35). 

 (One Screw on each side of Magazine (73).

4.

Remove the 

two Nuts (76).

5.

Slide the Magazine (73) back, off of the Nose (40).

6.

After clearing the jammed Nail, re-assemble in reverse order.

MAGAZINE (73)

MAGAZINE (73)

NOSE (40)

SCREW

(35)

NUT

(76)

Содержание 93760

Страница 1: ...ll rights reserved No portion of this manual or any artwork contained herein may be reproduced in any shape or form without the express written consent of Harbor Freight Tools For technical questions...

Страница 2: ...ock up tools and keep out of reach of children 5 Use the right tool for the job Do not attempt to force a small tool or attachment to do the work of a larger industrial tool There are certain applicat...

Страница 3: ...d altered or not working properly 10 Disconnect air hose and release any built up air pressure Never service the Nailer clear jams or disassemble with the air hose attached Always release any built up...

Страница 4: ...our circuit breaker to trip or your panel fuse to break If this happens either use the compressor without an extension cord or find a larger amperage circuit to use 19 Maintenance The maintenance outl...

Страница 5: ...onnect air supply when moving the tool in the workplace Carry the tool by the handle to avoid contact with the trigger 29 Avoid working alone If an accident happens an assistant can bring help 30 Note...

Страница 6: ...ycles fires stop immediately and have it repaired by a qualified service technician 7 Hold the tool away or off the workpiece in a safe direction The Nose 40 of the tool should return to its original...

Страница 7: ...on this tool Other people in the work area must also wear ANSI approved impact safety goggles WARNING Make sure the Nailer is not attached to the air hose when loading the tool SKU 93760 For technical...

Страница 8: ...s not depressed Once depressed gently and briefly squeeze the Trigger 58 once one Nail will be fired 4 Do not press the Nose 40 against the workpiece with extra force Allow the tool to do the work Alw...

Страница 9: ...a jammed Nail disconnect the Nailer from its air supply Empty the Magazine Assembly 73 completely of Nails Attempt to fire the Nailer into a piece of scrap wood to ensure it is disconnected and is inc...

Страница 10: ...se and have the tool repaired by a qualified service technician 10 When finished working disconnect the air supply Remove the Nails Then store the Nailer in a clean dry safe location out of reach of c...

Страница 11: ...nections for leaks 3 Have a qualified service technician install a head valve piston set Air leak near bottom of tool 1 Tighten all screws 2 Have a qualified service technician replace the bumper or h...

Страница 12: ...er Seal 63 Washer 5 18 Collar 64 Coil Spring Assembly 19 O Ring 54 4x4 65 Pin 20 Piston Assembly 66 Bushing 21 Cylinder 67 Screw M4x8 22 O Ring 72 4x3 5 68 Block 23 O Ring 67x3 69 Spring Washer 4 24 R...

Страница 13: ...urposes only and are not available individually as replacement parts SKU 93760 For technical questions please call 1 800 444 3353 PAGE 13 86 Nails not shown 87 Nails not shown 88 Goggles not shown 89...

Страница 14: ...ion of exclusion may not apply to you bear the cost of returning the product state to state WARRANTY P O Box 6009 Harbor Freight Tools Co makes every effort to assure that its products meet high quali...

Отзывы: