background image

SKU 93496     

For technical questions please call 1-800-444-3353

   Page 7

NOTE

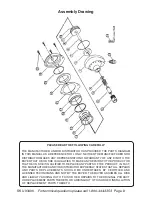
: Some parts are listed and shown for illustration purposes only and are not

available individually as replacement parts.

Parts List

Maintenance

1.

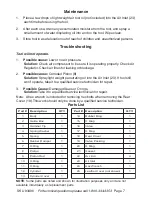
Place a few drops of light weight air tool oil (not included) into the Air Inlet (23)

each time before using the tool.

2.

After each use, drain any accumulated moisture from the tool, and spray a

small amount of water displacing oil into and on the tool. Wipe clean.

3.

Store tool in a safe location out of reach of children and  unauthorized persons.

Troubleshooting

Tool will not operate.

1.

Possible cause:

 Low or no air pressure.

Solution:

 Check air compressor to be sure it is operating properly. Check Air

Regulator. Check air lines for leaking or blockage.

2.

Possible cause:

 Corroded Piston (8).

Solution:

 Spray light weight penetrating oil into the Air Inlet (23). If tool still

won’t operate, take it to a qualified service technician for repair.

3.

Possible Cause:

 Damaged Seals or O rings.

Solution:

 Take it to a qualified service technician for repair.

#

t

r

a

P

n

o

i

t

p

i

r

c

s

e

D

.

Y

T

Q

#

t

r

a

P

n

o

i

t

p

i

r

c

s

e

D

.

Y

T

Q

1

y

d

o

B

1

4

1

g

n

i

R

r

e

b

b

u

R

1

2

x

o

B

e

d

i

u

G

1

5

1

g

n

i

R

O

1

3

p

i

T

r

e

m

m

a

H

1

6

1

e

v

l

a

V

1

4

r

e

h

s

a

W

g

n

i

r

p

S

1

7

1

g

n

i

R

O

1

5

g

n

i

r

p

S

1

8

1

r

e

v

o

C

r

a

e

R

1

6

r

e

p

m

a

D

r

e

b

b

u

R

1

9

1

g

n

i

k

c

a

P

e

v

l

a

V

1

7

g

n

i

R

O

1

0

2

g

n

i

R

O

1

8

n

o

t

s

i

P

1

1

2

t

e

k

s

a

G

1

9

d

o

R

n

o

t

s

i

P

1

2

2

w

e

r

c

S

4

0

1

g

n

i

R

O

1

3

2

t

e

l

n

I

r

i

A

1

1

1

g

n

i

R

O

1

4

2

h

c

n

e

r

W

x

e

H

1

2

1

r

e

d

n

il

y

C

1

5

2

)

n

w

o

h

s

t

o

n

(

r

e

v

o

C

r

e

h

t

a

e

L

1

3

1

r

e

v

o

C

r

e

d

n

il

y

C

1

Note:  A hex wrench is included for removing hex bolts when removing the Rear
Cover (18).This work should only be done by a qualified service technician.

Hex Bolt

Содержание 93496

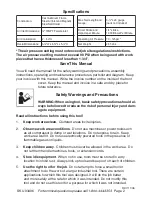
Страница 1: ...reight Tools All rights reserved No portion of this manual or any artwork contained herein may be reproduced in any shape or form without the express written consent of Harbor Freight Tools For techni...

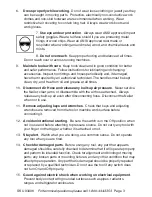
Страница 2: ...en not in use tools must be stored in a dry location to inhibit rust Always lock up tools and keep out of reach of children 5 Use the right tool for the job Do not attempt to force a small tool or att...

Страница 3: ...uilt up air pressure Never service the Nailer clear jams or disassemble with the air hose attached Always release any built up air even after disconnecting hose Disconnect the Nailer when not in use 1...

Страница 4: ...supply when done working Before storing or making any adjustments to the Nailer make sure that the compressed air is disconnected 23 Fire fasteners into an appropriate work surface only Do not attemp...

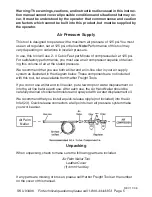
Страница 5: ...of deliver ing this volume of air at the stated pressure We recommend that you use both a filter and an in line oiler in your air supply system as illustrated in the diagram below These components are...

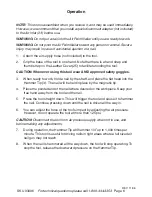
Страница 6: ...ork hold a nail by the shaft and place the flat head into the Hammer Tip 3 The nail will be held in place by the magnetic tip 4 Place the pointed end of the nail where desired on the workpiece Keep yo...

Страница 7: ...pray light weight penetrating oil into the Air Inlet 23 If tool still won t operate take it to a qualified service technician for repair 3 Possible Cause Damaged Seals or O rings Solution Take it to a...

Страница 8: ...E OR SHE IS QUALIFIED TO MAKE ANY REPAIRS TO THE PRODUCT OR THAT HE OR SHE IS QUALIFIED TO REPLACE ANY PARTS OF THE PRODUCT IN FACT THE MANUFACTURER AND OR DISTRIBUTOR EXPRESSLY STATES THAT ALL REPAIR...

Отзывы: