background image

| ENGLISH

B. MEASURING TOOLS

+

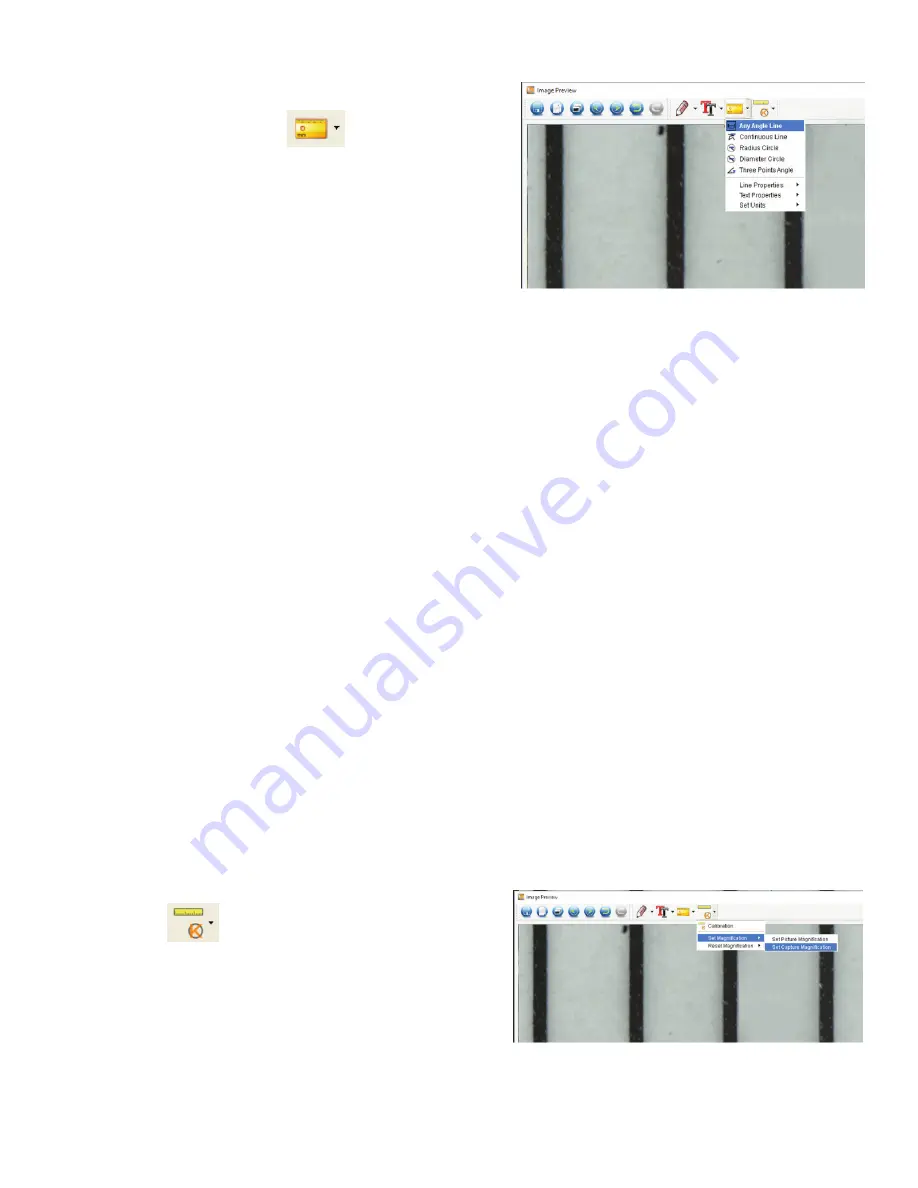
  Select the Measurement icon  

NOTE:

  This is a good time to verify your calibration. Using the ANY 

ANGLE TOOL, take a measurement of the same “known”
dimension you used in the Calibration step. If the measurement 
is the same or very close, the calibration was successful.

C. MEASUREMENT CHOICES

1.  

Any Angle Line Measurement

+

  Click from one point and drag to the next point, and then release the click.

2.  

Continuous Line Measurement

+

  The Continuous Line measurement allows you to measure 

any

 continuous desired length, not just a straight line.

Simply click and drag from one point to other desired point, and then release mouse button.

3.  

Radius Circle


Measurement

+

  Click and drag a line out to the desired radius and release the mouse button.


+

  The radius, circumference and area of the circle will show up accordingly.

4.  

Diameter Circle


Measurement

+

  Click and drag a line out to the desired diameter and release the mouse button.


+

  The diameter, circumference and area of the circle will show up accordingly.

5.  

Three Point Angle Measurement

+

  Cllick any three points in an angle and the value of the angle will be displayed.

D. SET THE CALIBRATION MAGNIFICATION

+

  So far the calibration and measurement features we have discussed involve the measurements on ONE image (your saved image) 

and the magnifi cation rate was determined by the computer when calibrating.

+

  The MicroDirect

®

 Portable Capture HD software allows you to “lock in” a magnifi cation rate, which allows you to take multiple pictures 

and then make measurements on them based on this “locked in” rate.

NOTE:

  Once the calibration is completed, you cannot change the physical position or focus range of your microscope, or you will 

change the actual magnifi cation and your measurements will not be correct.  

+

    Click    

   > Set magnifi cation > Set capture magnifi cation.

Now any pictures you take from this point forward will use the 
same magnifi cation rate for your measuring. Remember, you cannot 
change the position of the microscope or focus point or the 
magnifi cation will be wrong and you will have to reset it.

Содержание MicroDirect

Страница 1: ...PC SOFTWARE MANUAL MODEL 44316 ...

Страница 2: ... celestron com Note The software is compatible with Windows systems XP 7 8 10 only The software is not compatible with MAC operating systems 1 CD ROM Install Insert the driver CD into CD ROM Drive and this will automatically display the following interface SELECT the Install Software button The installation wizard will guide you through the whole process 2 COMPUTER SOFTWARE OPENING 1 Connect your ...

Страница 3: ... from your PC the following message box will appear 3 COMPUTER SOFTWARE DETAILS A CAPTURE STILL IMAGE There are 2 ways to capture a photograph with the Portable Capture HD software 1 Select Photo shortcut icon in the main menu bar 2 Select Capture Photo from the drop down menu ...

Страница 4: ...he interval between each photo or video in seconds to be taken d Video time sec i If you have chosen video time enter the length of the video clip in seconds you want to be taken at each interval e Total number i Set the total number of images to be taken f Once you are happy with your settings select the Start button and the time lapse will begin g Select Stop to end the time lapse NOTE Intervals...

Страница 5: ...appear Enter the known distance that you measured based on the calibration ruler The software will automatically calibrate the magnification rate Click OK and the adjusted magnification rate will show in the upper right corner NOTE Save this magnification rate so that you may use it for future settings Now you can take measurements on the saved image Select the Calibration icon and using your curs...

Страница 6: ...mouse button The diameter circumference and area of the circle will show up accordingly 5 Three Point Angle Measurement Cllick any three points in an angle and the value of the angle will be displayed D SET THE CALIBRATION MAGNIFICATION So far the calibration and measurement features we have discussed involve the measurements on ONE image your saved image and the magnification rate was determined ...

Страница 7: ...enu are MAIN 1 Line Draws a straight line on the image 2 Arrow Draws a line with an arrow on the image 3 Freehand Allows user to draw freehand Good for quick handwritten notes 4 Rectangle Draws a box Good for calling out features on the image or framing text SETTINGS 1 Line Properties Allows for setting the line type size and color To type notes on the image select the Type icon In the dropdown me...

Страница 8: ...rectory to store photos taken Videos Directory Set the directory to store video taken 2 Options Resolution Change preview size Date Time Set to display system date time on preview window Language Choose different OSD language Crossing Display cross on preview window Full screen mode Enter into full screen Click ESC or double click to exit 3 Capture Photo Take a photo Video Record a video clip 6 SO...

Страница 9: ... create moisture in the microscope housing Do not try to access the internal components of your microscope or attempt to modify it in any way Only authorized technicians should perform maintenance or repairs Keep your microscope away from water and other liquids Never use it in rain or snow Moisture creates the danger of fire and electric shock If the exterior of your microscope needs cleaning wip...

Страница 10: ...ommunications However there is no guarantee that interference will not occur in a particular installation If this equipment does cause harmful interference to radio or television reception which can be determined by turning the equipment off and on the user is encouraged to try to correct the interference by one or more of the following measures Reorient or relocate the receiving antenna Increase ...

Отзывы: