background image


6

decrease gradually to 10x as you move further away (up to about 1” or 
25mm). You will have to refocus at each position. 

3.


For high power, you will move the focus knob almost all the way to the right 

which will give you 150x.  At the high power, your views will be greatly 
magnified but somewhat darker and sometimes hard to find the object. The 
most enjoyable views can be at the lower powers which have a wider field of 
view and brighter image. Also, the microscope must be directly on the object. 


Illumination 

The LEDs of the microscope are automatically turned on when the USB cable is 
inserted into the USB port on your computer.  There is no illumination adjustment on 
this microscope but you may be able to position the microscope over the object you 
are viewing at different angles (or positions) to give the optimum illumination. 


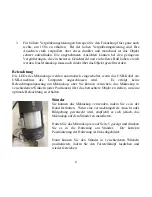
Stand 

You can use the microscope by holding it with your hand.  
However, if you want a steadier view for looking or 
imaging you may prefer to mount the microscope in the 
stand.  
 
Hold the microscope as shown on page 5 and then push it 
into the holding bracket on the stand.  The correct 
positioning of the stand bracket is shown to the left. 
 
You can then position the stand at various angles by 
loosening the locking knob and then retightening it. 

Содержание 44302

Страница 1: ...INSTRUCTION MANUAL Handheld Digital Microscope Model 44302 ENGLISH...

Страница 2: ...make usage easier for you See the microscope diagram to locate the parts discussed in this manual The microscope provides powers from 10x to 40x and 150x powers with a 19 monitor It is ideally suited...

Страница 3: ...3 USB Cable Stand Snapshot Button Microscope Focus Knob...

Страница 4: ...tor Built in y CD ROM Digital Microscope Suite y Instruction Manual Specifications Model 44302 Specifications Power 10 to 40x 150x on a 19 Monitor USB Cable 2 0 for power from a computer Illuminator 6...

Страница 5: ...re proceeding Focusing Changing Power Magnification when the microscope is placed directly over the object or slide use the focus knob to obtain a sharp focus The focus knob takes some getting used to...

Страница 6: ...e automatically turned on when the USB cable is inserted into the USB port on your computer There is no illumination adjustment on this microscope but you may be able to position the microscope over t...

Страница 7: ...ssage may say Installing Device Driver Software and shortly thereafter you may see a message Your Devices Are Ready to Use Just follow any instructions shown on the screen You will need to install the...

Страница 8: ...how something somewhat different to guide you through the installation process If the software did not begin automatically double click on My Computer and right click the CD ROM icon and it should sta...

Страница 9: ...apshot button on the microscope only with Windows OS or you can also use the keyboard by clicking enter on Capture an Image For videos you need to start stop on the icon shown on the screen Measuring...

Страница 10: ...he outside surfaces with a moist cloth y Never clean optical surfaces with cloth or paper towels as they can scratch optical surfaces easily y Blow off dust with a camel s hair brush or air blower off...

Страница 11: ...11 Coin 20x Currency 20x Currency 150x Circuit Board 40x Textile 20x Textile 150x Specimen Slide 25x Specimen Slide 150x...

Страница 12: ...Statement This device complies with Part 15 of FCC Rules Operation is subject to the following two conditions 1 This device may not cause harmful interference and 2 This device must accept any interf...

Страница 13: ...BEDIENUNGSANLEITUNG Handheld Digitalmikroskop Modell 44302 DEUTSCH...

Страница 14: ...sind in der Abbildung veranschaulicht Das Mikroskop bietet Vergr erungsleistungen von 10x bis 40x und 150x Vergr erungsleistungen mit 19 Zoll Monitor Es ist ideal f r die Betrachtung von massiven Obje...

Страница 15: ...3 USB Kabel St nder Schnappschuss Knopf Mikroskop Fokusknopf...

Страница 16: ...ert y CD ROM Digitalmikroskop Suite y Bedienungsanleitung Technische Daten Modell 44302 Technische Daten Vergr erung 10 bis 40x und 150x auf 19 Zoll Monitor USB Kabel 2 0 f r Stromversorgung vom Compu...

Страница 17: ...ndern der Vergr erung Wenn das Mikroskop direkt ber dem Objekt oder Objekttr ger steht drehen Sie den Fokusring zur Scharfstellung An die Verwendung des Fokusknopfs m ssen Sie sich etwas gew hnen Dre...

Страница 18: ...s des Computers angeschlossen wird Es erfolgt keine Beleuchtungsanpassung am Mikroskop aber Sie k nnen versuchen das Mikroskop in verschiedenen Winkeln oder Positionen ber das betrachtete Objekt zu st...

Страница 19: ...talling Device Driver Software Ger tetreiber Software wird installiert kurz darauf gefolgt von Your Devices Are Ready to Use Ihre Ger te sind betriebsbereit Befolgen Sie einfach die Anweisungen auf de...

Страница 20: ...en je nach Betriebssystem etwas abweichen Wenn die Software nicht automatisch gestartet wird doppelklicken Sie auf My Computer Arbeitsplatz und klicken dann mit der rechten Maustaste auf das CD ROM Sy...

Страница 21: ...machen nur mit Windows Betriebssystem Das ist auch ber die Tastatur m glich indem Sie bei Capture an Image Bild aufnehmen die Eingabetaste dr cken F r Videos m ssen Sie auf dem Symbol auf dem Bildsch...

Страница 22: ...y Niemals optische Oberfl chen mit Stoff oder Papiert chern reinigen da sie optische Oberfl chen leicht zerkratzen k nnen y Staub mit einem Kamelhaarpinsel oder einem Luftgebl se von den optischen Obe...

Страница 23: ...11 M nze mit 20x Geldschein mit 20x Geldschein mit 150x Platine mit 40x Stoff mit 20x Stoff mit 150x Objekttr ger mit 25x Objekttr ger mit 150x...

Страница 24: ...t entspricht Teil 15 der FCC Bestimmungen Der Betrieb unterliegt den folgenden zwei Bedingungen 1 Das Ger t darf keine sch dlichen St rungen verursachen und 2 Dieses Ger t muss alle empfangenen St run...

Страница 25: ...MANUAL DE INSTRUCCIONES Microscopio digital port til Modelo N 44302 ESPA OL...

Страница 26: ...el mismo Vea los diagramas del microscopio para ubicar las piezas detalladas en este manual El microscopio proporciona potencias de 10x a 40x y 150x potencias con un monitor de 19 pulgadas Es ideal pa...

Страница 27: ...3 Cable USB Pie Bot n para la obtenci n de fotos Microscopio Bot n de enfoque...

Страница 28: ...al Microscope Suite y Manual de instrucciones Especificaciones Modelo N 44302 Especificaciones Potencia De 10 a 40x y 150x en un monitor de 19 pulgadas Cable USB 2 0 para obtener energ a a trav s de u...

Страница 29: ...ntes de continuar Enfoque y cambio de potencia aumento Cuando el microscopio se coloca directamente sobre el objeto o el portaobjetos utilice el aro de enfoque para obtener una imagen n tida Hay que a...

Страница 30: ...uminaci n Las luces LED del microscopio se encienden autom ticamente cuando se inserta el cable USB en el puerto USB de su ordenador No hay un ajuste de la iluminaci n en este microscopio pero podr si...

Страница 31: ...ling Device Driver Software Instalando software del controlador del dispositivo y a continuaci n podr a ver el mensaje Your Devices Are Ready to Use Ya puede utilizar sus dispositivos Simplemente siga...

Страница 32: ...ara guiarle durante el proceso de instalaci n Si el software no comienza autom ticamente haga doble clic en Mi PC y haga clic en el icono CD ROM para iniciarlo y Podr ver Archivos que est n actualment...

Страница 33: ...el microscopio s lo con Windows o tambi n puede utilizar el teclado al hacer clic en entrar en Capture an Image Capturar una imagen Para v deos tiene que iniciar e interrumpir en el icono que se mues...

Страница 34: ...uperficies pticas con un pa o ni con toallitas de papel ya que pueden rayar f cilmente las superficies pticas y Limpie el polvo de las superficies pticas con una brocha de pelo de camello o con un sop...

Страница 35: ...11 Moneda a 20x Billete a 20x Billete a 150x Tarjeta de circuitos a 40x Textil a 20x Textil a 150x Muestra a 25x Muestra a 150x...

Страница 36: ...o cumple con la parte 15 de la normativa FCC Su funcionamiento est sujeto a las siguientes dos condiciones 1 Este dispositivo no puede causar interferencias perjudiciales y 2 Este dispositivo debe ace...

Страница 37: ...GUIDE DE L UTILISATEUR Microscope num rique portable Mod le n 44302 FRAN AIS...

Страница 38: ...du microscope pour rep rer les diff rentes pi ces dont il est question dans ce manuel Ce microscope offre des grossissements de 10x 40x et 150x grossissements obtenus avec un moniteur de 19 po Il conv...

Страница 39: ...3 C ble USB Socle D clencheur photo Microscope Bouton de mise au point...

Страница 40: ...Suite logicielle pour microscope num rique y Manuel de l utilisateur Sp cifications Mod le n 44302 Sp cifications Alimentation 10 40x et 150x sur un moniteur 19 po C ble USB 2 0 pour l alimentation le...

Страница 41: ...nt de puissance grossissement Lorsque le microscope est plac directement sur un objet ou une lame porte objets tournez la bague du dispositif de mise au point pour obtenir une image nette Il faut s ha...

Страница 42: ...es LED du microscope s clairent automatiquement lorsque vous ins rez le c ble USB dans le port USB de votre ordinateur Il n existe aucun r glage de l illuminateur sur ce microscope Vous pouvez toutefo...

Страница 43: ...st Installation du pilote en cours et tout de suite apr s le message Vos p riph riques sont pr ts l emploi s affiche Il suffit simplement de suivre les instructions l cran Vous devrez installer le log...

Страница 44: ...t le processus d installation Si le logiciel ne se lance pas automatiquement faites un double clic sur Poste de travail et un clic droit sur l ic ne du CD ROM et il devrait d marrer y Sous Files Curre...

Страница 45: ...e uniquement avec le SE Windows ou utiliser le clavier et cliquer entr e sur Capture an Image Capturer une image Pour les vid os il vous faut utiliser la fonction start stop marche arr t de l ic ne qu...

Страница 46: ...oyez les surfaces externes avec un chiffon humide y Ne nettoyez jamais les surfaces optiques avec des chiffons ou serviettes en papier qui pourraient les rayer facilement y liminez la poussi re des su...

Страница 47: ...11 Pi ce 20x Billet 20x Billet 150x Circuit imprim 40x Textile 20x Textile 150x Lame porte objets 25x Lame porte objets 150x...

Страница 48: ...onforme la partie 15 de la r glementation de la Commission F d rale sur les Communications Son fonctionnement est sujet aux deux conditions suivantes 1 Ce dispositif ne doit pas provoquer d interf ren...

Страница 49: ...MANUALE DI ISTRUZIONI Microscopio digitale palmare Modello n 44302 ITALIANO...

Страница 50: ...arie parti esaminate in questo manuale consultate il diagramma del microscopio Il microscopio offre potenze da 10x a 40x e 150x potenze con un monitor da 19 pollici perfetto per esaminare oggetti soli...

Страница 51: ...3 Cavo USB Supporto Pulsante per le istantanee Microscopio Manopola di messa a fuoco...

Страница 52: ...r microscopio digitale Digital Microscope Suite y Manuale di istruzioni Dati tecnici Modello n 44302 Dati tecnici Potenza Da 10 a 40x e 150x su un monitor da 19 pollici Cavo USB 2 0 per l alimentazion...

Страница 53: ...dimento quando il microscopio viene situato direttamente sopra l oggetto o il vetrino usare la manopola di messa a fuoco per ottenere una messa a fuoco nitida Occorre un po di tempo per abituarsi ad u...

Страница 54: ...utomaticamente quando il cavo USB viene inserito nella porta USB del computer Non c regolazione dell illuminazione su questo microscopio ma si potrebbe essere in grado di posizionare il microscopio so...

Страница 55: ...iver Software Installazione driver di dispositivo in corso e poco dopo si potrebbe vedere il messaggio Your Devices Are Ready to Use ora possibile utilizzare i dispositivi Basta seguire le eventuali i...

Страница 56: ...Se il software non si avvia automaticamente fare doppio clic su Il mio computer e poi fare clic con il pulsante destro del mouse sull icona del CD ROM a questo punto il software dovrebbe avviarsi y S...

Страница 57: ...io solo con il sistema operativo Windows oppure si pu usare la tastiera facendo clic su invio su Capture an Image Acquisisci un immagine Per i filmati occorre avviare fermare start stop sull icona mos...

Страница 58: ...le superfici ottiche con salviette di tessuto o di carta in quanto possono graffiarle facilmente y Rimuovere la polvere dalle superfici ottiche con una spazzolina di setole di cammello o una bombolett...

Страница 59: ...11 Moneta a 20x Banconota a 20x Banconota a 150x Scheda di circuito a 40x Tessuto a 20x Tessuto a 150x Vetrino di preparato a 25x Vetrino di preparato a 150x...

Страница 60: ...esto dispositivo risulta conforme alla Parte 15 delle norme FCC Il funzionamento soggetto alle seguenti due condizioni 1 Questo dispositivo non pu causare interferenze dannose e 2 Questo dispositivo d...

Отзывы: