background image

16 


>>


www

.celestron

.com

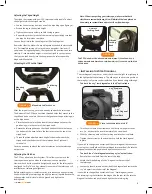
guiding on a star using an off-axis guider versus a straight through guide 
scope . To compensate for this, the direction of the drive control keys can 
be changed . To reverse the button logic of the hand control, press the 
MENU button and select Direction Buttons from the Utilities menu .  Use 
the UP/DOWN arrow keys (10) to select either the azimuth (left and right) 
or altitude (up and down) button direction and press ENTER . Pressing 
ENTER again will reverse the direction of the hand control buttons from 
their current state . Direction Buttons will only change the eyepiece rates 
(rate 1-6) and will not affect the slew rates (rate 7-9).
GoTo Approach – lets the user define the direction that the telescope will 
approach when slewing to an object.  This allows the user the ability to 
minimize the effects of backlash. For example, if your telescope is back 
heavy from using heavy optical or photographic accessories attached to 
the back, you would want to set your altitude approach to the negative 
direction .  This would ensure that the telescope always approaches an 
object from the opposite direction as the load pulling on the scope.  
Similarly, if using the CPC polar aligned on a wedge, you would want 
to set the azimuth approach to the direction that allows the scope to 
compensate for different load level on the motors and gears when 
pointing in different parts of the sky.
To change the GoTo approach direction, simply choose GoTo Approach 
from the Scope Setup menu, select either Altitude or Azimuth approach, 
choose positive or negative and press ENTER .
Autoguide Rate – Allows the user to set an autoguide rate as a 
percentage of sidereal rate . This is helpful when calibrating your 
telescope to a CCD autoguider for long exposure photography .
Cordwrap – Cord wrap safeguards against the telescope slewing more 
than 360º in azimuth and wrapping accessory cables around the base of 
the telescope . This is useful when autoguiding or any time that cables are 
plugged into the base of the telescope . By default, the cord wrap feature 
is turned off when the telescope is aligned in altazimuth and turned on 
when aligned on a wedge .
Custom Rate 9 – Allows the user to set the maximum slew speed when 
slewing to an object or pressing the arrow buttons while at rate 9.  This 
provides more controlled slews when equipped with delicate imaging 
equipment for example. User defined rates can be set for both the RA 
and Dec axes . Enabling and disabling this feature will allow you to toggle 
back and forth between the custom setting and the default setting .

>>

 Utility Features

Scrolling through the MENU (9) options will also provide access to 
several advanced utility functions within the CPC such as; Periodic Error 
Correction, Hibernate, as well as many others .
GPS On/Off – Allows you to turn off the GPS module. When aligning the 
telescope, the CPC still receives information, such as current time, from 
the GPS.  If you want to use the CPC database to find the coordinates of a 
celestial object for a future date, you would need to turn the GPS module 
off in order to manually enter a date and time other than the present.
Lights Control – This feature allows you to turn off both the red key pad 
light and LCD display for daytime use to conserve power and to help 
preserve your night vision .
Factory Setting – Returns the CPC hand control to its original factory 
setting .  Parameters such as backlash compensation values, initial date 
and time, longitude/latitude along with slew and filter limits will be reset. 
The hand control will ask you to press the “0” key before returning to the 
factory default setting .
Version – Selecting this option will allow you to see the current version 
number of the hand control and motor control software.  The first set 

of numbers indicates the hand control software version.  For the motor 
control, the hand control will display two sets of numbers; the first 
numbers are for azimuth and the second set are for altitude .
Get Axis Position – Displays the relative altitude and azimuth for the 
current position of the telescope .
GoTo Axis Position –  Allows you to enter a specific altitude and azimuth 
position and slew to it .
Hibernate – Hibernate allows the CPC to be completely powered down 
and still retain its alignment when turned back on . This not only saves 
power, but is ideal for those that have their telescopes permanently 
mounted or leave their telescope in one location for long periods of time .  
To place your telescope in Hibernate mode:

1 .  Select Hibernate from the Utility Menu .
2 .  Move the telescope to a desired position and press ENTER . 
3.  Power off the telescope. Remember to never move your  

telescope manually while in Hibernate mode .

Once the telescope is powered on again, the display will read Wake Up. 
After pressing ENTER, you have the option of scrolling through the time/
site information to confirm the current setting. Press ENTER to wake up 
the telescope .

Pressing UNDO at the Wake Up screen allows you to explore many 
of the features of the hand control without waking the telescope 
up from Hibernate mode. To wake up the telescope after UNDO 
has been pressed, select Hibernate from the Utility menu and press 
ENTER. Do not use the direction buttons to move the telescope 
while in Hibernate mode.

Sun Menu 

For safety purposes the Sun will not be displayed as a database object 
unless it is first enabled. To enable the Sun, go to the Sun Menu and press 
ENTER . The Sun will now be displayed in the Planets catalog and can 
be used as an alignment object when using the Solar System Alignment 
method .  To remove the Sun from displaying on the hand control, once 
again select the Sun Menu from the Utilities Menu and press ENTER .

Scrolling Menu

This menu allows you to change the rate of speed that the text scrolls 
across the hand control display .
  •  Press the UP (number 6) button to increase the speed of the text.
  •  Press the DOWN (number 9) button to decrease the speed  

  of the text .

Calibrate GoTo – GoTo Calibration is a useful tool when attaching heavy 
visual or photographic accessories to the telescope . GoTo Calibration 
calculates the amount of distance and time it takes for the mount to 
complete its final slow GoTo when slewing to an object. Changing the 
balance of the telescope can prolong the time it takes to complete the 
final slew. GoTo Calibration takes into account any slight imbalances and 
changes the final GoTo distance to compensate.

Set Mount Position

The Set Mount Position menu can be used to maintain your alignment 
in cases where you wish to disengage the clutches or similar situations . 
For instance, you might use this feature if you needed to rebalance the 
mount after having completed an alignment . To set the mount position 
simply slew to a bright star in the named star list then select Set Mount 
Position
 . The hand control will sync on the star by asking you to center 
the star in the eyepiece and pressing the Align button. Once synced on 
the star, you are free to manually move the mount in both axes in order 

Содержание 11007

Страница 1: ...InstructionManual 11007 11008 11009...

Страница 2: ...www celestron com...

Страница 3: ...20 22 CELESTIAL OBSERVING 23 24 CELESTIAL PHOTOGRAPHY 25 29 TELESCOPE MAINTENANCE 30 31 OPTIONAL ACCESSORIES 31 32 APPENDIX A TECHNICAL SPECIFICATIONS 33 34 APPENDIX B GLOSSARY OF TERMS 34 36 APPENDI...

Страница 4: ...other high performance features TheCPC DeluxeHD s features combined withCelestron s legendary optical systems give amateur astronomers the most sophisticated and easy to use telescopes available on th...

Страница 5: ...onal 9 Schmidt Corrector Lens 14 Accessory Tray Center 4 Hand Control 10 Altitude Locking Knobs Support Bracket 5 Eyepiece 11 Carrying Handle 15 Focus Knob 6 Finderscope A Hand Control Port C PC Inter...

Страница 6: ...tached so the tripod legs can collapse To set up the tripod 1 Hold the tripod with the head up and the legs pointed toward the ground 2 Pull the legs away from the central column until they will not s...

Страница 7: ...be aligned for GoTo use Any manual movement of the telescope will invalidate your telescope s alignment Before attaching your visual accessories first loosen the altitude locking knob while holding t...

Страница 8: ...erscope Installation The finderscope must first be mounted in the included quick release bracket then attached to the rear cell of the telescope To install the finderscope 1 Locate the finderscope mou...

Страница 9: ...target Remember that the image orientation through the finder is inverted i e upside down and reversed from left to right Because of this it may take a few minutes to familiarize yourself with the dir...

Страница 10: ...unique list of some of the most recognizable star patterns in the sky CCDObjects A custom list of many interesting galaxy pairs trios and clusters that are well suited forCCD imaging with theCPC tele...

Страница 11: ...rmation downloaded from theGPS 3 The hand control will display a message reminding you to level the tripod if you already haven t done so Press ENTER to continue 4 Use the arrow buttons on the hand co...

Страница 12: ...der press ENTER The display will then instruct you to center the star in the field of view of the eyepiece When the star is centered pressALIGN to accept this star as your second alignment star When t...

Страница 13: ...e EQ alignments gives you the choice of performing anAutoAlign Two Star alignment One Star alignment or Solar System alignment EQAutoAlign The EQAutoAlign uses all the same time site information as th...

Страница 14: ...amed Stars NamedObject Double Stars Variable Stars Asterisms andCCDObjects Selecting any one of these catalogs will display a numeric alphabetical listing of the objects under that list Pressing theUP...

Страница 15: ...number 1 on the hand control is the slowest rate 5x sidereal and can be used for accurate centering of objects in the eyepiece and photographic guiding To change the speed rate of the motors Press th...

Страница 16: ...by entering the R A and declination for that object Scroll to the Enter RA DEC command and press ENTER The display will then ask you to enter first the R A and then the declination of the desired obje...

Страница 17: ...tions If you notice a jump when releasing the button but setting the values lower results in a pause when pressing the button go with the higher value for positive but use a lower value for negative C...

Страница 18: ...acklash compensation values initial date and time longitude latitude along with slew and filter limits will be reset The hand control will ask you to press the 0 key before returning to the factory de...

Страница 19: ...ection PEC PEC is designed to improve photographic quality by reducing the amplitude of the worm gear errors and improving the tracking accuracy of the drive This feature is for advanced astrophotogra...

Страница 20: ...focusing knob until the image is sharp If the knob will not turn it has reached the end of its travel on the focusing mechanism Turn the knob in the opposite direction until the image is sharp Once a...

Страница 21: ...e apparent field of the eyepiece supplied by the eyepiece manufacturer by the magnification In equation format the formula looks like this As you can see before determining the field of view you must...

Страница 22: ...oving toward the west Motionof theStars The daily motion of the Sun across the sky is familiar to even the most casual observer This daily trek is not the Sun moving as early astronomers thought but t...

Страница 23: ...y bright star in the telescope s database select the AlignWedge option The telescope will then re slew to the same star 1 Center the star in the finderscope and press ENTER 2 Then accurately center th...

Страница 24: ...one after any one of the previously mentioned methods has been completed To perform the declination drift method you need to choose two bright stars One should be near the eastern horizon and one due...

Страница 25: ...te power PlanetaryObserving Hints Remember that atmospheric conditions are usually the limiting factor on how much planetary detail will be visible So avoid observing the planets when they are low on...

Страница 26: ...ance deep sky viewing from light polluted areas by blocking unwanted light while transmitting light from certain deep sky objects You can on the other hand observe planets and stars from light pollute...

Страница 27: ...models are available ShortExposurePrimeFocusPhotography Short exposure prime focus photography is the best way to begin recording celestial objects It is done with the camera attached to the telescope...

Страница 28: ...for your next exposure Don t forget to take photos of varying duration and keep accurate records of what you have done Record the date telescope exposure duration eyepiece f ratio film and some commen...

Страница 29: ...s ENTER You will have 5 seconds before the system starts to record The first time each observing session that PEC record or play is selected the worm gear must rotate in order to mark its starting pos...

Страница 30: ...f 2 There are only a select few objects that work well at f 10 The Moon images fine because it is so bright but planets are still a bit small and should be shot at f 20 The Ring Nebula is a good candi...

Страница 31: ...view 5 times larger and the object size 1 5 compared to that of f 10 see Figure 8 8 FIGURE 8 8 Telescope Standard f 10 f 2 Model Configuration Configuration 8 80 2032 mm 16 406 4 mm 9 25 93 2350 mm 1...

Страница 32: ...damage the optics If dust has built up on the corrector plate remove it with a brush made of camel s hair or a can of pressurized air Spray at an angle to the lens for approximately two to four second...

Страница 33: ...direction than simply repeat steps 2 through 6 as described above for the new direction FIGURE 9 3 A collimatedtelescope should appear symmetrical withthe central obstruction centered inthe star s di...

Страница 34: ...T shaped assembly that attaches to the rear cell of the telescope As light from the telescope enters the guider most passes straight through to the camera A small portion however is diverted by a pris...

Страница 35: ...122x Resolution Rayleigh Criterion 68 arc seconds 59 arc seconds 50 arc seconds Dawes Limit 57 arc seconds 49 arc seconds 42 arc seconds Light Gathering Power 843x 1127x 1593x Near Focus with Standard...

Страница 36: ...tude star or other celestial object as perceived by an observer on Earth Arc minute A unit of angular size equal to 1 60 of a degree Arc second A unit of angular size equal to 1 3 600 of a degree or 1...

Страница 37: ...celestial pole and ends at the South celestial pole and passes through the zenith If you are facing South the meridian starts from your Southern horizon and passes directly overhead to the North celes...

Страница 38: ...anet U Universe The totality of astronomical things events relations and energies capable of being described objectively V VariableStar A star whose brightness varies over time due to either inherent...

Страница 39: ...a Dec R34AB 12CE Scope must be aligned If command conflicts with slew limits there will be no action Get Azm Alt Z 12AB 4000 10 characters returned 12AB Azm comma 4000 Alt Get RA Dec E 34AB 12CE Scope...

Страница 40: ...38 www celestron com APPENDIXD MAPSOFTIMEZONES...

Страница 41: ...www celestron com 39...

Страница 42: ...40 www celestron com APPENDIXE SKYMAPS...

Страница 43: ...www celestron com 41...

Страница 44: ...42 www celestron com...

Страница 45: ...www celestron com 43...

Страница 46: ...44 www celestron com...

Страница 47: ...www celestron com 45...

Страница 48: ...EclipseType Duration Location 2001 Dec 14 Annular 03m53s North America Hawaii 2001 Jun 21 Total 04m57s South Africa Madagascar 2002 Dec 04 Total 02m04s S Africa Indonesia Australia 2002 Jun 10 Annula...

Страница 49: ...cted to abuse misuse mishandling or unauthorized repair Further product malfunction or deterioration due to normal wear is not covered by this warranty CELESTRON DISCLAIMSANYWARRANTIES EXPRESSOR IMPLI...

Страница 50: ...ars of age and older 2835 Columbia Street Torrance CA 90503 U S A Telephone 310 328 9560 Fax 310 212 5835 FCC Statement This device complies with Part 15 of FCC Rules Operation is subject to the follo...

Отзывы: