4
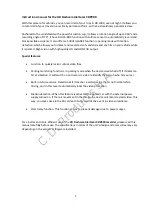
On / Off Button (1) functions:
1.
Manual switch: To turn on the camera, briefly press the on/off button once. The screen will turn on.
Press and hold the power on/off button to it turn off.
2.
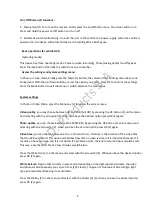
Automatic switch while driving: connect the unit to the vehicle's 5V power supply; when the vehicle is
powered on, the device will automatically start recording after a brief pause.
Basic operations for vehicle DVR
Operating modes:
This device has three operating modes: Camera (video recording), Photo (taking photos) and Playback.
Press the lock button (7) briefly to switch from one to another.
Access the settings and system settings menu:
In Photo or Video mode, briefly press the Mode (3) Button; the column of the Settings menu has a blue
background. With the Up/Down Buttons, select the option you prefer. Press OK to confirm the settings.
Press the Mode Button to exit the menu or switch between the two menus.
System settings
In Photo or Video Mode, press the Menu key (7) to access the system menu.
Video quality
: you may choose between HD and FHD (Full HD) by pressing the OK button (2) on the menu
and selecting with the arrows (4) (5). When you have the desired option press OK (2) again.
Photo quality
: you can choose between 1M 2M 5M 8M, by pressing the OK button (2) on the menu and
selecting with the arrows (4) (5), when you have the desired option press OK (2) again.
Video time
: you can choose between 2 min, 3 min and 5 min, this time is the duration of the video files
that the DVR will record. This option establishes how often a video is closed. It is important because if it
records an hour non-stop and it is not closed if a problem occurs, the entire recorded hour would be lost.
This way, only the short file of a few minutes would be lost.
Press the OK button (2) on the menu and select with the arrows (4) (5). When you have the desired option
press OK (2) again.
White balance
: Option that corrects in auto mode, depending on the light captured outside, the video
and photos made. Manually you can set it as Light, Cloudy, Tungsten or Fluorescent according to light
type. We recommend leaving it as automatic.
Press the OK key (2) on the menu, and select with the arrows (4) (5), when you have the desired option
press OK (2) again.
C.D. Products S.A.

