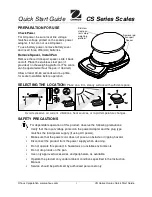
Features
• NSF® Certified
• Tare function
• Data hold
• Field calibration
• Removable stainless steel platform
• Batteries/power adapter
• Selectable units
• Overload indication
• Battery status indication
• On/off button
• Auto-off after 2 minutes
• Platform Size: 11.40 W x 7.08 H (in)/
29.0 W x 18.0 H (cm), removable
• Resolution: 0 lb:0.2 oz, 5 g
• Power Adapter: 100-240VAC 50/60Hz input,
9V DC (500mA) output (included)
• Two AAA 1.5V IEC LR03 alkaline batteries (included)
Note:
Clean the scale before each use.
Important: DO NOT IMMERSE IN LIQUID.
Note:
In the following instructions, names of the
control buttons are shown in CAPS. Function
information that appears on the display is shown in
BOLD CAPS
.
Battery Installation
Replace battery when LCD becomes dim.
bAtt
appears
on the display for 2 seconds before turning off when
the batteries need to be replaced.
1. Power off the unit before installing the batteries.
2. Remove battery cover on the bottom by pressing the
latch toward the battery cover and lifting up.
3. Install two AAA 1.5V IEC LR03 alkaline batteries
observing polarity shown in compartment.
4. Replace the battery cover until it clicks shut.
Power Adapter
Before using the external power adapter, make sure
that the printed voltage complies with the local
voltage.
Note:
Use only an original CDN power adapter (AD-AC3302).
The use of another adapter is subject to approval by CDN.
1. Insert the adapter plug into the jack in the rear of
the scale.
2. To turn the scale on, press the ON/OFF button as
described in
Section A: On/Off
. The scale will remain
on until turned off.
Note:
When the power adapter is plugged in, the auto-off
feature is disabled.
Model: SD5502
ProAccurate
®
Digital
Portion Control Scale
55 pounds/25 kilograms
by pounds:ounces and kilograms.grams


