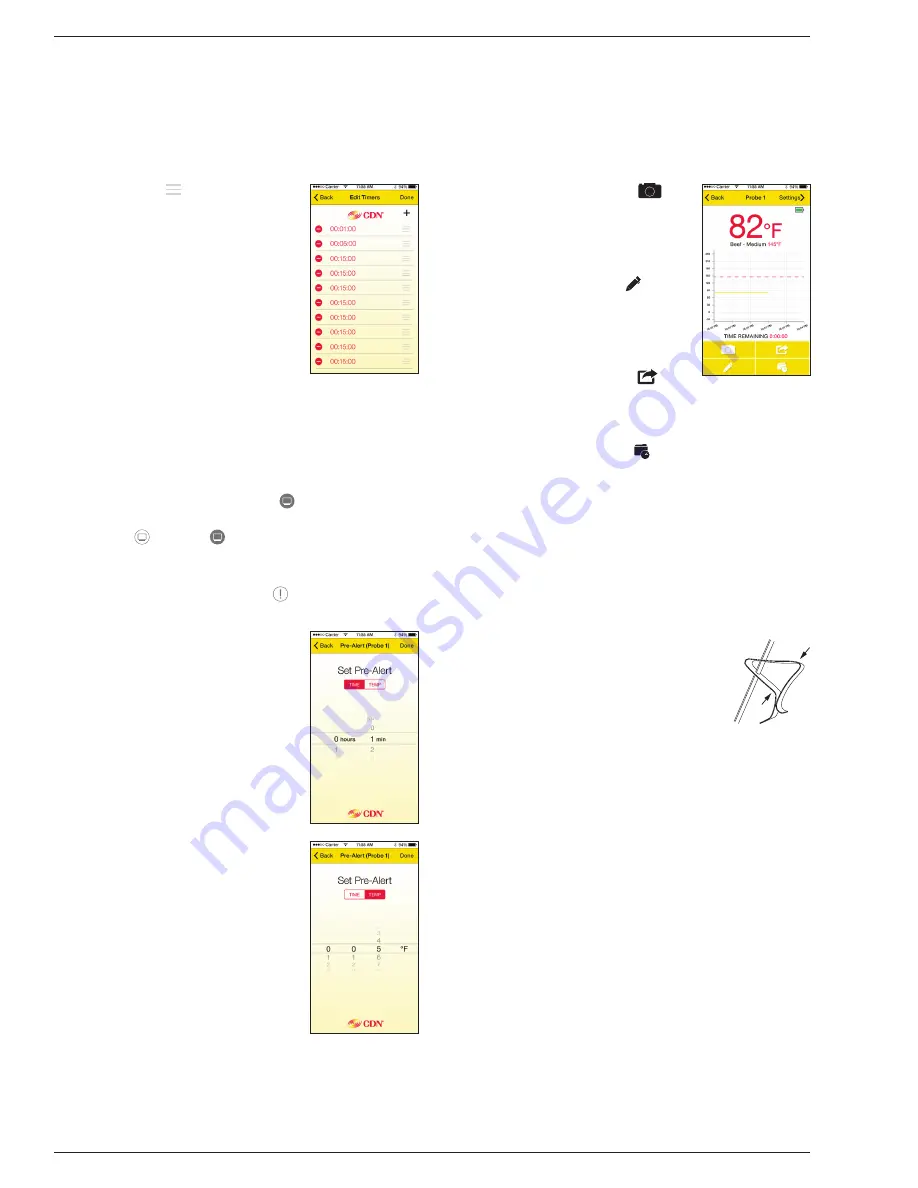
navigation bar to accept the edits and
return to the Timers screen. Touch
< BACK
on the left of the navigation bar
to return to the Timers screen without
accept the edits.
b.) Touch and hold the
order icon
( ) and then move
the timer up or down
to adjust the order
of the timers. Touch
DONE
on the right of
the navigation bar to
to accept the edits
and return to the
Timers screen. Touch
< BACK
on the left
of the navigation bar
to return to the Timers screen without
accept the edits.
10.) Touch
< BACK
on the left of the navigation
bar to return to the Settings screen.
f.
App Sleep Mode
CDN_XXXX
>
PROBE 1
or
2
>
SETTINGS
Touch the
app sleep icon
( ) in the middle
of the tab bar to toggle the app sleep function
off
( ) and
on
( ).
g.
Pre-Alert Mode
CDN_XXXX
>
PROBE 1
or
2
>
SETTINGS
Touch the
pre-alert icon
( ) on the right of the
tab bar to access the Pre-Alert screen.
1.) When
TIME
is selected
under
SET PRE-ALERT
,
rotate the time picker
wheels to select the desired
time for the pre-alert.
2.) When
TEMP
is selected
under
SET PRE-ALERT
,
rotate the temperature
picker wheel to select
the desired target
temperature for the
pre-alert. Depending on
the temperature scale,
the picker allows any
temperature in the range
from 0 to 145°F or 0 to
63°C (appearing darker
on the display) as you
move your finger up and
down over each wheel.
3.) Touch
DONE
on the right
of the navigation bar to
accept the Pre-Alert and
return to the Settings screen. Touch
< BACK
on the left of the navigation bar to return
to the Settings screen without setting the
Pre-Alert.
h. Touch
DONE
on the right of the navigation bar to
accept the changes to the settings and return to
the Details screen. Touch
< BACK
on the left of
the navigation bar to return to the Details screen
without accepting the changes to the settings
5.
Camera
Touch the
camera icon
(
)
to take a photo or choose an
existing photo to add to your
current or history session.
6.
Notes
Touch the
notes icon
( ) to add
notes to your current or history
session. The notes will be added
to the PDF file if you share it.
7.
Sharing
Touch the
sharing icon
(
) to
share an image, PDF or CSV file
of your current or history session.
8.
History
Touch the
history icon
( ) to access the list of
cooking sessions you have already completed.
F. Candy Thermometer
An exclusive adjustable stainless steel clip is available
from CDN if you wish to use this thermometer for
candy or deep frying. Send $1.00 to CDN at the
address to the right with your name and address.
1.
As a matter of safety, always position the probe
on the pot before filling it and/or applying heat.
2. Insert the probe through both holes in the
attachment clip. Press the top portion
of the clip together for easier sliding
up the probe.
3. Push the clip down onto the side of
the pot and position it until the probe
tip is just above the bottom. Do not let
the tip touch the bottom of the pot.
Important: Keep sensor cable away from direct heat
of the cooktop burner — wires inside the cable may
become damaged.
4. Set the alert temperature as described in E4b.
Candy temperatures are listed here for easy
reference.
G. Error Messages
The BT482 incorporates visual diagnostic messages
as follows:
1. If the remote is out range, the app displays
a pop-up window stating that your thermometer
is disconnected. Touch
OK
to return to the
Pairing screen.
2. Should the display appear incorrectly, press the
RESET button on the bottom of the thermometer
to reset.


