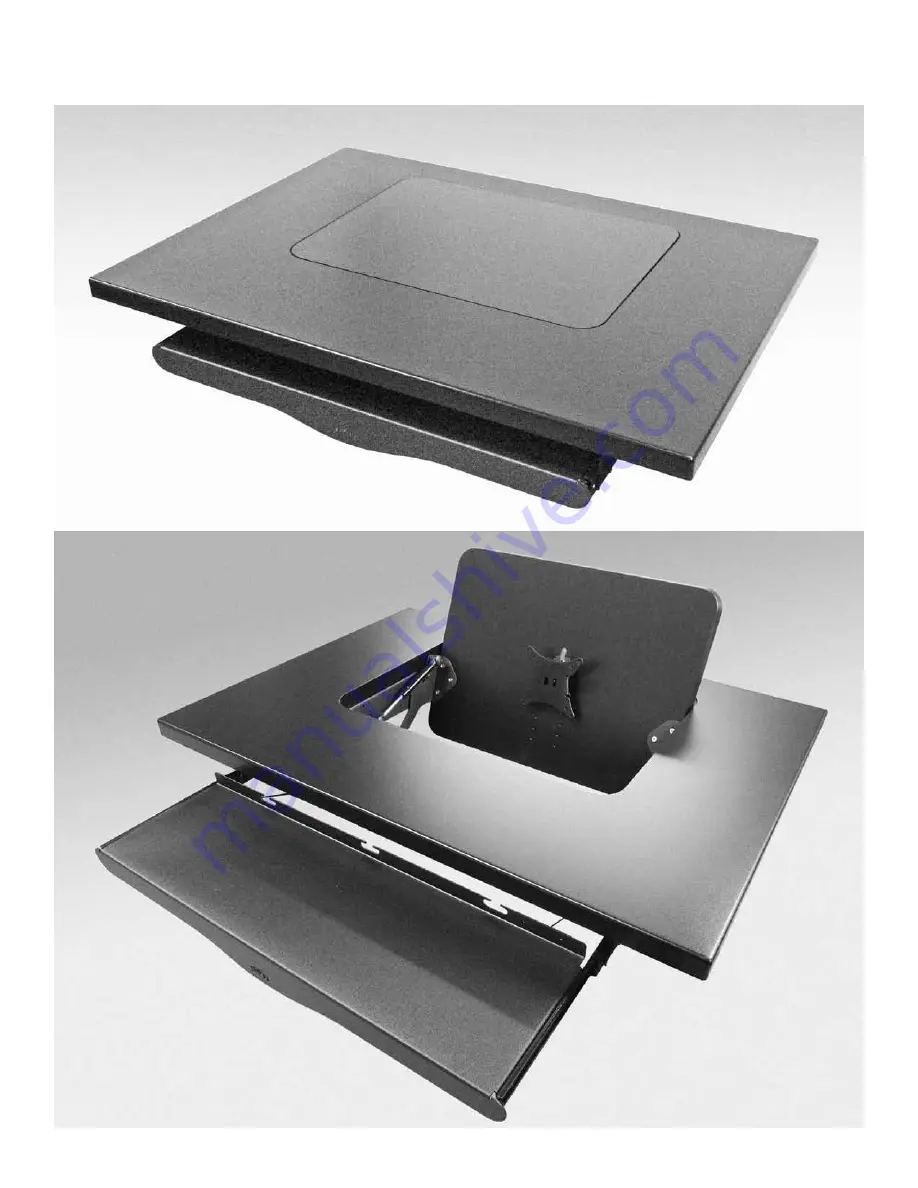
CBT Supply flipIT RIMLESS Скачать руководство пользователя страница 1

flipIT

®

RIMLESS

Convertible Computer Workstation

a S S E M b L y     I n S T R u C T I o n S

uS Patent no. 7,784,412

How to install flipIT® Rimless
Convertible Computer Workstation 
into a factory desktop. 

Technical Support: 800-770-7042 


© 2012 CBT Supply, Inc.  All rights reserved. 

Содержание flipIT RIMLESS

Страница 1: ...puter Workstation a ssem b l y i n str u cti o n s US Patent No 7 784 412 How to install flipIT Rimless Convertible Computer Workstation into a factory desktop Technical Support 800 770 7042 2012 CBT...

Страница 2: ...turer s safety instructions Parts Identification Euroscrews 8mm for installing flipIT lid brackets and VESA mount 9 total Post for gas spring 1 Installs to arm Pivot posts 2 installs into flipIT brack...

Страница 3: ...Post arm with nylon bushing cable to keyboard tray beta clip long bracket Rest assembly padded rest adjustment nut bolt mounting bracket Gas spring pneumatic cylinder with locking hubs FIK19R Rimless...

Страница 4: ...racket mounting holes pointing to the side with curved edge where the keyboard tray installs On flipIT lid use a 2 Phillips to break the thermofoil pilot holes for easier installation 2 Install simple...

Страница 5: ...tment may have to be refined after the monitor is installed Note that this is the pivot that will be loosened and re tightened to complete that adjustment using a straight edge as a reference on the t...

Страница 6: ...ylon bushing and insert the threaded part into the back slot of the long bracket Spin on hex nut and lock washer then fully tighten the pivot using 7 16 open end wrench and 5 32 hex key This uses the...

Страница 7: ...Press the locking hub into place to finish the installation 5 Install VESA mount Use three Euroscrews to install the VESA bracket Most monitors use the second from the top position for bal anced oper...

Страница 8: ...to install bracket Use the 5 32 hex key and 3 8 open end wrench to tighten the rest This is using the table top as a reference and the pressure you place on the rest to simulate the weight of the mon...

Страница 9: ...n using the 3rd hole from the L Self tapping machine screws are packaged with the brackets Use a 2 screwdriver NOT a power driver Place the keyboard tray over its pilot holes then install using two 1...

Страница 10: ...ws provided with your monitor to install the VESA mount The VESA mount captures the bracket and gravity does the rest A spring loaded pin holds the monitor in place at every angle Close the lid CAREFU...

Страница 11: ...and5 32 hex keyontherestwiththemonitorinstalled Install the gas spring silver shaft to the long bracket Remove locking hub press end onto post press in locking hub Install monitor Then remove the moni...

Страница 12: ......

Отзывы: