688151-152 G21NE
6
EN
G
LI
S
H
15. Never use other parts than the ones which are from CaterChef.
CaterChef is not taking any responsibilty for damage caused by the use of other (non-related) parts.
DEGREASE:
Before operating for the first time, clean the device with warm water, a wet cloth and a small amount of detergent. Do
not rinse the appliance under the tap, this could cause serious damage to the appliance.
In addition, make sure that you have dried it properly before you start operating the device.
PRECAUTIONS FOR USE
1. Hang the waste liquid container to hanging holes on front panel
2. Do not fill with engine running. Replace the lid after filling.
3. The device is suitable for an ambient temperature between 16°C - 32°C.
4. To maintain the quality of the drinks, leave the dispenser turned on (day and night).
REGULAR USE
1. Before filling the container, make sure the switch is set to
0 (OFF)
or the plug is unplugged.
2. Do not mix drinks in the appliance but in a separate cup or bowl.
3. Do not put hot drinks in the container.
4. Make sure the fluid level is not above the “MAX” level line and is not less than 3-4 liters.
INSTRUCTIONS FOR USE
The device has 2 control panels:
1. On the left the temperature controller.
2. On the right the ON/OFF switch (red) and the switch(es) for the mix motor (black),
each container can be turned on independently.
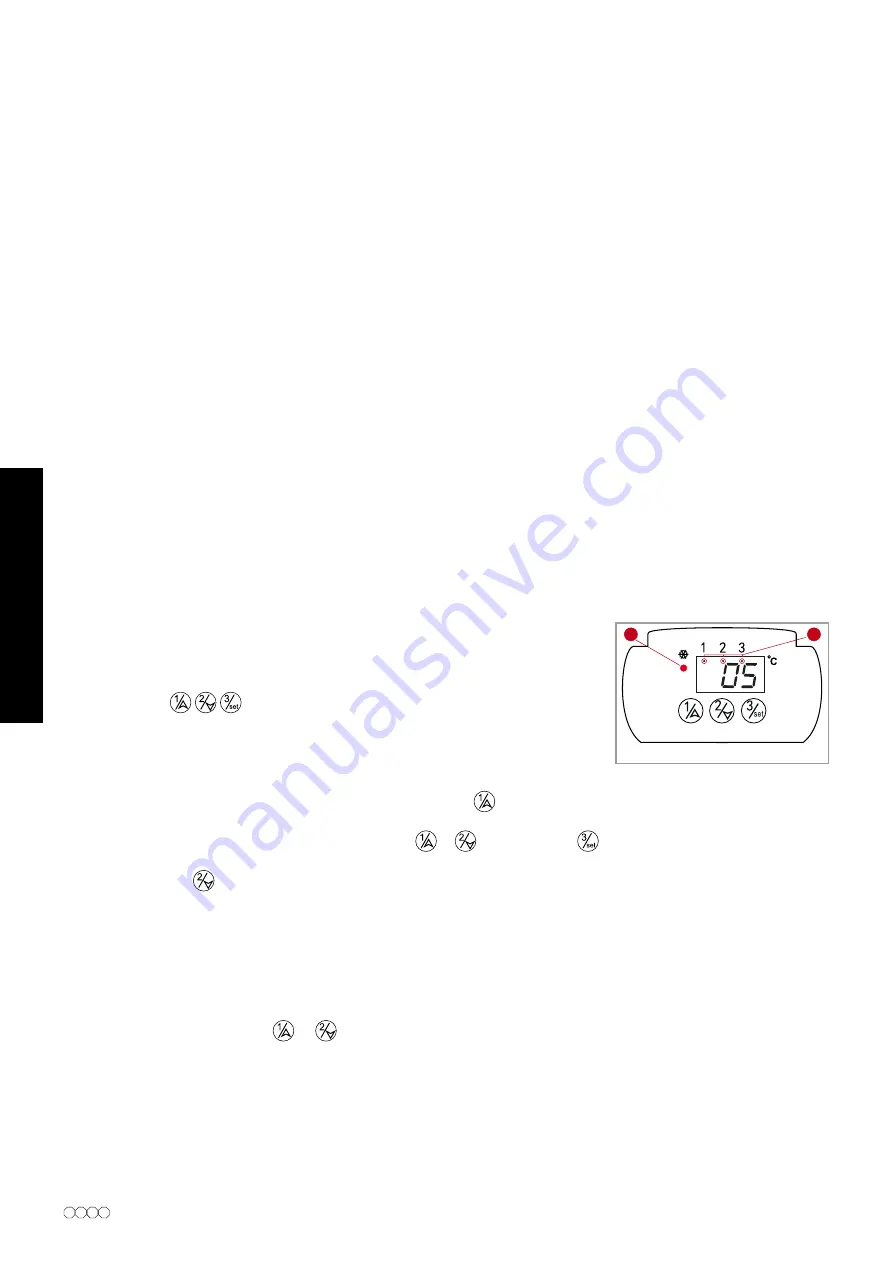
SETTING THE BEVERAGE TEMPERATURE (FIG.1)
Fig. 1
A
B
1. Turn on the main switch.
2. The light
(A)
on the digital temperature controller will light up.
3. The buttons:
have a double function, you select the container with
them, but you can also adjust the temperature with them.
4. The temperature of each container can be set separately, it is set with the
temperature control on the left. (model 688152: from the front,
container 1 is the left and container 2 is the right).
5. To set the temperature of container 1, press the button twice
. The indicator light below 1
(B)
at the top of the
display will now light up and the current set temperature will flash.
6. Set the desired temperature with the arrow buttons
&
and then press
.
The temperature can be set between 2°C and 8°C. The temperature for container 1 is now set.
7. Press the button
twice and repeat the process to set the temperature of container 2.
8. When the device is in operation, it will automatically display the actual temperature of each container for
2 seconds (the indicator light
(B)
indicates which container is involved).
ADJUSTING THE TEMPERATURE (FIG.1)
1. To turn off the cooling of a selected container, press the corresponding container number on temperature controller
for 3 seconds.
"OFF"
will be displayed for the selected container.
2. To turn on the cooling, press
or
and hold for 3 seconds.


