


Hand Alignment
Adjustment
Strong magnetism or impact can cause the
time indicated by the analog hands to become
different from the time on the digital display. If
this happens, adjust hand alignment.
Adjusting Hand Alignment
1.
Enter the Timekeeping Mode.
l
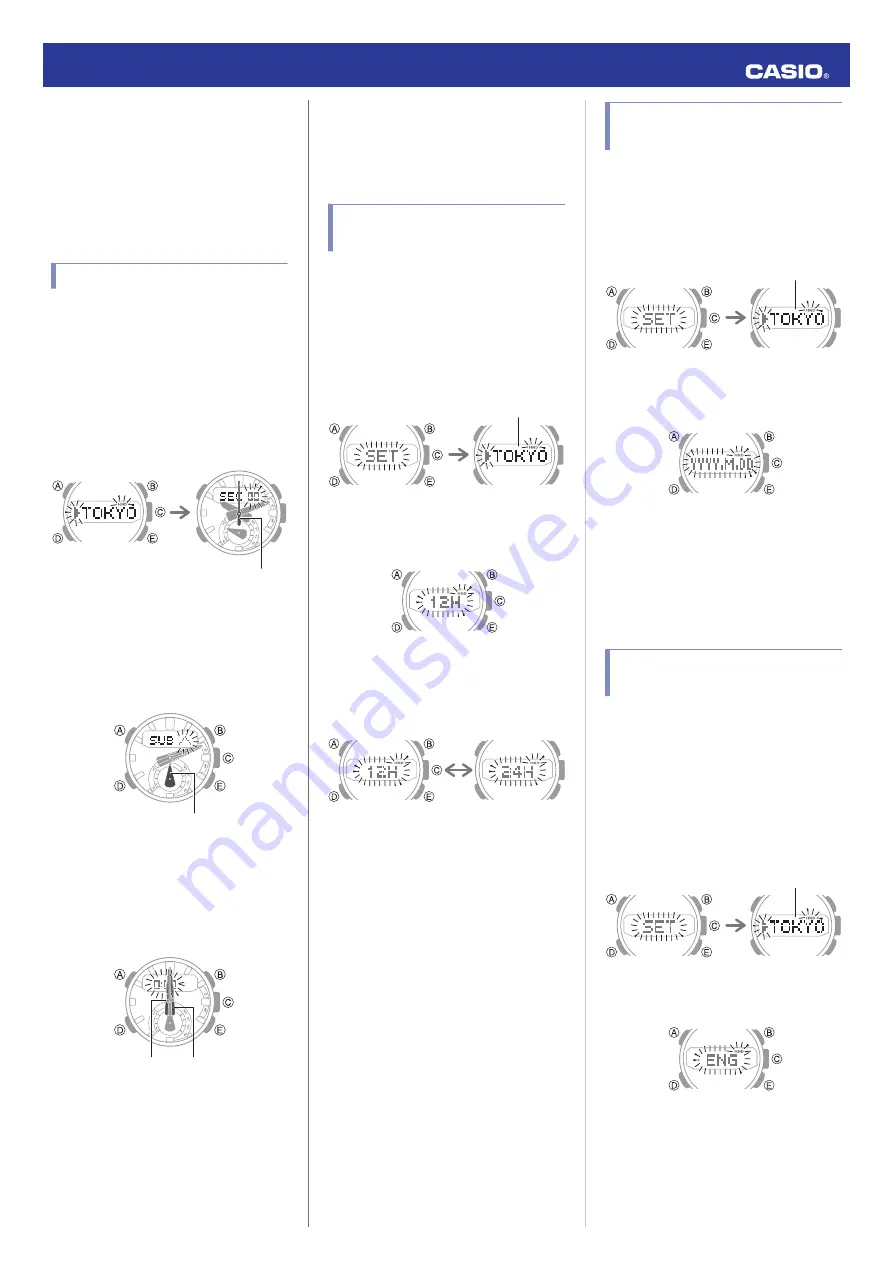
2.
Hold down (A) for at least five seconds.
Release the button when [00] starts to
flash.
This enables adjustment of second hand
alignment.
After five seconds
After two seconds
Second hand
3.
If the second hand is not at 12 o’clock, use
(B) and (E) to align it.
4.
Press (D).
This enables adjustment of mode hand
alignment.
Mode hand
5.
If the mode hand is not at 12 o’clock, use
(B) and (E) to align it.
6.
Press (D).
This enables adjustment of the hour and
minute hands.
Minute hand
Hour hand
7.
If the hour hand and minute hand are not
at 12 o’clock, use (B) and (E) to align them.
8.
Press (A) to exit the setting screen.
Other Settings
This section explains other watch setting you
can configure.
Switching between 12-hour
and 24-hour Timekeeping
You can specify either 12-hour format or 24-
hour format for the time display.
1.
Enter the Timekeeping Mode.
l
2.
Hold down (A) for at least two seconds
until the name of the currently selected
Home City is displayed.
Home City
3.
Press (D) eight times.
This causes [12H] or [24H] to flash on the
display.
4.
Press (E) to toggle the setting between
[12H] (12-hour timekeeping) or [24H] (24-
hour timekeeping).
24-hour timekeeping
12-hour timekeeping
5.
Press (A) to exit the setting screen.
Changing the Date Display
Format
1.
Enter the Timekeeping Mode.
l
2.
Hold down (A) for at least two seconds
until the name of the currently selected
Home City is displayed.
Home City
3.
Press (D) nine times.
This displays a screen for selecting the
date display format.
4.
Use (E) to select a date display format.
YYYY: Year
M: Month
DD: Day
5.
Press (A) to exit the setting screen.
Specifying the Day of the
Week Language
You can select any one of six languages for
the day of the week display in the Timekeeping
Mode.
1.
Enter the Timekeeping Mode.
l
2.
Hold down (A) for at least two seconds
until the name of the currently selected
Home City is displayed.
Home City
3.
Press (D) 10 times.
This causes the language setting to flash.
Operation Guide 5608
16