42
1.
2.
B
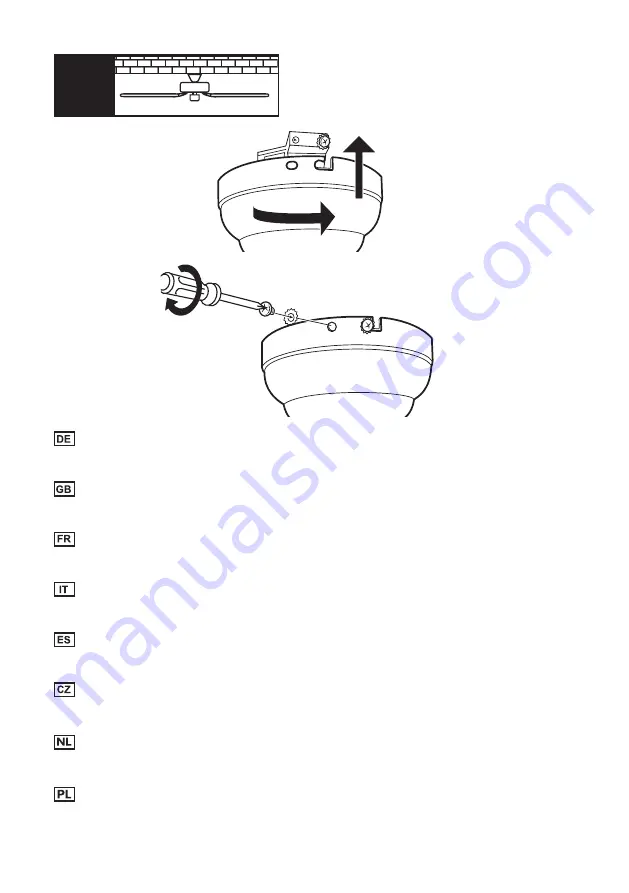
1. Stellen Sie den elektrischen Anschluss wie auf Seite 43 gezeigt her.
2. Schieben Sie den Baldachin nach oben und verdrehen Sie ihn in den Bajonettver-
schluss mit den Baldachinschrauben. Ziehen Sie die 4 Baldachin-Schrauben fest.
1. Make the electrical connection as shown on page 43.
2. Slide the canopy up and twist it into the bayonet lock with the canopy screws.
Fasten the 4 canopy screws.
1. Effectuez le branchement électrique comme indiqué à la page 43.
2. Pousser le cache supérieur vers le haut et le tourner dans la fixation à baïonnette
formée par les vis. Serrer les 4 vis.
1. Effettuare il collegamento elettrico come descritto a pagina 43.
2. Far scorrere il baldacchino e trasformarlo in baionetta raccordo con le viti baldac-
chino. Serrare le 4 viti a baldacchino.
1. Realice la conexión eléctrica como se indica en la página 43.
2. Deslice la capota hacia arriba y gírela en el cierre de bayoneta con los tornillos
de la capota. Apriete los 4 tornillos de la capota.
1. Proveďte elektrické připojení, jak je znázorněno na straně 43.
2. Posuňte vrchlík nahoru a pomocí šroubů vrchlíku jej otočte do bajonetové tvarov-
ky. Utáhněte 4 šrouby vrchlíku.
1. Maak de elektrische aansluiting zoals aangegeven op pagina 43.
2. Schuif de baldakijn omhoog en draai hem in de bajonetsluiting met de baldakijn-
schroeven. Draai de 4 baldakijnschroeven vast.
1. Podłączenie elektryczne wykonać zgodnie z instrukcją na stronie 43.
2. Przesuń baldachim do góry i przekręć go w zamek bagnetowy za pomocą śrub
baldachimu. Dokręcić 4 śruby.
Содержание Eco Elements 103
Страница 2: ...2 min 28 kg min 40 cm min 230 cm max 24 ...
Страница 28: ...28 ECO ELEMENTS b a F R OFF LIGHT FAN U 3 ...
Страница 30: ...30 ECO ELEMENTS b a F R OFF LIGHT FAN U 3 ...


