10
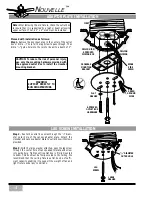
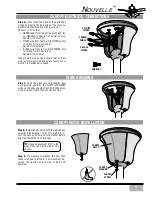
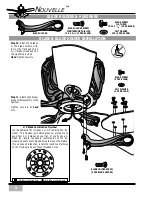
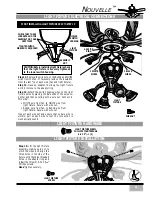
Step 16.
Install three finger
screws into each light fitter.
Turn only once or twice.
Step 17.
Position the shade
fully in the fitter and tighten
each finger screw two turns
each in rotation until the
shade is centered in the fit-
ter. Check that the shade is
captured by the finger screws
by lightly pulling on the
shade.
Ha
nd
tighten the finger
screws securely.
Repeat for each shade.
Step 18.
Install the light
bulbs. Replace bulbs
only
with the exact type and watt-
age.
LIGHT SHADE & BULB INSTALLATION
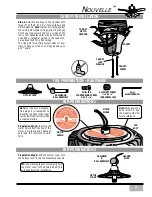
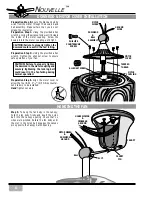
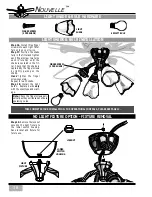
Step 19.
Remove the locknut
securing the light fixture to
the lower switch housing.
Save locknut and fixture for
future use.
LIGHT SHADE & BULB HARDWARE
FINGER SCREW
(3 PER SHADE)
LIGHT
SHADE
NO LIGHT FIXTURE OPTION - FIXTURE REMOVAL
LOCKNUT
60 WATT BULB
LOWER
SWITCH
HOUSING
LIGHT
FIXTURE
FINGER SCREW
(3 PER SHADE)
THIS COMPLETES YOUR INSTALLATION. FOR OPERATIONAL CONTROLS, PLEASE SEE PAGE 12.
Note:
Check the finger screws peri-
odically as they will loosen and cause
operating noise.
N
OUVELLE
™
Содержание Nouvelle
Страница 1: ...NOUVELLE OWNER S MANUAL...

